How to Move Heavy Furniture: A Safe 2026 Strategy Guide
You're probably staring at the one piece that makes the whole move feel bad. A solid wood dresser. A sleeper sofa that barely cleared the door when it came in. A bookshelf you love, but now you have to get it through a narrow hallway, down stairs, and into a building that somehow has even tighter corners than your current one.
That's where a frequent error occurs. This error involves treating moving heavy furniture like a strength test. It isn't. It's a logistics job first, and a lifting job second.
If you want to know how to move heavy furniture without wrecking your back, gouging your walls, or getting halfway through the day and realizing the piece won't even fit in the new place, start with planning. The safest moves usually look boring from the outside. Good measurements, the right tools, clear communication, and a willingness to stop when the job stops making sense as a DIY project.
Before You Lift a Single Thing Plan Your Move
The hardest furniture move often gets decided before anyone touches the piece. If the route is wrong, the furniture is too big, or the destination can't handle it, all the muscle in the world won't save the day.

Measure the furniture and the path
Grab a tape measure and write down the height, width, and depth of the piece. Then measure every choke point between where it sits now and where it needs to go. That means apartment doors, hallway widths, stair landings, elevator openings, and the inside dimensions of the moving vehicle if you're packing one yourself.
Don't eyeball this. Eyeballing is how a dresser ends up wedged in a doorway while two people try not to drop it.
Use a simple checklist:
- Measure the piece: Include handles, legs, and any lip or trim that sticks out.
- Measure the route: Door frames, corners, stair rails, and ceiling clearance all matter.
- Map the turns: Tight corners usually kill the move, not the straightaways.
- Check the destination too: A piece that fits in your current apartment may not fit in the new one.
A lot of guides jump straight to sliders and dollies, but they skip the more important question. Should this piece be moved at all? That gap shows up often in moving advice, especially for people heading into smaller urban spaces, as noted in this discussion of heavy furniture moving gaps.
Decide whether moving it is worth it
Some furniture earns the effort. Some doesn't.
Ask yourself:
| Question | If the answer is yes | What it means |
|---|---|---|
| Is it solid, durable, or expensive to replace? | Keep evaluating | It may be worth the effort |
| Does it fit the new space on paper? | Good sign | Keep planning the route |
| Will you actually use it in the new layout? | Keep it | It has a job to do |
| Is it damaged, oversized, or awkward for your next place? | Reconsider | Moving it may create a bigger problem |
Good movers don't just ask, “How do we move this?” They ask, “Why are we moving this at all?”
That's especially true if you're downsizing. Big sectionals, wide dressers, and heavy dining tables can dominate a small apartment and create storage problems after the move. If you want a broader look at planning a smoother relocation, this guide on the best way to move is useful for building your overall game plan.
Clear the route before move day
Once you've decided a piece is worth moving, make the path boring. Remove rugs, cords, shoe racks, floor lamps, and anything else that can shift underfoot. Prop doors open. If a door is close enough to be a problem, take it off the hinges before the furniture starts moving.
Protect the route too. Blankets on railings, cardboard on corners, and a clear staging area save a lot of touch-up work later. Most wall damage happens in transitions, not during the long carry.
Essential Tools for Moving Heavy Furniture
Moving heavy furniture with bare hands is how people turn manageable jobs into ugly ones. The right tool doesn't just make the work easier. It changes the type of force you're using, which is exactly what you want.
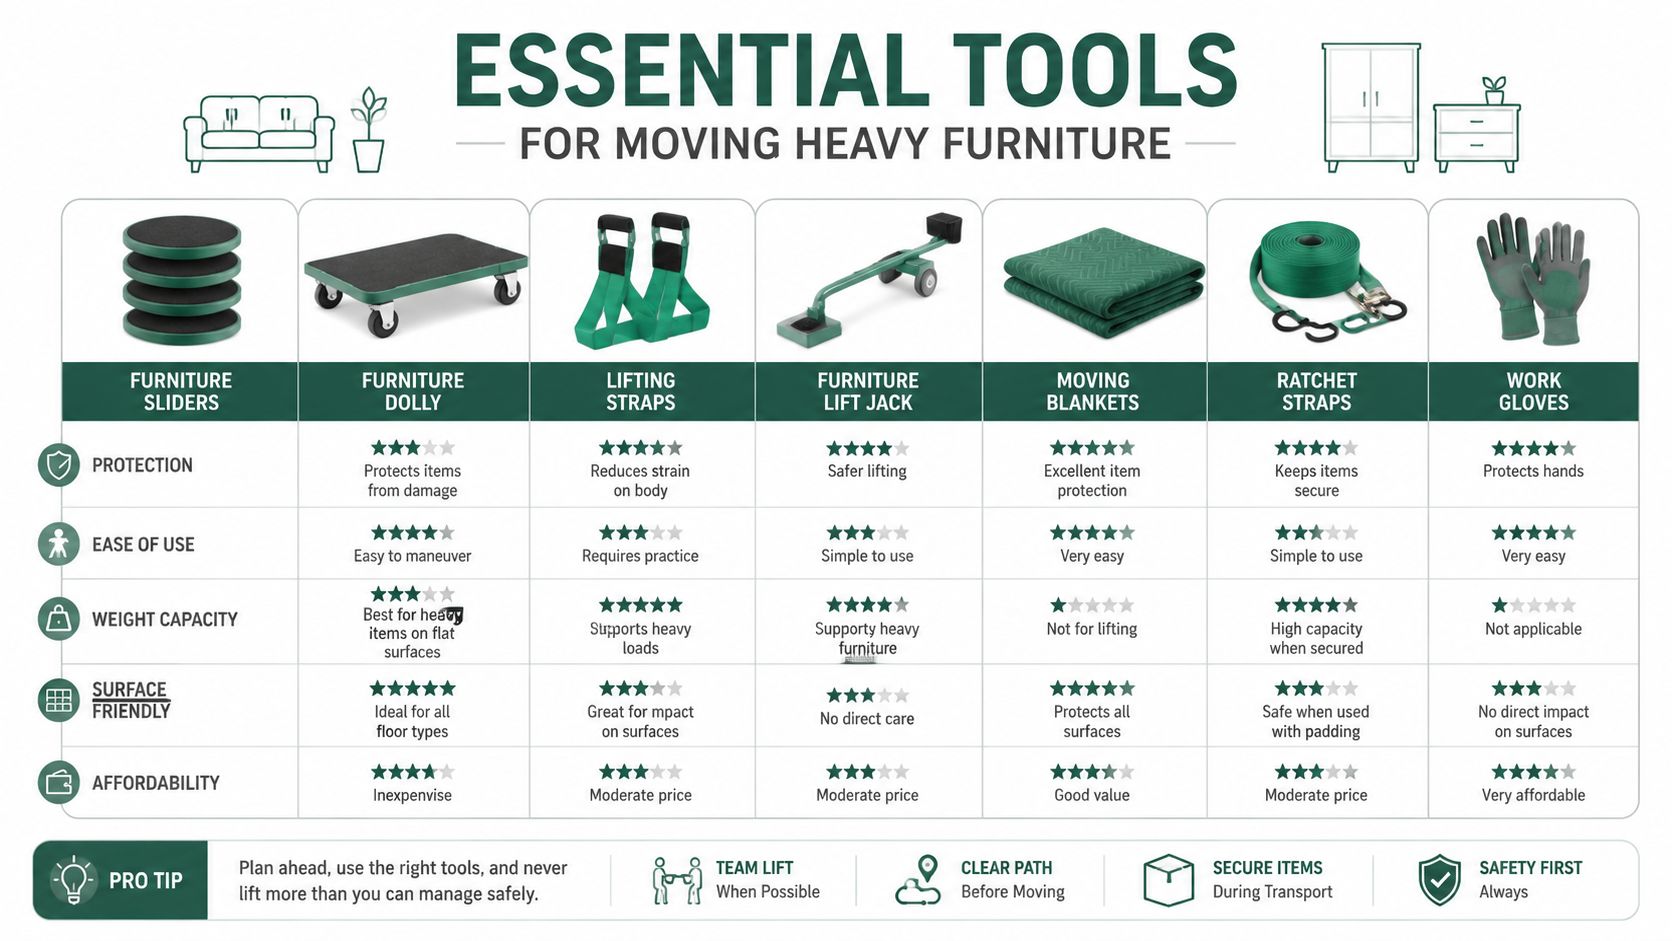
Match the tool to the problem
A lot of people rent one dolly and think they're covered. They're not. Different pieces behave differently.
| Tool | Best for | What it does well | What it does badly |
|---|---|---|---|
| Furniture sliders | Dressers, couches, cabinets | Reduces friction on floors | Useless on stairs |
| Moving blankets | Almost everything | Protects wood, fabric, walls, rails | Doesn't help with lifting |
| Forearm lifting straps | Two-person carries | Shifts some load away from hands | Bad for cramped stairs and awkward pivots |
| Hand truck | Tall, narrow items | Great control for upright loads | Poor choice for wide furniture |
| Furniture dolly | Heavy, low, boxy items | Rolls bulky pieces on flat surfaces | Needs a stable, balanced load |
| Work gloves | Every move | Better grip, fewer pinches and splinters | Won't fix bad technique |
Sliders are one of the most useful tools in a home move because they let you push and guide instead of dead-lifting. On hard floors, use soft felt-style sliders to avoid scratching. On carpet, use hard plastic-style sliders that glide over the pile better.
The non-negotiables
There are a few things I wouldn't skip.
- Moving blankets: Wrap wood, leather, painted surfaces, and sharp corners. They protect the furniture and the house.
- Gloves with grip: Helpful when your hands get sweaty or you're handling wrapped pieces.
- Tape or stretch wrap: Keeps blankets in place so they don't slide off in the middle of a carry.
- A proper dolly: If you're moving more than one large piece, this stops the day from becoming pure lifting.
If you're putting together your supply pile on a budget, this roundup of cheap moving supplies can help you avoid overbuying random gear you won't use.
A cheap blanket used correctly beats a fancy gadget used wrong.
What works and what doesn't
What works is combining tools. A wrapped dresser on sliders. A strapped fridge on a hand truck. A couch protected with blankets before it goes through a narrow hallway.
What doesn't work is improvising with towels, trying to drag furniture directly across wood floors, or balancing a heavy piece on a dolly that's too small. If the base isn't stable, don't trust it.
Another common mistake is using straps on furniture that has no secure grip points. If your hands can't control the item's swing and tilt, straps can make the load feel lighter while making the move less stable. That's not a trade worth making.
Mastering Safe Lifting and Sliding Techniques
Halfway through a move is when people get hurt. The truck is waiting, the hallway feels tighter than it did an hour ago, and someone decides to muscle a dresser instead of resetting the plan. That is usually the wrong call.
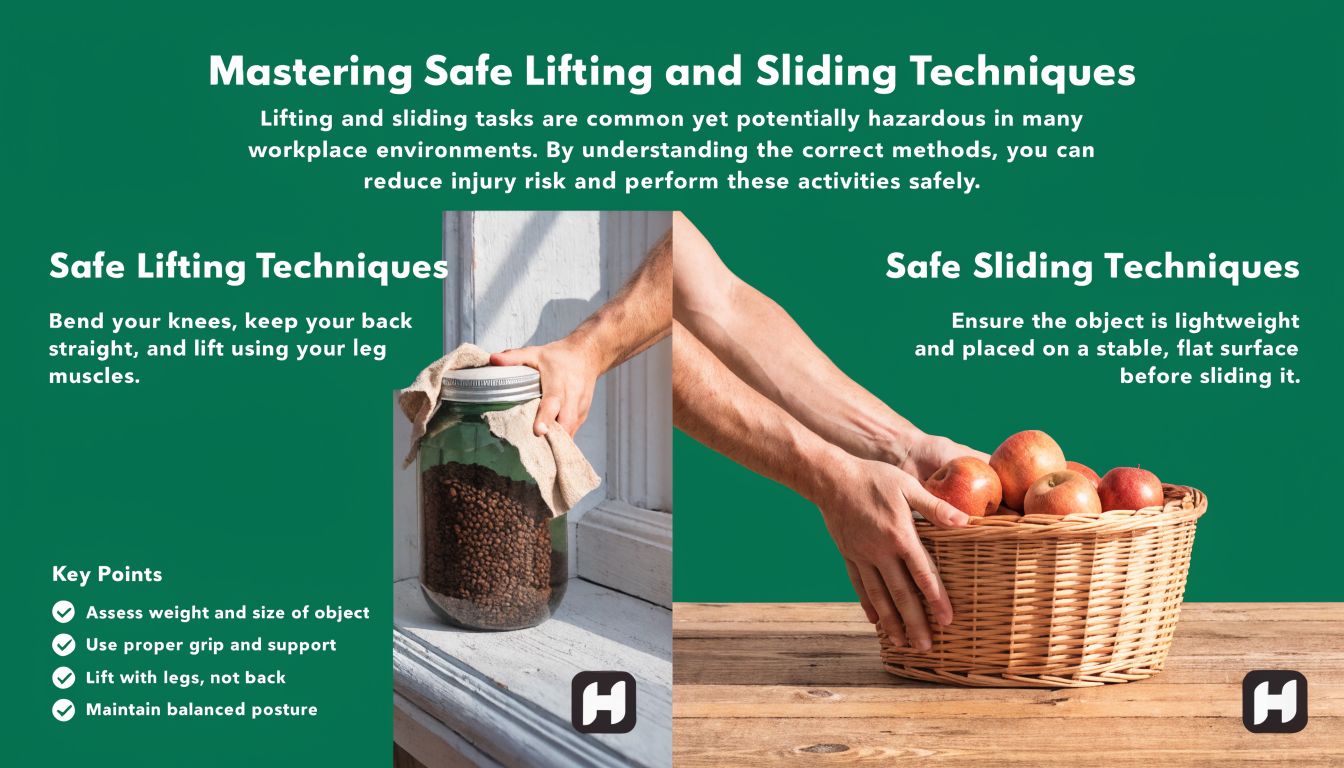
Lift with control, not speed
Good lifting starts before the item leaves the floor. Check where your hands will go, where you will set the piece down, and whether the path is still clear. If any of that is uncertain, stop and fix it first.
Keep the load close to your body. Bend at the knees and hips, brace your midsection, and stand up in one smooth motion. Jerking the weight up is how dressers shift, couches slip, and backs get tweaked.
Use the same sequence every time:
- Set your grip before the lift. Do not lift first and hunt for a better hold afterward.
- Call the timing out loud. “Ready, lift” keeps both people moving together.
- Stand straight up. No twisting during the rise.
- Walk with short, steady steps. Heavy pieces punish rushed footwork.
- Lower with the same control. Bend your knees and keep your back neutral.
Turning is where a lot of DIY moves go bad. Pivot with your feet. Do not twist through your torso while carrying weight.
Sliding usually beats carrying
Across a flat room, sliding is often the smarter method. Tip the piece only enough to get sliders under the legs or base, then guide it slowly. One person should watch the path and call out floor transitions, especially at thresholds where sliders can shoot out.
A controlled pivot also has its place. For a sturdy bookcase or cabinet on a flat surface, you can tilt it slightly and "walk" it by moving one bottom corner at a time. I use that method only when the item is stable, the floor has some grip, and the route is short. If the piece is top-heavy, loosely assembled, or headed into a tight doorway, stop trying to be clever and switch to a dolly or break the item down.
That decision matters in city moves, where furniture often sits in limbo between leases, elevators, and loading windows. Treat each piece like part of a logistics plan, not a gym test. If an item is too awkward to move safely in one trip, a short storage stop or even shipping part of the load can be cheaper than damage or an injury. This guide to the cheapest way to ship heavy items is useful when carrying everything yourself stops making sense.
Communication prevents stupid mistakes
Two strong people without clear commands are less safe than two average people who stay coordinated.
Use short, specific cues:
- “Lift” means stand now.
- “Stop” means freeze and hold position.
- “Down” means lower slowly.
- “Rotate toward me” works better than “other way.”
- “Reset” means put it down and start again.
Say the command before the movement, not during it. If either person loses grip, footing, or sightline, set the piece down. No piece of furniture is worth trying to save mid-fall.
If you can slide it, slide it. If you can roll it, roll it. If you cannot control it, put it down.
Conquering Stairs and Tricky Corners
Stairs change everything. A piece that feels manageable on a flat floor can become dangerous the second the angle changes and gravity starts pulling in the wrong direction.

Move a tall piece down stairs the right way
Take a tall bookcase as an example. It's awkward, top-heavy, and easy to lose control of if you treat it like a big box.
A hand truck is usually the right call. Strap the piece tightly so it can't shift. Tilt the dolly back enough to keep the weight settled into the frame. Then set your positions before you start down.
When using a hand truck on stairs, the strongest person should be at the lower end and carry about 60 to 70% of the load, while the helper guides from above. That method can reduce injury risk by about 40% compared with traditional two-person lifting, based on this stair-moving guidance from Home Depot.
The lower person controls the load. The upper person controls the direction.
Going downstairs, the person handling the hand truck stays behind it with the handles toward the body and keeps the dolly tilted back at roughly a 45-degree angle. That angle helps prevent the load from rolling forward too aggressively on each step.
Tight corners need patience, not force
Corners fool people because the furniture looks like it should fit. Then one arm of the sofa catches, somebody pushes harder, and now the wall has a new scar.
The fix is usually a pivot sequence, not more strength.
Try this:
- Stand the piece up if the design allows it: Sofas and bookcases often clear corners better vertically.
- Lead with one end: Don't try to shove the whole piece through square.
- Use tiny rotations: A few inches at a time is normal.
- Watch the top edge and the feet: Those are the parts that usually hit first.
If a refrigerator is part of the move, stair and doorway planning matters even more because of the size, weight distribution, and the need to keep it protected. This guide on storing a refrigerator is useful if the appliance won't go directly into place right away.
Know the warning signs
Stop the move if any of these show up:
- The load starts tipping off-center
- One person can't maintain footing
- The hand truck straps loosen
- You need to “catch” the furniture instead of controlling it
That last one is the red flag I take most seriously. If you're catching weight mid-move, the plan is already failing.
Why You Should Disassemble and Protect Your Furniture
People skip disassembly because it feels like extra work. Most of the time, it saves work.
Bed frames, dining tables, sectionals, shelving units, and anything with removable legs or shelves usually move better in pieces. The weight drops, the shape gets simpler, and your chances of clearing a tight doorway go up fast. A wide table that's impossible to turn in one piece often becomes easy once the legs are off.
What to take apart and how to keep track of it
Start with the obvious parts. Remove legs, shelves, drawers, glass inserts, and detachable hardware. Put screws and bolts in a labeled bag, then tape that bag to the underside or back of the item it belongs to. Don't trust yourself to remember which hardware goes with which piece six hours later.
For a practical outside reference on what movers commonly handle during takedown and setup, this article on Sydney movers and furniture assembly is worth a look.
Protection is part of the move
Once the piece is smaller, wrap it properly. Moving blankets protect corners and finished surfaces. Stretch wrap keeps blankets from sliding off and helps secure drawers or doors that you aren't removing.
What doesn't work is a single loose blanket draped over a dresser and held by hope. Wrap with intention. Pad the edges that will meet walls, rails, and truck interiors first. Those are the impact points.
Knowing When to Call for Help
You get the sofa to the stairwell, tilt it once, and realize there's no clean turn, no safe place to rest it, and no margin for error if someone loses grip. That is the moment to stop treating the move like a lifting problem and start treating it like a project decision.
Some pieces cross the line from manageable to risky fast. Pianos, safes, marble tops, commercial desks, large solid-wood furniture, and anything top-heavy or awkwardly balanced can hurt people, damage the building, or get ruined in one bad pivot. I've seen plenty of moves go sideways not because the item was impossible, but because the plan depended on confidence instead of control.
The signs a DIY move has stopped making sense
Hire help if any one of these is true:
- The item is so heavy or awkward that you cannot lower, rest, or turn it in a controlled way.
- The route includes stairs, tight landings, sharp corners, elevator rules, or a strict building time window.
- The piece is expensive, fragile, or hard to replace.
- Your plan relies on improvising once you reach the tricky part.
- One mistake would injure a helper or damage walls, floors, railings, or the item itself.
Insurance matters too. Friends can help with muscle. They usually cannot help with claims, repair costs, or building management after something gets gouged.
If a piano is involved, don't wing it. This guide with essential piano moving advice gives a good sense of why these moves are their own category.
The real trade-off is cost versus risk
Many people compare moving quotes to the cost of doing it themselves and stop there. That misses the full job. An accurate comparison includes truck rental, equipment, packing supplies, lost time, building penalties, injury risk, and the cost of replacing a damaged piece. If you're weighing that decision, this breakdown of the cost of hiring movers is a useful place to start.
Paying for movers is not always the right call. Paying for the right movers often is.
Storage solves the part many DIY plans ignore
Urban moves often break into stages. The lease starts late. The elevator slot is tomorrow. The new place needs paint, floor work, or basic cleaning before large furniture can go in. That leaves furniture in limbo, which is usually where rushed decisions start.
Good planning gives those in-between days a place in the schedule. Flexible storage can hold the smaller items that create clutter and slow the move down, especially hardware bags, lamps, shelf contents, decor, kitchen overflow, and the loose parts created during disassembly. Even when the big furniture goes directly to the next address, getting the smaller pieces out of the way makes access, staging, and reassembly easier.
The best call for help is often made before moving day. If the route is bad, the building is difficult, or the timeline has gaps, bring in pros for the heavy pieces and use storage to keep the rest of the project under control.
If your move includes a lease gap, downsizing, or all the loose items that pile up while furniture is in transition, Endless Storage can help simplify the logistics. Their storage-by-the-box model works well for apartment moves, temporary staging, seasonal items, hardware, decor, and the smaller belongings that make a heavy-furniture move feel chaotic.