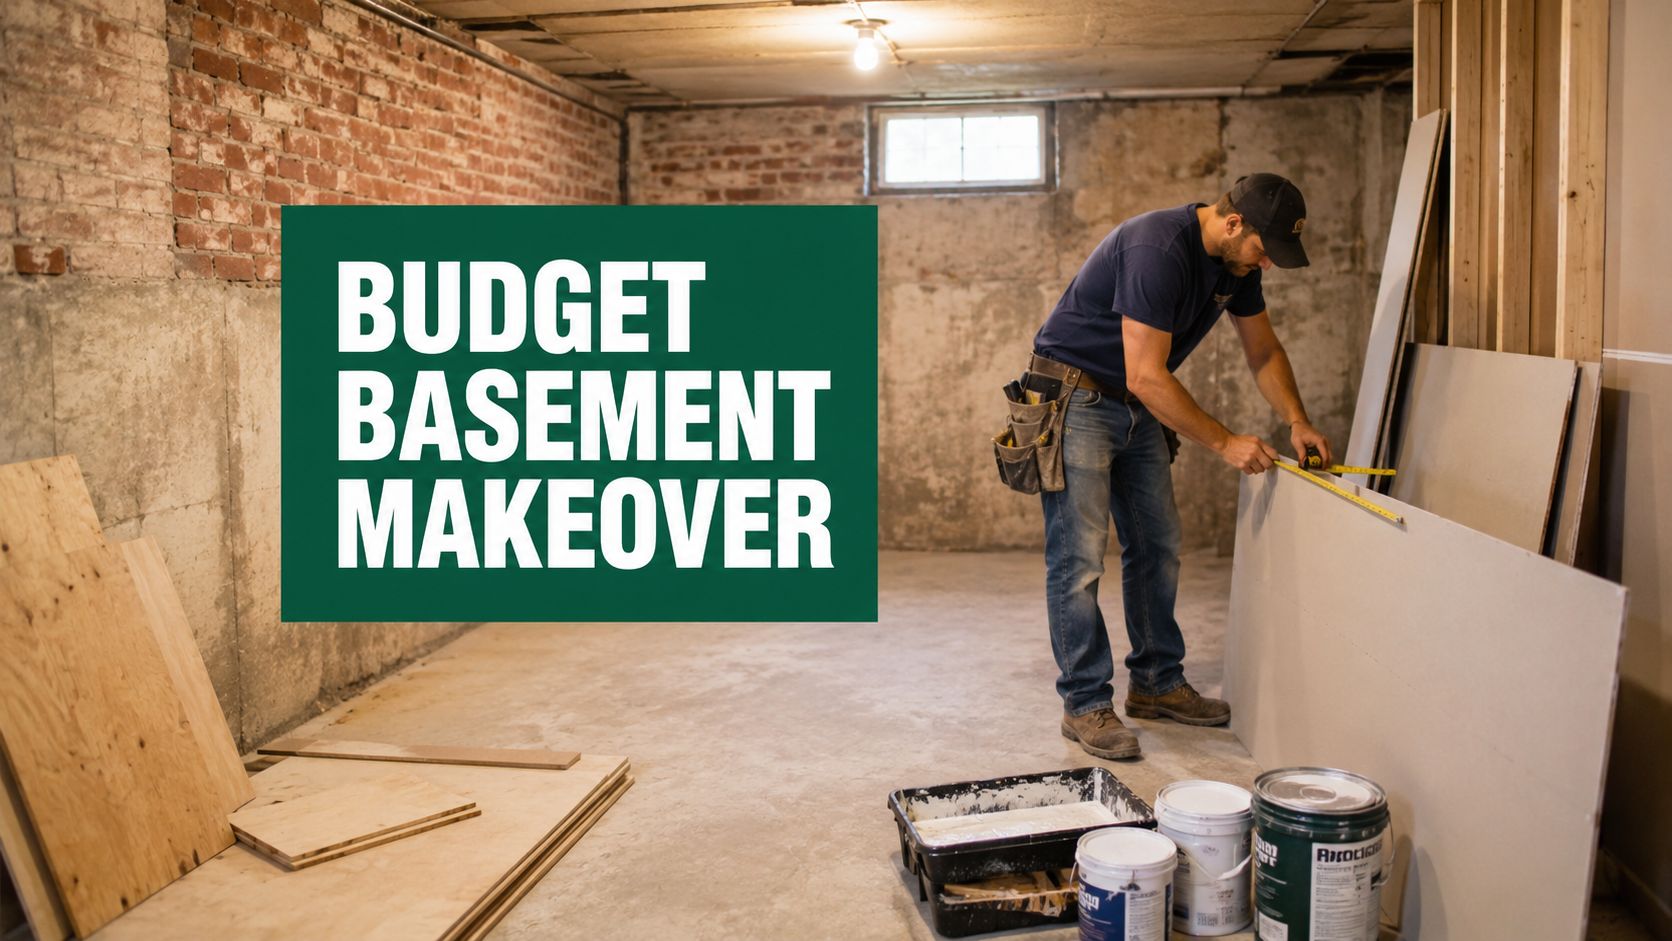
The usual basement problem starts the same way. You walk downstairs planning a home office, workout spot, or TV area, and the first thing you see is overflow storage. Holiday tubs, old furniture, extra paint, hand-me-down shelving, and boxes nobody has opened in years are taking up the square footage you were counting on.
That is why a budget remodel should start with space recovery, not finishes. Get the clutter out, decide what needs to stay in the basement, and move the rest off-site if needed. For many homeowners, that first step matters more than paint color or flooring because it lets you see the room clearly, measure it properly, and avoid building a nicer version of the same storage problem.
If you are collecting affordable basement finishing ideas, keep the budget conversation grounded. Basement work gets expensive fast once moisture control, insulation, lighting, and flooring stack up. The practical way to keep costs down is to phase the work, handle low-risk cosmetic jobs yourself, and spend first on changes that make the space dry, usable, and easier to maintain.
I have seen homeowners waste money on finishes before clearing the room. They install new flooring, then realize they still need wall-to-wall storage because nothing was sorted first. A decluttering-first plan avoids that mistake.
The ideas below follow that order. Clear the basement, protect it from moisture, then improve the surfaces and layout. Where a coating makes sense, even basement utility areas can borrow ideas from transforming your Melbourne garage. Every project also ties back to storage, because a remodeled basement only works if it stops serving as the house's dumping ground.
1. DIY Paint and Epoxy Flooring
A bare concrete floor can make the whole basement feel unfinished, even if the walls and lighting are decent. Painting it or coating it with epoxy is one of the fastest ways to change that visual without committing to tile or wall-to-wall carpet.
The win here is simplicity. Clean concrete, patch obvious flaws, etch or prep the surface as directed by the product, then apply thin coats instead of trying to cover everything at once. Basement floors punish rushed prep work. If grease, dust, or moisture are still present, the coating usually tells on you later.
A garage-floor style finish can also work well in a basement utility zone, workshop corner, or game area. If you want inspiration for coating techniques and the kind of glossy finish people often aim for, this look overlaps with transforming your Melbourne garage.
What works best on real basement floors
- Use concrete paint for utility areas: Laundry zones, storage walkways, and workshop corners don't need a luxury finish.
- Choose epoxy for heavier wear: It makes more sense where furniture drags, bikes roll through, or kids treat the basement like a rec room.
- Add slip resistance: Smooth coatings can look sharp but feel risky near exterior doors or damp areas.
Practical rule: Don't coat a basement floor until you're confident water isn't coming up through the slab or sneaking in at the walls.
Later, if you add area rugs or modular furniture, the painted floor still works as a clean base layer instead of fighting the room design.
Storage Connection: This project is hard to do well in a cluttered basement. Coatings need an open floor and time to cure. Pulling out boxes, spare furniture, and seasonal gear first gives you the uninterrupted workspace this kind of finish requires.
Here's a useful walkthrough before you start:
2. Decluttering and Vertical Storage Solutions
Some of the best basement remodeling ideas on a budget aren't remodeling at all. They're space recovery.
If the basement is packed wall to wall, every improvement gets harder. You can't inspect the perimeter. You can't paint. You can't frame. You can't even tell how much usable room you have. Start by pulling everything into categories: keep in basement, move elsewhere, donate, toss, and store off-site.
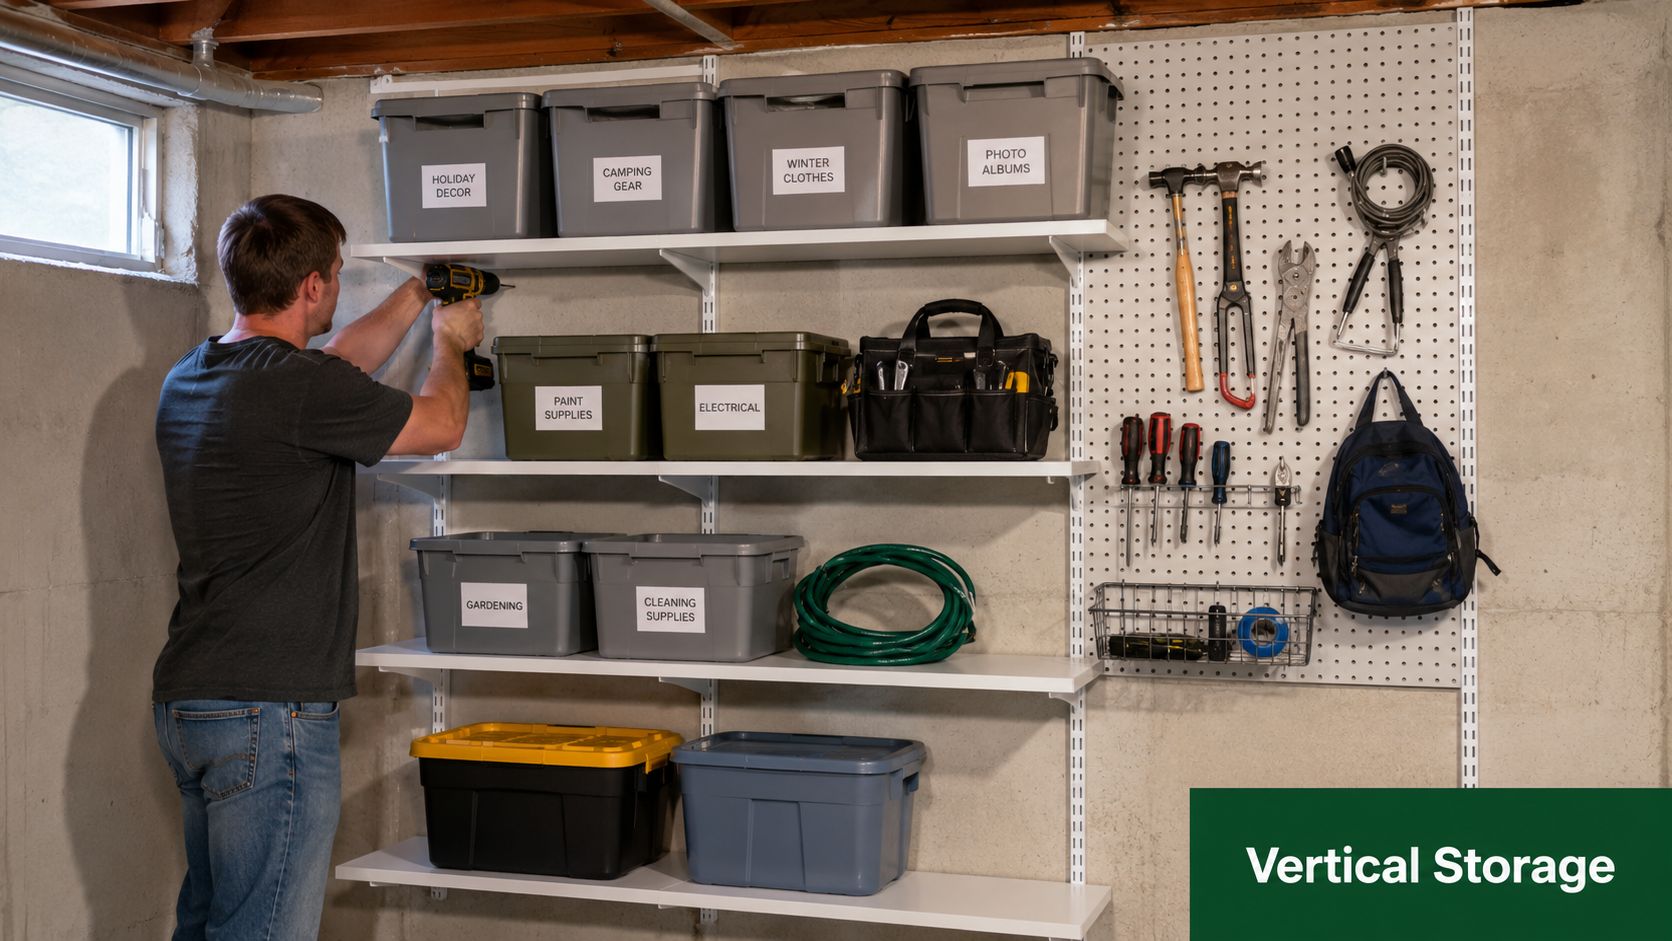
Wall-mounted shelving changes the room more than one might expect. Heavy-duty metal racks, stud-mounted shelves, and labeled bins get items off the floor and make the basement feel deliberate instead of abandoned. Systems like IKEA IVAR, simple utility shelving, and stackable clear totes work well because they're easy to expand later.
A smarter way to organize the basement perimeter
Use the walls for things you need access to. Holiday decor, tools, archived paperwork, sports equipment, and backup household supplies can all live vertically. Keep the center of the room open so the basement starts reading as living space, not storage.
If you need a step-by-step method, this guide on how to organize a basement is a useful starting point.
The biggest visual upgrade often comes before the first gallon of paint. Open floor area changes how the whole basement feels.
Storage Connection: This is the core step. If the basement is carrying too much overflow, move low-use items out before you design anything else. Storage-by-the-box works especially well here because many basement items are small, seasonal, and rarely needed, which makes them poor candidates for taking up permanent floor space.
3. Peel-and-Stick Wallpaper and Paint Accent Walls
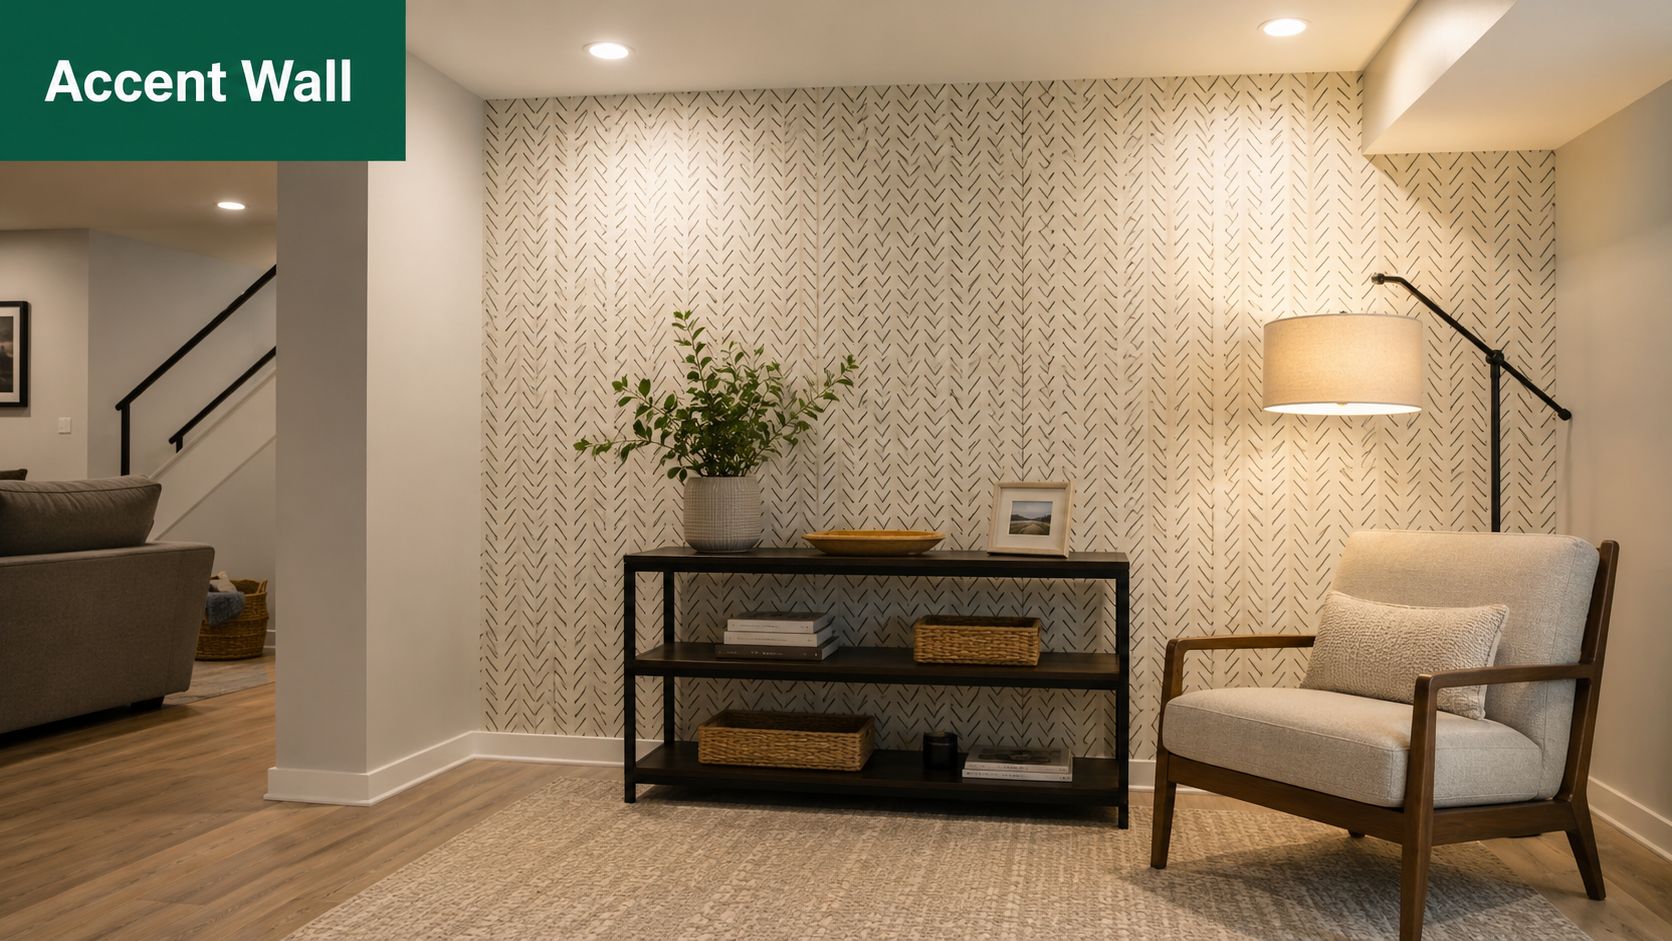
Basement walls usually need one thing more than anything else. They need contrast and intention. A single painted feature wall or a peel-and-stick wallpaper panel behind a sofa, desk, or media console can create that without a full tear-out.
Paint is the safer option in basements that still have humidity swings. Wallpaper works best when the wall is smooth, dry, and already reliable. If you're testing the room's conditions, start small. A reading nook, stair landing wall, or the section behind a bar cart tells you quickly whether the material will stay crisp or start lifting at the edges.
Good places to add visual interest
- Behind a desk: It helps a basement office feel finished on video calls.
- At the TV wall: A darker paint color reduces glare and gives the room more depth.
- By the stairs: This turns an ignored transition space into part of the design.
The mistake I see most often is overcommitting to a bold pattern in a basement with weak lighting. Basements usually look better when the walls support the room instead of dominating it. If there's limited natural light, use lighter paint on most walls and reserve pattern for one controlled area.
Storage Connection: Accent walls work when the eye has a clear line to them. If bins, broken furniture, and extra household supplies still line the walls, you lose the payoff. Clearing and relocating overflow storage lets a small cosmetic project register as a room upgrade.
4. LED Lighting Upgrades and Task Lighting
You walk into a basement with decent paint, usable furniture, and plenty of square footage, yet it still feels like storage space. In many cases, lighting is the reason. A $100 to $300 lighting update can make the room feel cleaner, taller, and more finished without opening a wall.
Start with the basics. Swap old bulbs so color temperature matches across the room, then add light where people use the space. Recessed LEDs or flush-mount fixtures handle general lighting. A desk lamp, plug-in sconce, or under-shelf LED strip handles focused tasks. If rewiring is off the table, plug-in fixtures and adhesive LED tape give you a lot of improvement for very little labor.
Where to put light for the biggest payoff
Focus on the desk, the bottom of the stairs, and the darkest corner first. Those areas usually make a basement feel unfinished because they collect shadows. For work zones, bulbs in the 4000K range usually read cleaner and sharper. For TV or lounge areas, warmer bulbs around 2700K to 3000K tend to feel better at night.
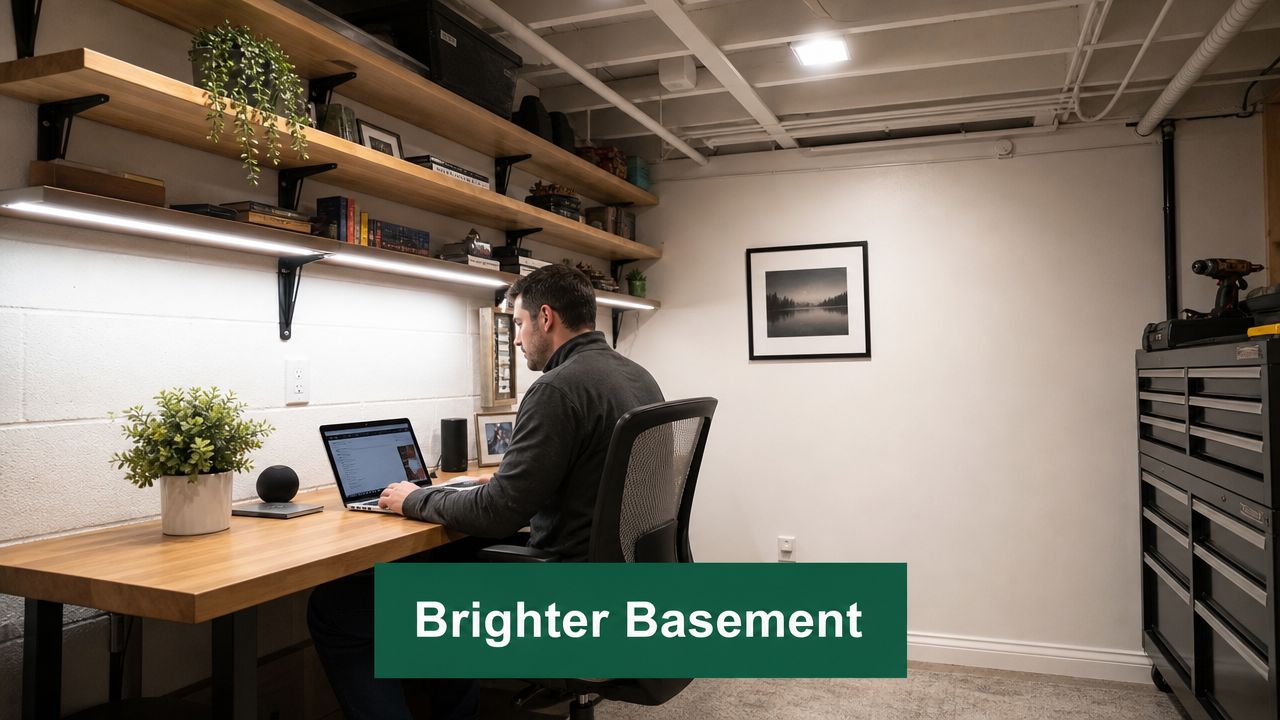
I usually tell homeowners to spend lighting money before decorative add-ons. Better light improves every other finish in the room, from paint color to shelving to flooring. The trade-off is simple. Cheap fixtures can look harsh, and too many cool bulbs can make a basement feel sterile. It is better to use fewer fixtures in the right spots than overload the ceiling with bright light that flattens the room.
Storage Connection: Lighting plans work better after clutter is reduced and wall space is visible. Stacked bins and extra furniture block outlets, cast shadows, and hide the corners that need attention. Clearing overflow first with practical budget storage ideas for small and shared spaces makes it much easier to place lamps, shelf lighting, and task fixtures where they improve how the basement works.
5. Carpet Tiles and Budget Flooring Options
You clear out a corner of the basement, set down a chair or a treadmill, and the bare concrete still makes the space feel temporary. Flooring changes that fast. On a tight budget, the best choices are usually carpet tiles, sheet vinyl, or luxury vinyl plank, depending on how much moisture, traffic, and storage movement the room has to handle.
Carpet tiles make sense when comfort matters more than a perfectly uniform look. They are easy to carry downstairs, easy to cut around posts, and easy to swap out if one section gets stained. LVP costs more up front, but it gives a cleaner finish and usually holds up better under rolling chairs, guest beds, and regular foot traffic. Sheet vinyl is often the cheapest route for larger basements, though repairs are less forgiving if it gets torn.
Picking the right floor for how the basement is used
- Choose carpet tiles for lounge and play zones: They soften noise and feel warmer underfoot, but they can trap odors if the basement runs damp.
- Choose LVP for offices, guest areas, and workout spaces: It is easier to clean and usually stands up better to mixed use, but the floor underneath needs to be fairly level.
- Choose sheet vinyl for the lowest installed cost in open areas: It covers a lot of square footage cheaply, though seams and tears are harder to hide later.
- Keep extra material: Save one unopened box of tile or a few spare planks so a future repair does not turn into a full replacement job.
Budget matters, but prep work matters too. If the slab is dusty, uneven, or occasionally damp, even cheap flooring can fail early. I usually tell homeowners to spend a little less on the finish and a little more on floor prep, because a bargain floor installed over a bad surface rarely stays a bargain.
Storage Connection: Flooring lasts longer when the basement is not acting as overflow storage. Heavy bins, loose boxes, and constant reshuffling wear out carpet tiles and scratch vinyl surfaces. Clearing excess items first, then using ideas from these basement apartment decorating ideas that make small lower-level spaces feel more usable helps you choose flooring for real living, not for stepping around clutter.
6. DIY Insulation and Moisture Control
A basement can look finished and still feel miserable. If the walls are cold, the air smells musty, or cardboard boxes pick up dampness after a few weeks, pause the cosmetic work and fix the shell first.
Start with a simple inspection. Pull everything 12 to 18 inches away from exterior walls. Check for efflorescence on masonry, staining near the slab edge, rust on metal fasteners, and dark spots around rim joists or window corners. Seal small, non-structural gaps around pipe penetrations and obvious air leaks, but do not treat caulk as a cure for active water entry. If water is coming in through the wall or floor joint, that calls for drainage or foundation work before insulation goes up.
The best budget move is usually targeted work, not a full tear-out. Air-sealing rim joists, adding rigid foam where it makes sense, and running a properly sized dehumidifier often give a bigger comfort boost than spending the same money on decorative finishes. Fiberglass can be affordable, but it performs poorly if it gets damp. In basements that have a history of moisture, rigid foam or other moisture-tolerant assemblies are often the safer choice.
If you plan to install any wood-based finish floor nearby, moisture control gets even more important. Proper subfloor prep and a moisture barrier help ensure stable hardwood floors and reduce the chance of cupping or adhesive failure later.
One more practical point. Insulation projects stall fast when the basement is still acting as long-term storage. You need access to the perimeter, the mechanicals, and the floor-wall joint. Moving overflow furniture and packed boxes into storage space for furniture during a remodel makes the inspection easier and helps you spot problems before they get covered.
Storage Connection: Decluttering first is not optional here. Clear walls let you see moisture marks, feel cold spots, and reach the exact areas that usually leak air. Off-site storage can be the first real remodel step because it turns a crowded basement into a space you can diagnose, dry out, and insulate correctly.
7. Basement Furniture Repurposing and Thrift Shopping
Not every basement needs new furniture. In fact, basements often look better when the mix is relaxed and a little less precious.
A thrifted media console, a repainted side table, and a durable secondhand sectional can create a casual family room without the stress of protecting expensive pieces in a below-grade space. Habitat ReStore finds, Facebook Marketplace sideboards, old bookcases with fresh paint, and inherited chairs with new fabric all fit well here. What matters is scale and condition, not pedigree.
What's worth bringing downstairs
- Solid wood side tables: Easy to sand, paint, and live with.
- Bookcases and cabinets: Great for games, office supplies, and hidden storage.
- Cleanable upholstered seating: Better than delicate fabrics that hate humidity.
Skip anything already musty, unstable, or swollen from previous water exposure. Basements reveal weak furniture fast. If a piece smells off upstairs, it won't improve downstairs.
There's also a practical side to this. A basement that still changes use over time benefits from furniture you won't feel bad moving, repainting, or replacing. If you're deciding what stays, what goes, and what should be stored instead of crowding the room, this guide to storage space for furniture helps sort the keep-versus-store decision. And if moisture is a concern anywhere in the house, it's smart to understand the basics that ensure stable hardwood floors.
Storage Connection: Basement remodels stall when homeowners try to design around too much furniture. Store the pieces you might want later, keep only what fits the new layout, and let the room breathe. That's how a thrifted setup looks curated instead of crowded.
8. Basement Finishing with Temporary Walls and Studs
You clear the boxes out, finally see the floor again, and realize the problem is not square footage. It is that the basement is doing four jobs at once. A simple stud wall or partial divider can fix that faster and cheaper than a full finish.
Temporary or lightly finished walls work well when you need definition, not a full set of enclosed rooms. Use them to block the view of mechanicals, create a small office corner, or give a TV area a back wall that does not feel makeshift. Keep them simple. One clean partition with straight lines and basic trim usually improves the room. Too many small walls make a basement feel chopped up and can hurt light and airflow.
Where budget partitions make sense
- Office nook: A single partition can create privacy for calls without building a full room.
- Mechanical screening: Hide the furnace, water heater, or storage racks from the main seating area.
- Media wall: Build a shallow framed wall to mount a TV and place storage behind or beside it.
- Stair landing divider: A short wall can make the basement feel like a finished zone instead of an open utility space.
There are trade-offs. Temporary walls cost less and go up faster, but they still need to respect access to shutoffs, service panels, cleanouts, and equipment clearances. They also do not solve sound control unless you add insulation and solid finishes. If you are framing near exterior walls or concrete, use pressure-treated lumber where required and keep moisture in mind. Basements punish shortcuts.
For a basic non-load-bearing partition, many homeowners can build the frame themselves and hire out drywall or trim if needed. Material cost depends on size and finish level, but a modest divider is usually one of the cheaper ways to make a basement feel intentional. The smart move is to build only the walls that improve how the room works today, then leave flexibility for later.
Storage Connection: This project goes better after a decluttering pass. If bins, old furniture, and seasonal overflow are still spread across the basement, it is hard to tell where a wall should go. Clearing the room first, including moving keep-but-not-now items into a service like Endless Storage, helps you frame around actual use instead of around leftover clutter.
9. Low-Cost Ceiling Solutions and Drop Ceilings
Ceilings are one of the hardest basement elements to ignore. Exposed joists can look industrial in the right house, but in many basements they just read unfinished. A drop ceiling is still one of the most practical ways to clean that up while preserving access to pipes, wires, and ductwork.
That access matters more than people think. Drywall may look more upscale, but if your basement has active utility lines or future service needs, a suspended ceiling is often the friendlier long-term choice. Use flat, bright tiles for a cleaner look, and avoid anything that adds visual heaviness in a room that may already have limited height.
Best use cases for a drop ceiling
- Utility-heavy basements: You'll appreciate access later.
- Family rooms and playrooms: The finished grid helps the room feel complete fast.
- Spaces with mixed systems overhead: It hides visual noise without locking everything away.
The trap is trying to force a drop ceiling into a basement that's already too tight. If headroom is marginal, painting the ceiling and improving lighting may be the better budget move.
Storage Connection: Ceiling work usually means ladders, long tile boxes, and room to maneuver. Removing excess basement contents first isn't optional. It keeps installation safer and helps you see whether the room can handle a lowered ceiling without feeling cramped.
10. Multi-Purpose Basement Zones with Budget Rugs and Dividers
A lot of basements need to do three jobs at once. Friday night TV room. Monday morning office. Occasional guest space when family visits. You do not need to frame new rooms to make that work.
In budget remodels, zoning is often the smartest first move because it improves how the basement functions before you spend money on permanent changes. Rugs, open shelving, curtains, and folding dividers can separate activities without closing off light or making a low basement feel tighter. That flexibility matters if your needs are still changing or if you want to test a layout before building anything.
Low-cost ways to create separate basement zones
- Use rugs to mark each function: A rug under a desk or seating group creates a clear visual boundary fast.
- Place furniture with intention: Bookcases, consoles, and sofa backs can divide space while still giving you storage or seating.
- Add simple dividers where privacy matters: Curtains on ceiling tracks, folding screens, or shelving units work well for workout corners, guest beds, or hobby areas.
- Light each zone separately: A floor lamp in the lounge and a task lamp at the desk make each area feel planned instead of improvised.
The trade-off is privacy and sound control. Soft dividers help define space, but they will not block noise the way a real wall will. For many homeowners, that is a fair compromise because the cost stays low and the layout stays easy to change. If a zone gets heavy use over time, you can always upgrade that one area later.
For ideas that divide space and add function at the same time, these room divider storage solutions can help you plan a layout that works harder.
Storage Connection: Zoned basements only work when each area has room to breathe. If the floor is still covered with bins, old furniture, and seasonal overflow, every new "zone" turns back into storage. Clearing out what does not need to stay on-site is often the first real remodeling step. Services like Endless Storage make that easier, and once the clutter is out, rugs and dividers can create usable space instead of just rearranging the mess.
10 Budget Basement Remodel Ideas Comparison
| Option | 🔄 Implementation Complexity | 💰 Resource Requirements & ⚡ Efficiency | 📊 Expected Outcomes | Ideal Use Cases | 💡 Tips / ⭐ Key Advantages |
|---|---|---|---|---|---|
| DIY Paint and Epoxy Flooring | Moderate, DIY-friendly but requires thorough surface prep | Low cost ($1–3 /ft²); basic tools; quick curing (24–48h) ⚡ | Durable, stain‑resistant polished finish; limited design options | Budget basement or garage floors; quick refresh projects | Tip: clean/degrease, use primer, add anti‑slip texture · ⭐ Low cost, long‑lasting |
| Decluttering and Vertical Storage Solutions | Easy, simple DIY shelving and wall mounts | Moderate upfront ($200–500); modular units $15–50 each; fast install ⚡ | Frees floor space; organized, more usable basement area | Small or cluttered basements needing more storage capacity | Tip: anchor to studs; label bins; measure heights · ⭐ Flexible, high impact for cost |
| Peel‑and‑Stick Wallpaper and Paint Accent Walls | Very easy, minimal skill; renter‑friendly | Very low ($0.50–2 /ft² wallpaper; $15–30 paint); quick application ⚡ | Immediate visual refresh; temporary solution (may peel) | Accent walls, renter makeovers, small budget aesthetic upgrades | Tip: choose moisture‑resistant types; test small area · ⭐ Affordable, reversible |
| LED Lighting Upgrades and Task Lighting | Easy–Moderate, plug‑and‑play bulbs to some wiring | Low–moderate ($100–300 total); bulbs $2–10; highly energy‑efficient ⚡ | Brighter, safer, energy‑saving basement; better task visibility | Home office, workshops, storage access areas | Tip: layer ambient/task/accent lighting; use dimmers · ⭐ High efficiency, large functional gain |
| Carpet Tiles and Budget Flooring Options | Easy, DIY tile/plank installation; prep recommended | Low–moderate ($1–4 /ft²); may need vapor barrier; replaceable sections | Warmer, quieter floor; comfortable, repairable surface | Living areas, playrooms, rental basements (low moisture) | Tip: install vapor barrier; keep spare tiles · ⭐ Comfortable, modular |
| DIY Insulation and Moisture Control | Moderate, assessment + sealing; some skill needed | Low cost materials (foam board $0.50–1 /ft²); dehumidifiers $50–200; ongoing maintenance | Reduces moisture & mold risk; improves energy efficiency and longevity | Any basement before finishing; damp or uninsulated spaces | Tip: test moisture first; seal cracks; run dehumidifier · ⭐ Essential for long‑term protection |
| Basement Furniture Repurposing and Thrift Shopping | Easy–Moderate, shopping and light refurbishing | Low–moderate ($200–500 total); time investment for sourcing | Unique, budget‑friendly furnishings; sustainable aesthetic | Game rooms, media areas, eclectic living spaces | Tip: inspect for stability; use chalk paint for updates · ⭐ Affordable, personalized style |
| Basement Finishing with Temporary Walls and Studs | Moderate–High, carpentry and drywall skills needed | Moderate ($200–400 per wall); tools and finishing materials; time‑intensive | Defined rooms and finished appearance; semi‑permanent layout | Creating bedrooms, offices, or dedicated media rooms | Tip: preplan electrical/plumbing; use laser level · ⭐ Creates true usable rooms |
| Low‑Cost Ceiling Solutions and Drop Ceilings | Easy–Moderate, grid installation, tile placement | Low cost ($1–3 /ft²); moisture‑resistant tiles recommended; quick install ⚡ | Hides pipes/wiring; improves acoustics/insulation; lowers ceiling height | Basements with exposed systems needing concealment | Tip: measure headroom; use moisture‑resistant tiles · ⭐ Affordable concealment, easy access above tiles |
| Multi‑Purpose Basement Zones with Budget Rugs and Dividers | Very easy, no construction, instant reconfiguration | Low cost (rugs $50–150; dividers $50–200); highly flexible ⚡ | Defined functional zones without walls; retains flexibility | Renters, multi‑use basements, temporary layouts | Tip: color‑block rugs to define areas; layer lighting · ⭐ Flexible, low‑commitment zoning |
Your Budget Basement Remodel Starts Now
You walk downstairs ready to start, and the first thing you see is stacked bins, an old loveseat, paint cans, and boxes that have not moved in years. That is the essential starting point for a budget remodel. Before paint, flooring, or lighting, the basement needs enough open floor and wall space for you to see what you are working with and what is worth changing.
The cheapest remodels usually follow the same pattern. Clear the space. Fix moisture problems. Improve lighting. Then spend on finishes. That order protects your budget because it prevents waste. New carpet over a damp slab, fresh drywall beside an unresolved leak, or a media zone built around stored clutter usually leads to rework, and rework is what blows up a modest budget.
Cost still matters, and basement work adds up fast. Even a basic finish can become expensive once framing, flooring, ceiling treatments, and labor stack together. The practical way to stay in control is to keep DIY work focused on low-risk tasks such as painting, shelving, trim, simple flooring, and furniture upgrades, while hiring licensed help for electrical, plumbing, or anything that affects code compliance. That trade-off saves money without creating expensive correction work later.
Storage Connection: If the basement is serving as long-term storage, it is not ready to function as living space. Clearing low-use items out first gives you clean measurements, safer work access, and better decisions about layout. It also shows whether you need temporary walls, a drop ceiling, or just better zoning and lighting.
Start with one useful win. Paint the concrete floor. Install brighter LED fixtures. Add vertical shelving to one wall. Build a small office nook or family lounge before trying to finish the entire basement at once. A phased approach works better for tight budgets because each upgrade can be tested in real use before you commit to the next one.
If your basement is packed with seasonal bins, extra furniture, archived paperwork, or "figure it out later" stuff, Endless Storage can help you create the room you need to begin. Their storage-by-the-box model is a practical fit for urban households and cluttered homes because you can move low-use items out of the basement without renting a full unit. Clear the floor, reclaim the walls, and give your remodel a real starting point.
Frequently Asked Questions
Unveiling the Secrets to Effortless Storage
Endless Storage is available nationwide. You pick a plan, tell us where to pickup, and we'll send a UPS van to collect, whichever state you're in.
Your shipping label will be sent to your email within a few minutes, if not instantaneously. It can also be accessed through your customer profile.
Your box will be shipped to one of our climate controlled self storage facilities in our closest self storage facility. Our manager will accept your package, notify you that your box has been received, and securely stored. Only our managers will have access to Endless Storage boxes.
Email us at admin@endless-storage.com click to live chat with us, or send us a message below.
Never! We're committed to transparent pricing with no surprises. You'll lock in your rate with no hidden fees and no long-term contracts.
Fast access guaranteed! Your boxes will arrive at your doorstep within 48 hours of requesting them back. Need to check on delivery? We provide tracking information for complete peace of mind.
Totally flexible! Store month-to-month with no long-term commitment and cancel anytime.
Everything's online! Use your account dashboard to:
• Set up automatic monthly payments
• Request box returns
• Update your address
• Order additional boxes
• Track shipments
Your boxes are insured up to $100 each. Our customer service team will help you file any necessary claims and resolve issues quickly.
Don't worry – we'll email you right away if there's a payment issue. Your items stay safe, though you may have temporary service interruption or late fees until payment is resolved.
When you request our free storage kits, you'll have 30 days to send in your boxes to activate your 3 months of free storage. Think of it like starting a gym membership – your activation window begins when you receive your kits, and your full free trial begins once you send in your first box. During your free months, you'll experience our complete storage service at no cost.
Your 30-day activation window begins when you receive your storage kits. We'll send you an email confirmation when your kits are delivered, marking the start of your activation period.
If you haven't sent any boxes for storage within your 30-day activation window, your free trial will expire and we'll begin charging the regular monthly rate of $9.99 per box. This helps ensure our storage kits go to customers who are ready to use our service.
A box costs $9.99 per month to store (plus sales tax). This price includes free shipping for standard boxes under 50 lbs. and smaller than 16"x16"x16"
Log into your Endless Storage account, locate the box you would like returned, and simply click Return My Box.
Yes, each box stored with us is insured for up to $100 throughout transit as well as the duration of storage within our facilities.
Your box will be at your doorstep within 48 hours of you requesting it back.
Store 10+ boxes? We'll pick them up for free! After your purchase, we'll contact you to schedule a convenient pickup time and arrange UPS collection.
We trust UPS with all shipments, and every box includes $100 insurance coverage. You'll receive tracking information to monitor your items' journey.
Yes! Visit any of our locations by appointment. Just bring a photo ID matching your customer profile.
For everyone's safety, we can't store hazardous materials, firearms, or perishables. All items must fit within our standard boxes.
It's easy! Order your storage kit online, and we'll ship it to you within 1-2 business days. Your shipping labels will be emailed instantly and available in your account.
We're here to help! Email us at admin@endless-storage.com, use our live chat, or send us a message through your account.
To cancel your storage service with Endless Storage, please email your cancellation request to admin@endless-storage.com. Our team will process your request within 2 business days and confirm your cancellation via email.
We understand packing takes time. However, to maintain your free trial benefits, you'll need to send at least one box within the 30-day activation window. If you need more time, you can always start with one box to activate your trial and send the rest later. You can always reach out to admin@endless-storage.com if you have any issues or concerns.
When you request our free storage kits, you're starting a 30-day window to begin using our storage service.
Important: To activate your free trial, send at least one box for storage within 30 days. If no boxes are sent within this 30-day window, a one-time $50 fee applies to cover materials and shipping costs. This fee is clearly disclosed before you sign up.
Think of it like reserving a hotel room – we're setting aside space and sending specialized packing materials for your use. The fee only applies if you request materials but don't begin storage, similar to a hotel's no-show charge.