
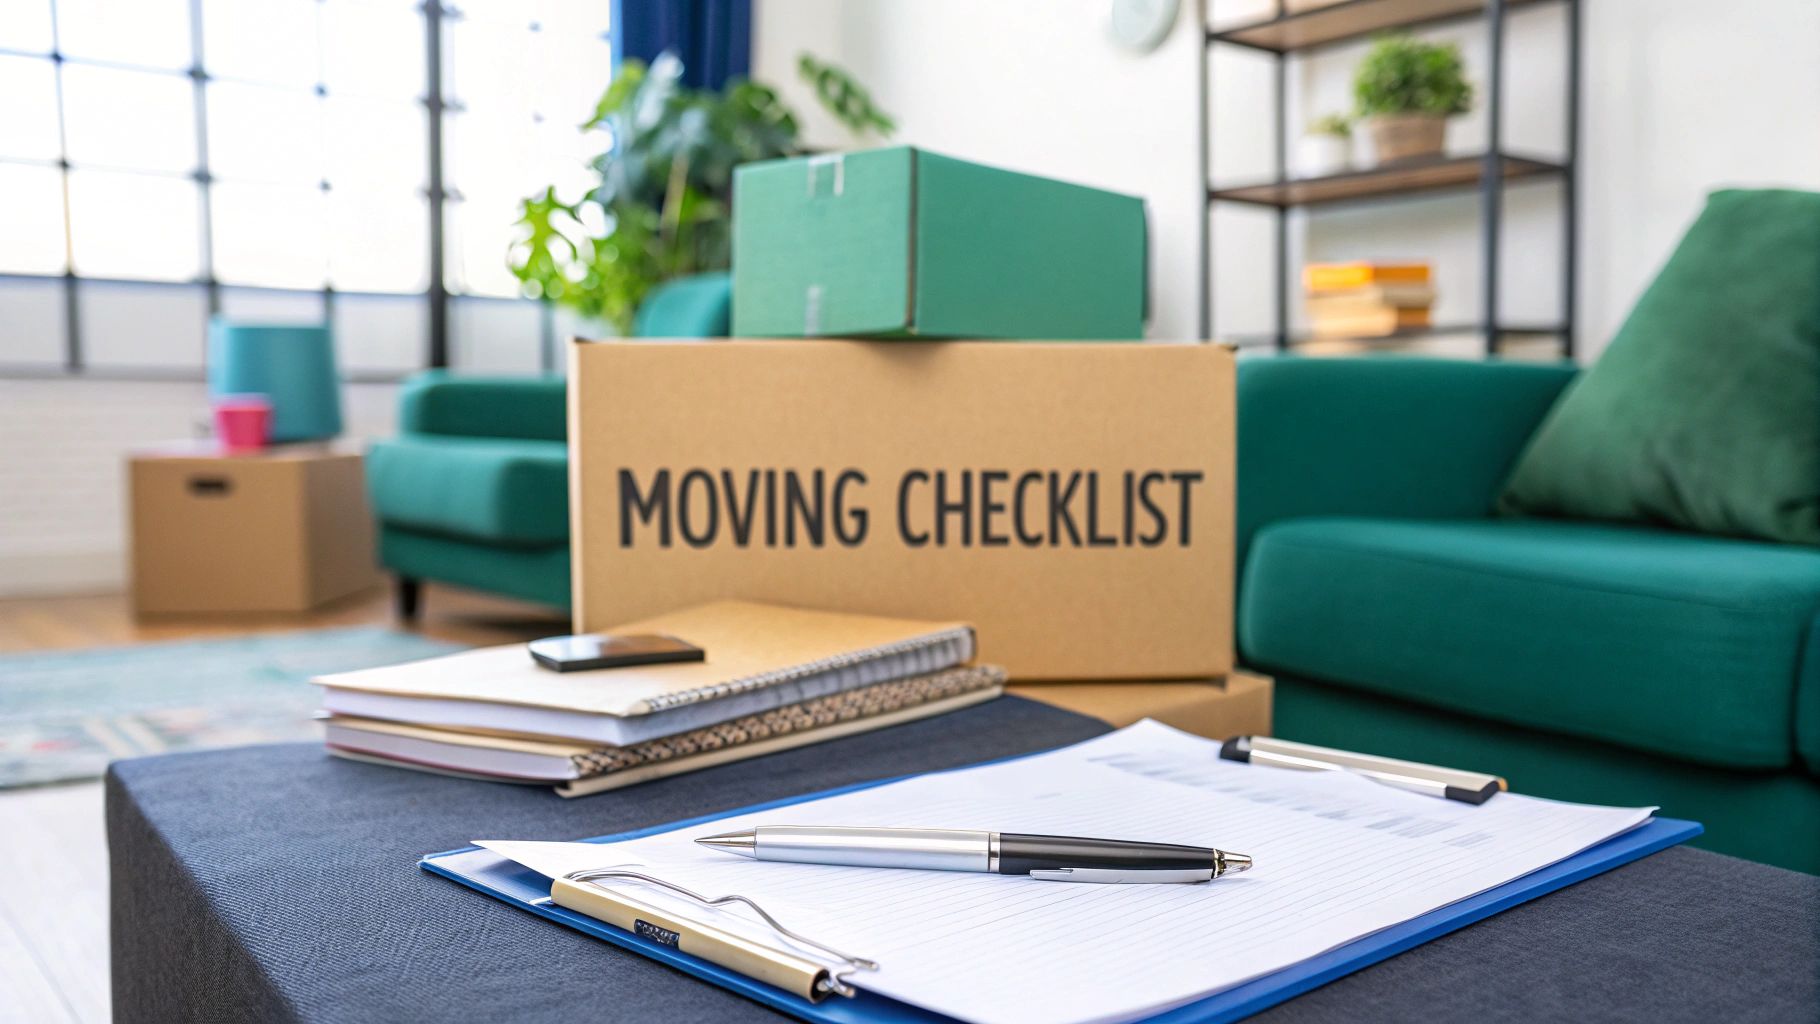
A moving inventory list is more than just a piece of paper; it's your command center for tracking every single thing you own during a move. Think of it as a detailed checklist that documents each item, its condition, and exactly which box it's in. This simple document is the key to turning moving chaos into an organized, manageable process.
The Real Reason You Need a Moving Inventory

Moving consistently ranks as one of life's most stressful events. A huge chunk of that anxiety comes from feeling disorganized and out of control. A moving inventory isn't just about "knowing what you have"—it’s a strategic tool that brings clarity and security to an overwhelming experience. It becomes your single source of truth when boxes are stacked to the ceiling and your memory is foggy.
Ultimately, it’s the best safeguard for your belongings. This list empowers you in a few critical ways.
Protecting Your Possessions
Without a detailed record, how can you be sure everything actually made it to your new home? An inventory list lets you check off items as they come off the truck, so you can immediately spot anything that might be missing.
It also serves as crucial evidence if you need to file an insurance claim for damaged goods. Having a list that details an item's pre-move condition—maybe even with a photo attached—makes the claims process worlds easier.
The inventory sheets are your best friend if something gets lost or damaged. Make sure you are well-acquainted with them before, during, and after your movers handle your belongings.
Streamlining Your Entire Move
A well-prepared inventory does more than just track your stuff; it makes every stage of the move more efficient. It helps movers give you a more accurate quote because they know exactly what they’re transporting. On moving day, your list tells everyone which room each box belongs in, turning unpacking from a chaotic guessing game into a methodical task.
This is also the perfect time to get organized. Our guide on how to declutter your home before moving can help you figure out what's worth listing in the first place.
This structured approach is just as valuable for businesses. In fact, companies that use a moving inventory list for office relocations can slash inventory loss by as much as 40%. You can see more examples of how businesses use these templates at Smartsheet.com. By taking the time to create this document, you're not adding another chore; you're building the foundation for a successful, stress-free move.
Choosing the Right Inventory Template for Your Move

Let's be honest, not every move is the same, so a one-size-fits-all moving inventory template just doesn't cut it. The right format really comes down to your move's complexity, how comfortable you are with tech, and exactly what you need to track.
Picking the right tool from the get-go saves you the headache of trying to switch systems when you're already surrounded by boxes. The goal here is to find something that makes your move simpler, not adds another complicated task to your to-do list.
Let’s walk through the most common options so you can figure out what’s going to work best for you.
Digital Spreadsheets Versus Printable PDFs
For the person who loves to customize everything, digital spreadsheets like Google Sheets or Microsoft Excel are the gold standard. They give you total control over your inventory. You can add columns for anything you can think of—item value, condition, photos, you name it.
Best of all, you can instantly sort and filter your data. Need to find the box with your coffee maker? A quick search, and you've got your answer in seconds.
On the flip side, you have the classic printable PDF checklists. These are perfect for smaller moves or for anyone who just prefers a low-tech, pen-and-paper approach. There’s something genuinely satisfying about physically checking items off a list.
The downside? They’re a pain to update, you can't search them quickly, and they can easily get lost in the chaos of moving day.
Dedicated Moving and Inventory Apps
If you want a more guided experience, a dedicated moving app might be your best bet. These apps are built specifically for relocation and come loaded with pre-built templates and helpful features.
Here are a few key things to look for in a good moving app:
- Barcode/QR Code Generation: This is a game-changer. You can print unique labels for your boxes and scan them with your phone to instantly see what's inside.
- Photo Integration: Snap a picture of high-value items or the contents of a box and attach it directly to your inventory entry. It's great for insurance purposes.
- Cloud Syncing: Access and update your list from any device. This ensures you and anyone helping you are always looking at the most current version.
Sure, some of these apps might have a slight learning curve or a subscription fee, but the convenience they offer often outweighs those minor hurdles, especially for big or long-distance moves.
Still not sure which way to go? Every format has its place, and the "best" one is really about what fits your personal style and the scale of your move. I've put together a quick comparison to help you weigh the pros and cons at a glance.
Comparing Moving Inventory Template Formats
Ultimately, whether you choose a high-tech app or a simple piece of paper, the most important thing is that you pick a system and stick with it.
Your inventory list is only as good as your ability to use it consistently. Choose a format that feels intuitive and accessible, whether that’s a simple pen-and-paper list or a feature-rich application.
To get a better sense of what information you should be tracking, take a look at our comprehensive home inventory checklist template. It provides a solid foundation you can adapt, no matter if you decide to go digital or stick with a classic printable list. Your choice should support your organizational style and make tracking your belongings feel effortless.
Building Your Comprehensive Moving Inventory
Alright, this is where the real work begins. Creating a moving inventory isn't something you do in one sitting; it's a process that happens right alongside your packing. If you approach it methodically, what seems like a monster of a task becomes a totally manageable project. You'll actually build momentum and confidence as you go.
The trick is to start smart. Don't dive into the kitchen first—it’s the heart of your home and probably the most complicated room you have. Instead, kick things off in a low-traffic area like a guest room, office, or that storage closet you've been avoiding. This lets you get a few easy wins under your belt and nail down your system before you face the more challenging spots.
This systematic approach is your best defense against feeling overwhelmed, and it helps you stay accurate from the very first box.
The infographic below breaks down the basic flow for creating your inventory, from categorizing your stuff to verifying it's all there.
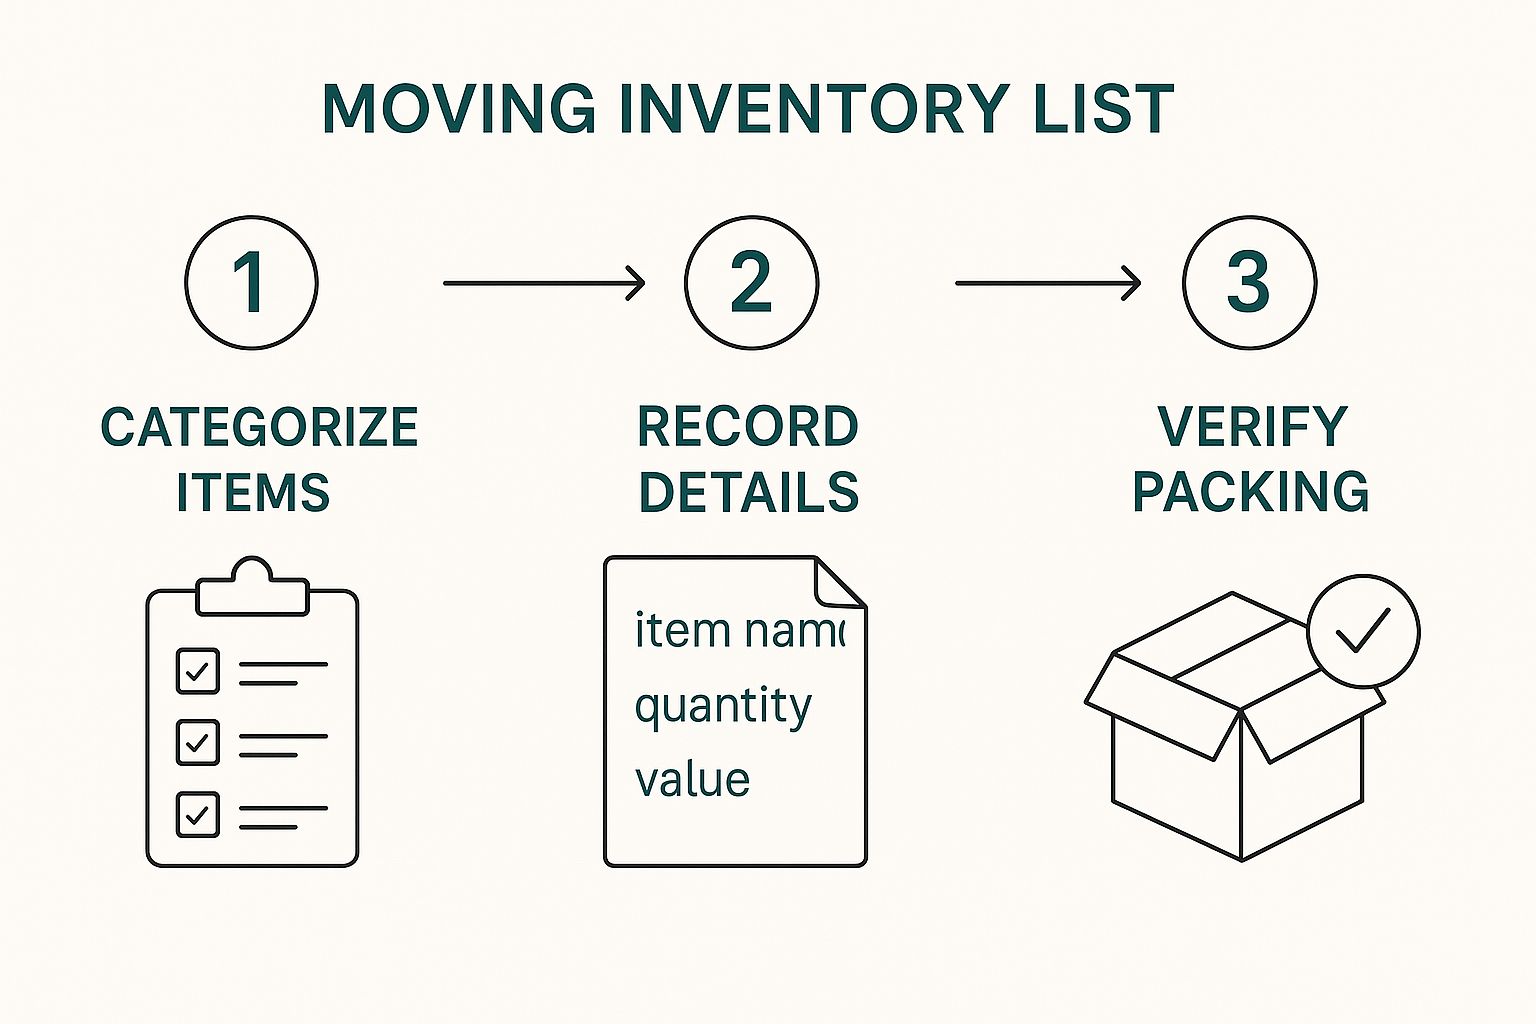
This visual guide really simplifies things into three core actions: categorize, record, and verify. Think of these as the backbone of any solid inventory system.
Capturing the Essential Details
Your moving inventory list is only as good as the information you put into it. Being detailed doesn't mean writing a novel for every single item, but it does mean being consistent and capturing the crucial data points for everything you pack.
For every box or large, standalone item, your list should include:
- Box Number: This is non-negotiable. Give every box a unique number and write it clearly on at least two sides.
- Room of Origin: Where did it come from? This is a lifesaver when you're trying to remember where you packed something specific.
- Destination Room: Where does this box need to go in the new place? Your movers (and your future self) will thank you for this one.
- Item Description: Be specific enough to be helpful. Instead of "Kitchen stuff," try "Toaster, blender, coffee mugs." For a box of books, something like "15 hardcover novels" works perfectly.
- Condition: Note the current state of your belongings, especially furniture and electronics. Simple terms like "Good," "Like New," or "Minor scratch on left side" are perfect.
Here's a pro tip: for anything valuable, always take photos. A timestamped picture of your TV screen or the surface of an antique table is undeniable proof of its condition before the move. This is absolutely invaluable if you have to file an insurance claim.
If you want to dive deeper into organizing for more than just a move, check out our guide on how to create an inventory system for all kinds of long-term needs. The principles are the same and can help you manage your belongings whether they're on a truck or in storage.
Practical Examples in Action
Let’s look at how this plays out with a couple of real-world examples.
Scenario 1: A High-Value Electronic Item
You're packing up your 65" OLED TV. A lazy entry like "TV" just isn't going to cut it if something goes wrong. A strong inventory entry, on the other hand, looks like this:
See? This entry gives you everything you need for tracking and insurance purposes. You’ve got the specific model, the serial number, its condition, and what it would cost to replace. No ambiguity, no questions.
Scenario 2: A Box of Assorted Items
Now, let's tackle a box from your home office. You don't need to list every single paperclip. Grouping items makes way more sense here.
In this case, you've clearly identified the most valuable item (the printer) while efficiently summarizing the less critical stuff. This approach strikes that perfect balance between being detailed and being efficient, turning your moving inventory list template into a genuinely powerful tool for your entire move.
Pro Tips for a Smarter Inventory System

Once you've got the basics down, you can take your moving inventory from a simple checklist to the mission control center for your entire move. These are the strategies I’ve seen make the biggest difference in saving time, cutting down on stress, and making unpacking feel surprisingly smooth. It's all about working smarter, not just harder.
The real magic happens when your physical packing methods and your inventory list—whether it's on paper or a screen—are perfectly in sync. This synergy is what separates a good system from a great one.
Implement a Color-Coding System
This is a genuine game-changer. Assign a specific color to each room in your new place. Grab some colored tape or big, bold stickers and slap one on at least two sides of every single box.
Now, here’s where your inventory list comes in. Just add a "Color" column to your spreadsheet. For instance, everything headed for the kitchen gets a red sticker, and your inventory sheet should show that.
- Kitchen: Red
- Main Bedroom: Blue
- Living Room: Green
- Bathroom: Yellow
When the movers show up, they can tell where each box goes with just a glance—no need to stop and read every label. This speeds up the unloading process like you wouldn't believe and prevents that giant mountain of cardboard from piling up in your living room. You can find more great tips in our guide on the best way to label storage bins, which follows a lot of the same principles.
Master the "First Night Box" Strategy
Picture this: you've finally arrived at your new home, you're exhausted, and you have no clue where your toothbrush, phone charger, or coffee maker ended up. The "First Night Box" is your secret weapon against this all-too-common moving day nightmare.
This box is packed with everything you'll need for the first 24 hours. Think toiletries, a change of clothes, medications, some basic kitchen supplies, and essential tools like a box cutter.
On your inventory list, give this box a special name like "PRIORITY 1 - OPEN FIRST" and wrap it in a unique, brightly colored tape. This tells the movers to load it on the truck last, so it's the very first thing that comes off. You'll have immediate access to all the essentials you need to feel human again.
Leverage Digital Tools for Real-Time Collaboration
If you’re using a digital template, put its collaborative features to good use. A cloud-based spreadsheet like Google Sheets lets you share the list with your partner, family, or even the moving company.
Suddenly, everyone is working from a single, updated source of truth that they can pull up on their phone. As soon as someone finishes packing a box, they can update the list in real-time. It’s also incredibly helpful for movers, giving them a clear roadmap of your belongings and where they need to go.
Thinking about effective organization with clear storage bins can also simplify both the packing and inventory process. These pro tips turn your inventory from a passive list into an active, dynamic tool that makes for a seamless move.
Putting Your Inventory to Work on Moving Day
The big day is finally here, and all that meticulous planning is about to pay off. On moving day, your inventory list transforms from a simple planning document into your most active and essential tool. Think of it as your command center for the entire loading and unloading process.
Keep your master inventory sheet—whether it’s on a clipboard or your tablet—with you at all times. As the movers carry each numbered box or piece of furniture out of your home, check it off the list. This isn't just for your own peace of mind; it’s a systematic way to guarantee nothing gets left behind in a forgotten closet or tucked away in a corner.
A Two-Way Verification Process
Your list is really a two-way verification system. You’ll use it once when loading the truck and again, just as critically, when unloading at your new place. It’s your absolute best defense against lost or misplaced items.
As items come off the truck, do the same check-off process in reverse. This simple action will immediately flag any problems. If box #42 is on your list but hasn't shown up, you'll know right away to ask the moving crew before they even think about leaving.
I always make a point to jot down any significant scratches, gouges, or dings on furniture before it's loaded. When it arrives, I can quickly compare its condition against my notes, which provides clear evidence if any damage happened in transit.
This system is your primary tool for accountability and is absolutely essential if you end up needing to file an insurance claim.
Your Roadmap for Unpacking
Once everything is safely inside your new home, your inventory’s job still isn’t done. Now, it becomes your strategic guide to unpacking. Instead of staring at a daunting wall of identical brown boxes, you can consult your list to decide what to open first.
Your color-coding system and priority labels will lead you straight to the "First Night Box," packed with essentials like toiletries, medications, and phone chargers. From there, you can direct the kitchen boxes to the kitchen and the bedroom boxes upstairs, turning a mountain of cardboard into a manageable, organized task. For a deeper look at this, an ultimate moving out apartment checklist is a fantastic resource for ensuring a smooth transition.
An organized approach like this helps you settle in faster and with way less stress. To make the truck loading even smoother, our guide on the best way to pack a moving truck has practical tips that work perfectly with your new inventory list.
Common Questions About Moving Inventories
Even with the best moving inventory template in hand, a few questions always seem to pop up. It's totally normal. Getting clear, straightforward answers can clear up any last-minute doubts and help you jump into packing with confidence.
Let's tackle the most frequent questions people have when putting together their moving inventory.
How Detailed Should My Moving Inventory Be?
This is a great question, and the answer really comes down to an item's value. You're looking for that sweet spot between being super thorough for the important stuff and staying efficient for everything else.
For your high-value electronics, precious antiques, or sentimental pieces, get as specific as you can. I'm talking make, model, and serial number. Always, and I mean always, snap a quick photo of its condition before you wrap it up. This level of detail is your best friend if you ever need to file an insurance claim.
Now, for general household items like books, dishes, or clothes, it’s perfectly fine to group them. An entry like "Box of 20 hardcover novels" or "Kitchen plates and bowls" gets the job done. The goal is to create a list that’s actually useful, not one that’s overwhelming to manage.
The rule of thumb is simple: If it would be expensive or heartbreaking to replace, give it a detailed entry. If it's easily replaceable, a general description is all you need.
Should I Share the Inventory List with My Movers?
Absolutely. In fact, it’s one of the smartest things you can do. Handing your movers a copy of your inventory lets them give you a much more accurate quote because they know exactly what they’re working with. No surprises for them, no surprise charges for you.
More importantly, it becomes a shared checklist that keeps everyone on the same page on moving day. This simple step dramatically cuts down the risk of things getting left behind or misplaced. Honestly, professional movers love to see an organized list—it tells them you’re a well-prepared client, which helps the entire day run smoother for everyone involved.
What Is the Best Way to Manage My Inventory Digitally?
For most people, a cloud-based spreadsheet like Google Sheets is a fantastic, and free, option. It means you can access and update your list from your phone while you're packing or from your computer at night. Plus, you can easily share it with your partner or send a link to the moving company.
If you want something a bit more specialized, moving apps are another great way to go. They often come with handy features that make the process even easier, like:
- Barcode or QR code scanning for your boxes
- Simple photo integration for those valuable items
- Pre-built templates designed specifically for relocations
When Is the Best Time to Start My Moving Inventory?
You’ll want to start this as you begin decluttering and packing, which for most people is about 4-6 weeks before the move. Whatever you do, don't try to cram it all into one weekend.
The trick is to start in the rooms you use the least, like a guest room, the basement, or a storage closet. By documenting items as you pack them, you ensure your list is accurate and save yourself the massive headache of trying to remember what’s inside each box later on. Tackling it room by room makes the whole task feel much more manageable.
Ready to store a few of those boxes instead of moving them all at once? Endless Storage offers a hassle-free, by-the-box storage solution, delivering everything you need right to your door. Learn more about our simple, secure storage options.
Frequently Asked Questions
Unveiling the Secrets to Effortless Storage
Endless Storage is available nationwide. You pick a plan, tell us where to pickup, and we'll send a UPS van to collect, whichever state you're in.
Your shipping label will be sent to your email within a few minutes, if not instantaneously. It can also be accessed through your customer profile.
Your box will be shipped to one of our climate controlled self storage facilities in our closest self storage facility. Our manager will accept your package, notify you that your box has been received, and securely stored. Only our managers will have access to Endless Storage boxes.
Email us at admin@endless-storage.com click to live chat with us, or send us a message below.
Never! We're committed to transparent pricing with no surprises. You'll lock in your rate with no hidden fees and no long-term contracts.
Fast access guaranteed! Your boxes will arrive at your doorstep within 48 hours of requesting them back. Need to check on delivery? We provide tracking information for complete peace of mind.
Totally flexible! Store month-to-month with no long-term commitment and cancel anytime.
Everything's online! Use your account dashboard to:
• Set up automatic monthly payments
• Request box returns
• Update your address
• Order additional boxes
• Track shipments
Your boxes are insured up to $100 each. Our customer service team will help you file any necessary claims and resolve issues quickly.
Don't worry – we'll email you right away if there's a payment issue. Your items stay safe, though you may have temporary service interruption or late fees until payment is resolved.
When you request our free storage kits, you'll have 30 days to send in your boxes to activate your 3 months of free storage. Think of it like starting a gym membership – your activation window begins when you receive your kits, and your full free trial begins once you send in your first box. During your free months, you'll experience our complete storage service at no cost.
Your 30-day activation window begins when you receive your storage kits. We'll send you an email confirmation when your kits are delivered, marking the start of your activation period.
If you haven't sent any boxes for storage within your 30-day activation window, your free trial will expire and we'll begin charging the regular monthly rate of $9.99 per box. This helps ensure our storage kits go to customers who are ready to use our service.
A box costs $9.99 per month to store (plus sales tax). This price includes free shipping for standard boxes under 50 lbs. and smaller than 16"x16"x16"
Log into your Endless Storage account, locate the box you would like returned, and simply click Return My Box.
Yes, each box stored with us is insured for up to $100 throughout transit as well as the duration of storage within our facilities.
Your box will be at your doorstep within 48 hours of you requesting it back.
Store 10+ boxes? We'll pick them up for free! After your purchase, we'll contact you to schedule a convenient pickup time and arrange UPS collection.
We trust UPS with all shipments, and every box includes $100 insurance coverage. You'll receive tracking information to monitor your items' journey.
Yes! Visit any of our locations by appointment. Just bring a photo ID matching your customer profile.
For everyone's safety, we can't store hazardous materials, firearms, or perishables. All items must fit within our standard boxes.
It's easy! Order your storage kit online, and we'll ship it to you within 1-2 business days. Your shipping labels will be emailed instantly and available in your account.
We're here to help! Email us at admin@endless-storage.com, use our live chat, or send us a message through your account.
To cancel your storage service with Endless Storage, please email your cancellation request to admin@endless-storage.com. Our team will process your request within 2 business days and confirm your cancellation via email.
We understand packing takes time. However, to maintain your free trial benefits, you'll need to send at least one box within the 30-day activation window. If you need more time, you can always start with one box to activate your trial and send the rest later. You can always reach out to admin@endless-storage.com if you have any issues or concerns.
When you request our free storage kits, you're starting a 30-day window to begin using our storage service.
Important: To activate your free trial, send at least one box for storage within 30 days. If no boxes are sent within this 30-day window, a one-time $50 fee applies to cover materials and shipping costs. This fee is clearly disclosed before you sign up.
Think of it like reserving a hotel room – we're setting aside space and sending specialized packing materials for your use. The fee only applies if you request materials but don't begin storage, similar to a hotel's no-show charge.