
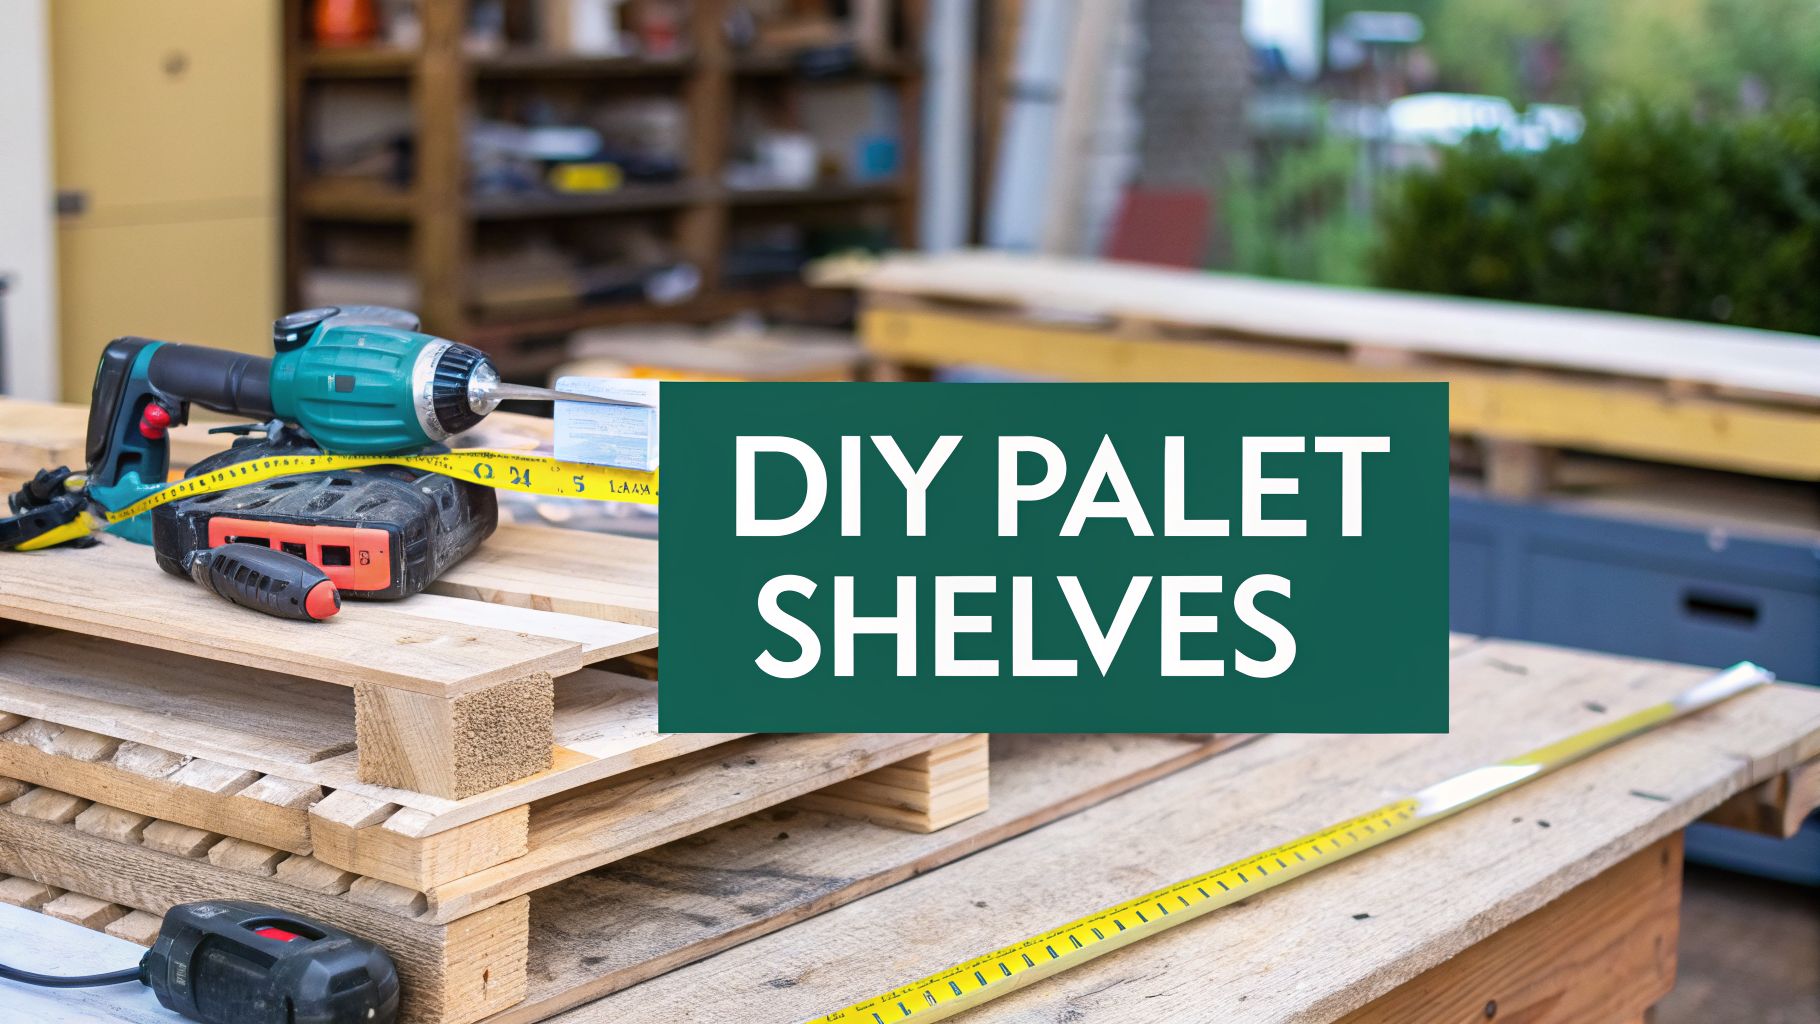
Thinking about turning a simple pallet into a functional, stylish piece for your home? A pallet shelving DIY project is a fantastic way to get custom storage that’s practical, good-looking, and won't break the bank. Let's walk through how you can transform a humble pallet into a genuinely useful piece of organization.
Why Build Your Own Pallet Shelving

Taking on a pallet shelving project is about so much more than just making furniture—it’s about creating something that is completely, uniquely yours. For most people, the biggest draw is the cost. Professional storage can get expensive fast, but reclaimed pallets are often free or very cheap. This makes it a great project for just about any budget.
But it’s not just about saving money. There's a real satisfaction that comes from building something with your own two hands. You're in complete control of the design, from the exact size to the final stain, making sure it fits your space and your style perfectly. That’s a level of personalization you just can’t find with store-bought furniture.
Tailoring Storage to Your Space
One of the best parts of any DIY project is how adaptable it is. Whether you're in a tiny apartment or just trying to figure out what to do with an awkward corner, you can design pallet shelves that fit your needs to a T.
A few of the main perks are:
- Total Customization: You get to decide the height, depth, and width to fit any wall or nook. If you need a skinny shelf for paperbacks or a deep one for storage bins, you can build it.
- Your Personal Style: Stain it dark for a rustic look, paint it white for a clean, modern feel, or just sand it down and leave it raw for an industrial vibe. The look is entirely up to you.
- Versatile Function: You can make a floating bookshelf, a freestanding media console, or even a bar cart on wheels. The final piece is dictated by what you need it to do.
There’s nothing quite like the feeling of turning a discarded pallet into a beautiful and functional shelf. It’s not just about the money you save; it's about adding real value and personality to your living space, from the ground up.
The commercial pallet racking market, which is projected to be worth USD 12.88 billion in 2025, shows how much demand there is for heavy-duty storage. This industrial trend also highlights a gap for homeowners: affordable, sturdy shelving is hard to find. In fact, over 40% of urban households say they don’t have enough storage. This is where DIY pallet shelving comes in, empowering people to create effective, low-cost solutions at home.
If you’re hunting for more creative projects, you might like our other DIY ideas for storage. This approach takes inspiration from professional systems but scales it down for home use, making it perfect for organizing seasonal items or managing your belongings during a move.
Sourcing and Preparing Your Pallets Safely
Your whole pallet shelving DIY project hinges on one thing: choosing the right pallet. Before you even touch a saw, your first mission is to find wood that’s not just strong, but completely safe to bring into your home. This definitely isn’t the time to just snag the first pallet you spot behind a big-box store.
So, where do you find the good ones? It takes a little bit of legwork. I’ve had the best luck at smaller, local businesses like garden centers, pet supply stores, and hardware shops. They often get shipments on clean, single-use pallets and are happy to let you take them off their hands. The golden rule is to always ask for permission first—never just assume they’re free for the taking.
Identifying Safe and Unsafe Pallets
Once you've got a potential pallet in your sights, it's time to play detective. The most important clue is the IPPC (International Plant Protection Convention) stamp. This little symbol, usually burned or stamped onto the side, tells you everything you need to know about how the wood was treated.
Here’s a quick-reference guide to what those markings mean and whether they get the green light for your project.
Pallet Safety Markings Explained
| Marking | Meaning | Safe for DIY? |
|---|---|---|
| HT | Heat Treated | Yes. The wood was heated to 56°C for 30 minutes to kill pests. No chemicals involved. |
| MB | Methyl Bromide | No. This pallet was fumigated with a toxic chemical. Avoid it at all costs. |
| No Stamp | Unknown | No. It's a total mystery. You have no idea of its origin or treatment, so it's best to pass. |
Beyond the official stamps, just use your common sense. Does the wood have weird stains, oily patches, or discolored areas? It could have been used to haul chemicals or other hazardous stuff. Give it a sniff, too. If it has any kind of funky chemical smell, leave it where you found it.
Preparing Your Pallet for Building
You found a winner—a clean, HT-stamped pallet. Great! Now comes the prep work. Even the best-looking pallet has been on quite a journey, and it needs a deep clean before it can become furniture.
Start with a good old-fashioned scrub down. A stiff brush, some soap, and water will do the trick. If it's really grimy, a pressure washer is your best friend here, as it will blast away any caked-on dirt. Once it’s clean, let it sit out in the sun for a day or two to dry completely. This is crucial for preventing mold and stopping the wood from warping later.
Pro-Tip: After the initial scrub, I always disinfect with a simple solution of one part white vinegar to one part water. This helps neutralize any lingering bacteria and odors without using harsh chemicals on the wood you’ll be bringing indoors.
It's amazing to think that pallet systems are the very backbone of global logistics, with the whole market expected to hit US$ 62.3 billion in 2024. For us DIY folks, that massive supply chain means an incredible source of cheap, versatile material. A single pallet can easily create 20-30 cubic feet of shelving space—a total game-changer if you’re trying to find storage in a small apartment. You can see the sheer scale for yourself by checking out the latest pallet market report.
Finally, it's time to break it down. You’ll want to carefully dismantle the pallet to get your planks. A pry bar and a bit of muscle work, but a specialized pallet buster tool can make the job much easier and help you avoid splitting the boards. Take your time with this step; you want to preserve the wood you’ll be using for your shelves. Once you're done, you will also want to organize your garage with the extra tools, so you might find our hands-on guide to transforming your space helpful.
How to Build Your Pallet Shelves
Alright, you've got your stack of clean, dismantled pallet boards ready to go. This is the fun part of any pallet shelving DIY project—where sawdust flies and your vision starts coming to life. Whether you’re dreaming up some sleek floating shelves or a beefy freestanding bookcase, the basics of measuring, cutting, and assembling are pretty much the same.
Before you even think about picking up a saw, lay out your best planks and give them a job. The thicker, tougher stringer boards? They’re perfect for the main frame or the vertical supports on a freestanding unit. The thinner deck boards make fantastic shelf surfaces. Taking a minute to plan this out ensures you're playing to the wood's strengths.
Measuring and Cutting Your Wood
Getting your measurements right at this stage will save you a world of frustration later. Start by measuring the spot where your shelves will live, then finalize the dimensions of your unit. For a freestanding bookshelf, this means locking in the overall height and width, plus how deep you want the shelves. For floating shelves, just decide on the length and depth you're going for.
Grab a tape measure and a speed square to mark your cut lines with a pencil. A speed square is a lifesaver for making sure your lines are perfectly square, which is the secret to shelves that don’t wobble.
When you're ready to make the cuts:
- For Straight Cuts: A circular saw is your best friend here. It’ll give you quick, clean cuts every time. Just be sure to clamp your board down securely to a workbench first.
- For Notches or Curves: If your design is a bit more complex—say, you need to cut a notch to fit around a pipe—a jigsaw gives you the flexibility to handle those intricate shapes.
And don't forget the old woodworker's mantra: measure twice, cut once. Seriously. A simple mistake here can send you back to square one, so double-check everything before you fire up the saw.
This quick visual guide sums up the prep work you should have already completed to get your pallet wood ready for this stage.

It all starts with finding the right pallet, giving it a good clean, and carefully dismantling it. Once that's done, you're ready to build.
Assembling the Frame and Shelves
Now, let's put it all together. How you assemble everything will depend on your design, but the end goal is always a strong, stable piece of furniture.
If you're building a freestanding bookcase, start with the outer frame, or the "skeleton." I can't recommend a pocket hole jig (like a Kreg jig) enough for this. This handy tool lets you drill angled holes so you can join boards with screws that are totally hidden from sight. It gives your project a clean, professional look with no screw heads showing.
My go-to pro-tip for assembly is to use scrap wood as spacers. When you’re adding the shelves inside your bookcase frame, cut a couple of wood blocks to the exact height you want between each shelf. Just rest the shelf on top of your spacers while you screw it in—it's a foolproof way to get perfectly level and evenly spaced shelves, every single time.
With the main frame solid, you can install your shelves. Again, pocket holes are great here, but you can also just drive screws through the outside of the frame straight into the ends of each shelf board. For some serious staying power, run a bead of wood glue along the edge of the board before you screw it in. That glue joint will often end up being stronger than the wood itself.
For simpler wall-mounted shelves, the process is much more direct. If you're looking for more inspiration in this area, take a look at our guide on other DIY floating shelf ideas you can tackle. You'll just need to attach your mounting brackets to the wall first—make sure you hit the wall studs for solid support. Then, place your pallet board on top and secure it to the brackets from below. It's a quick and stylish method for a fast pallet shelving DIY win.
Custom Finishes to Match Your Style
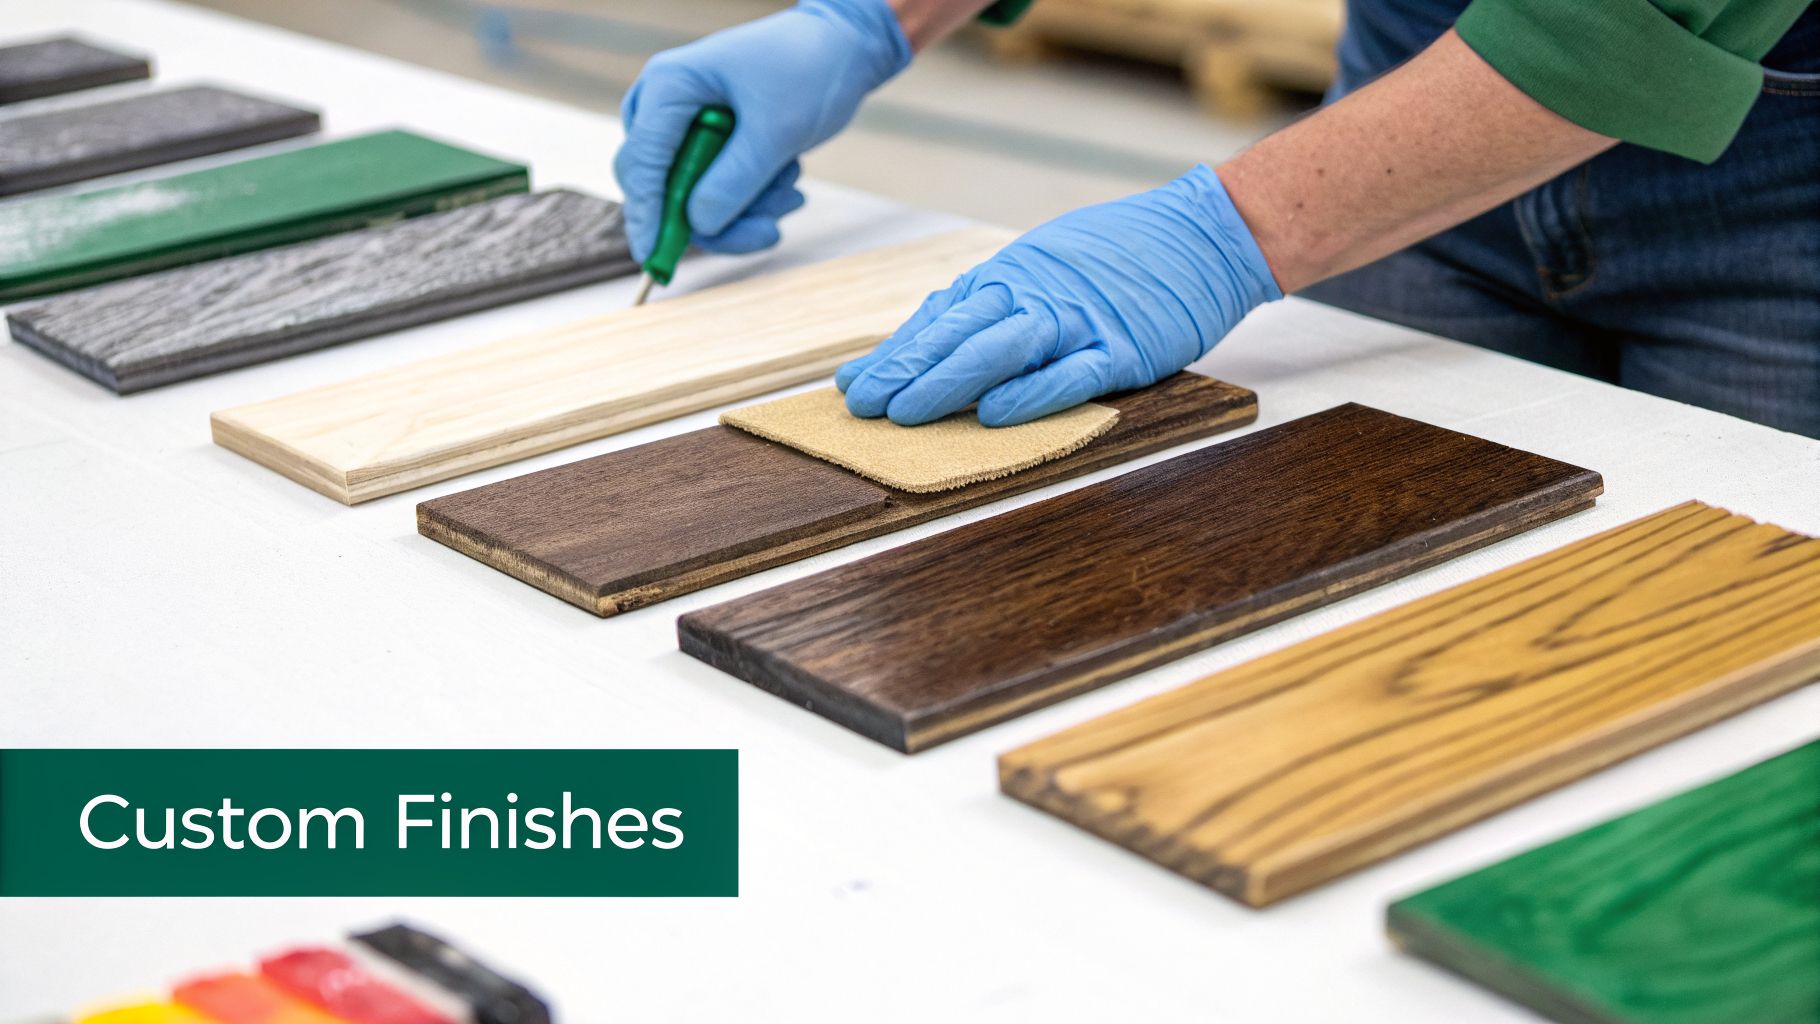
With your pallet shelving fully assembled, you’ve shifted from construction to creation. This is the fun part—where you get to add your personality and transform raw wood into something that feels right at home. The finish you choose isn't just about protection; it's what gives your project its final character.
But first, you have to sand. Don't even think about skipping this step. Pallet wood is notoriously rough, and you need a smooth, splinter-free surface for safety and a high-quality finish. I always start with a coarse 80-grit paper to knock down the rough spots, then work my way up to a 120-grit and finally a 220-grit for a surface that’s smooth to the touch. A power sander will be your best friend here.
Choosing Your Perfect Finish
Once it’s sanded, your shelf is a blank canvas. Think about the look you're going for. Do you want to celebrate the wood's rustic history, or do you need a clean, solid color to match your decor?
- Wood Stain: Perfect for bringing out the natural grain and knots in the wood. Stains come in a massive range of colors, from light, airy oaks to rich, dark espressos.
- Paint: This is your go-to for a modern, bold, or colorful look. Paint covers the wood grain entirely, giving you a solid, uniform finish and endless color options. For a result that lasts, it helps to research the best paint for interior wood before you start.
- Clear Coat: If you just love the natural, raw look of the sanded wood, a few coats of polyurethane or lacquer will do the trick. It protects the shelf from moisture and dings without altering the color.
It's no surprise that DIY projects like this have taken off. When professional shelving installations can easily run over $5,000, the appeal of a pallet that costs less than $20 is undeniable. That’s a savings of over 90%, making it an incredibly cost-effective way to get sturdy, stylish organization.
Creative Customizations to Make It Yours
Now, let's get creative. This is where your pallet shelving project becomes truly unique. Think beyond the basic structure and consider little touches that add both function and flair.
I love adding unexpected elements to my projects. On one shelf, I installed industrial black pipe fittings as brackets for an urban loft vibe. For another, I added casters to the base of a low-slung unit, turning it into a mobile bar cart that's perfect for entertaining.
You could also install LED strip lighting under the shelves to highlight your favorite items or use decorative metal brackets for a more elegant feel. These small additions can elevate a simple shelf into a standout piece of furniture. For even more ways to blend style with storage, check out our guide on apartment organization ideas.
Beyond DIY: When You Need a Different Storage Solution
Building your own pallet shelving is a fantastic project, and there's nothing quite like the satisfaction of creating stylish, functional storage with your own hands. It’s perfect for showing off your favorite books, plants, and decor.
But as you start putting things away, you'll probably have a moment of hesitation. What about the stuff that shouldn't be out in the open? The truth is, open, rustic shelving isn't the right home for everything.
Some of your most important belongings need more than just a spot on a shelf; they need protection from dust, humidity, pests, and big swings in temperature. That’s where pallet shelves, by their very design, fall short.
Recognizing the Limits of Open Shelving
Your new shelves are a great solution for quick access and display, but they just can't protect certain items. It’s important to be honest about what should and shouldn't live on them to keep your valuables safe.
Think about things that are vulnerable to damage over time:
- Irreplaceable Keepsakes: Old family photos can fade in the sunlight, and sentimental heirlooms can be damaged by dust and moisture in the air.
- Delicate Textiles: That favorite wool sweater, silk dress, or even your spare bedding can become a snack for moths or suffer damage from the environment.
- Important Paperwork: Financial records, birth certificates, and other critical documents need a secure, climate-controlled, and preferably fire-resistant home to prevent them from degrading.
- Sensitive Electronics: Things like cameras, old laptops, and other gadgets don't do well with the dust and temperature changes that come with open-air storage.
This is where you can create a truly complete organization system. By pairing your creative DIY pallet shelves with a specialized storage solution for your most valuable possessions, you get the best of both worlds—style and security.
When to Call in a Professional Solution
So what do you do with those sensitive items? This is where a service like Endless Storage can be a game-changer for your home organization. Instead of trying to find a safe corner in a closet, you can have your delicate and valuable items stored in a secure, climate-controlled facility.
It's a smart strategy to get that clean, clutter-free look you want without putting your most important belongings at risk. For a closer look at modern storage solutions, check out our guide on finding an alternative to a traditional storage unit.
If your storage needs have grown beyond what a DIY project can handle, or if you just need temporary space during a move or renovation, exploring professional self-storage options is a practical next step. This hybrid approach—combining your DIY flair with professional peace of mind—ensures every item you own has the perfect place to call home.
Your Questions About Pallet Shelving Answered
Alright, so you're ready to tackle a pallet shelving DIY project. That's fantastic. But I'm willing to bet a few questions are buzzing around your head, especially about safety and getting a sturdy result. That’s a good thing—it means you’re thinking like a builder.
Let's walk through some of the most common things people wonder about before they start. Getting these answers straight will help you steer clear of common mistakes and make sure your project is a total success.
How Can I Be Sure A Pallet Is Safe To Use Indoors?
This is easily the most important question to ask. The good news is, the answer is usually stamped right on the pallet itself. You'll want to scan the wood blocks for an IPPC (International Plant Protection Convention) logo.
Look for the letters "HT," which means the pallet was Heat Treated. This is the gold standard. It certifies the wood was baked to kill off any pests, making it totally chemical-free and safe to bring inside your home.
On the other hand, if you spot the letters "MB" (for Methyl Bromide), that pallet is a hard pass. It was treated with a toxic fumigant you definitely don't want anywhere near you, your family, or your pets. Just leave it.
Beyond the stamp, just use your common sense. Does the pallet have weird stains, feel oily, or give off a chemical smell? It might have been used to ship something hazardous. When in doubt, it’s always better to find a cleaner, safer pallet.
How Much Weight Can DIY Pallet Shelves Actually Hold?
The real answer is: it depends. The final strength comes down to the pallet's original build, how you design your shelves, and how well you put them together. The wood itself is incredibly tough—a standard shipping pallet is designed to hold over 2,000 pounds.
For a simple wall-mounted shelf using the pallet's deck boards, you can realistically expect it to hold between 30-50 pounds. The key is making sure it's anchored securely into wall studs, not just drywall.
A freestanding shelving unit is a whole different beast. If you build it right—using the pallet's chunky stringer boards as the frame and securing every joint with both wood glue and screws—it can easily support several hundred pounds. It's always a good idea to test your finished shelves with some weight before fully loading them up.
What Are The Most Essential Tools For A Beginner?
You don't need a pro-level workshop to make this happen. You can get the whole job done with just a few basic tools.
Here’s what I'd consider the bare minimum to get started:
- Safety Gear: This is non-negotiable. Get yourself some safety glasses, a good pair of heavy-duty gloves, and a dust mask.
- Dismantling Tools: A pry bar and a hammer will get the job done, but a pallet buster tool is a game-changer. It makes taking the pallet apart much quicker and helps you salvage more of the wood without splitting it.
- Cutting & Assembly: A power drill and a saw are must-haves. A circular saw is perfect for making straight cuts, and a jigsaw will give you the freedom to create more custom shapes.
Once you get a project or two under your belt, you might want to add a power sander for a smoother finish or a pocket hole jig to create strong, hidden joints. These tools can really elevate the final look of your pieces.
Feeling inspired to organize but not ready for a full DIY project? Endless Storage offers a simple, secure alternative. We provide the boxes, pick them up, and store your items in a climate-controlled facility, all starting at just $7.99 per box. Get clutter-free living without the sawdust by visiting Endless Storage.
Frequently Asked Questions
Unveiling the Secrets to Effortless Storage
Endless Storage is available nationwide. You pick a plan, tell us where to pickup, and we'll send a UPS van to collect, whichever state you're in.
Your shipping label will be sent to your email within a few minutes, if not instantaneously. It can also be accessed through your customer profile.
Your box will be shipped to one of our climate controlled self storage facilities in our closest self storage facility. Our manager will accept your package, notify you that your box has been received, and securely stored. Only our managers will have access to Endless Storage boxes.
Email us at admin@endless-storage.com click to live chat with us, or send us a message below.
Never! We're committed to transparent pricing with no surprises. You'll lock in your rate with no hidden fees and no long-term contracts.
Fast access guaranteed! Your boxes will arrive at your doorstep within 48 hours of requesting them back. Need to check on delivery? We provide tracking information for complete peace of mind.
Totally flexible! Store month-to-month with no long-term commitment and cancel anytime.
Everything's online! Use your account dashboard to:
• Set up automatic monthly payments
• Request box returns
• Update your address
• Order additional boxes
• Track shipments
Your boxes are insured up to $100 each. Our customer service team will help you file any necessary claims and resolve issues quickly.
Don't worry – we'll email you right away if there's a payment issue. Your items stay safe, though you may have temporary service interruption or late fees until payment is resolved.
When you request our free storage kits, you'll have 30 days to send in your boxes to activate your 3 months of free storage. Think of it like starting a gym membership – your activation window begins when you receive your kits, and your full free trial begins once you send in your first box. During your free months, you'll experience our complete storage service at no cost.
Your 30-day activation window begins when you receive your storage kits. We'll send you an email confirmation when your kits are delivered, marking the start of your activation period.
If you haven't sent any boxes for storage within your 30-day activation window, your free trial will expire and we'll begin charging the regular monthly rate of $9.99 per box. This helps ensure our storage kits go to customers who are ready to use our service.
A box costs $9.99 per month to store (plus sales tax). This price includes free shipping for standard boxes under 50 lbs. and smaller than 16"x16"x16"
Log into your Endless Storage account, locate the box you would like returned, and simply click Return My Box.
Yes, each box stored with us is insured for up to $100 throughout transit as well as the duration of storage within our facilities.
Your box will be at your doorstep within 48 hours of you requesting it back.
Store 10+ boxes? We'll pick them up for free! After your purchase, we'll contact you to schedule a convenient pickup time and arrange UPS collection.
We trust UPS with all shipments, and every box includes $100 insurance coverage. You'll receive tracking information to monitor your items' journey.
Yes! Visit any of our locations by appointment. Just bring a photo ID matching your customer profile.
For everyone's safety, we can't store hazardous materials, firearms, or perishables. All items must fit within our standard boxes.
It's easy! Order your storage kit online, and we'll ship it to you within 1-2 business days. Your shipping labels will be emailed instantly and available in your account.
We're here to help! Email us at admin@endless-storage.com, use our live chat, or send us a message through your account.
To cancel your storage service with Endless Storage, please email your cancellation request to admin@endless-storage.com. Our team will process your request within 2 business days and confirm your cancellation via email.
We understand packing takes time. However, to maintain your free trial benefits, you'll need to send at least one box within the 30-day activation window. If you need more time, you can always start with one box to activate your trial and send the rest later. You can always reach out to admin@endless-storage.com if you have any issues or concerns.
When you request our free storage kits, you're starting a 30-day window to begin using our storage service.
Important: To activate your free trial, send at least one box for storage within 30 days. If no boxes are sent within this 30-day window, a one-time $50 fee applies to cover materials and shipping costs. This fee is clearly disclosed before you sign up.
Think of it like reserving a hotel room – we're setting aside space and sending specialized packing materials for your use. The fee only applies if you request materials but don't begin storage, similar to a hotel's no-show charge.