
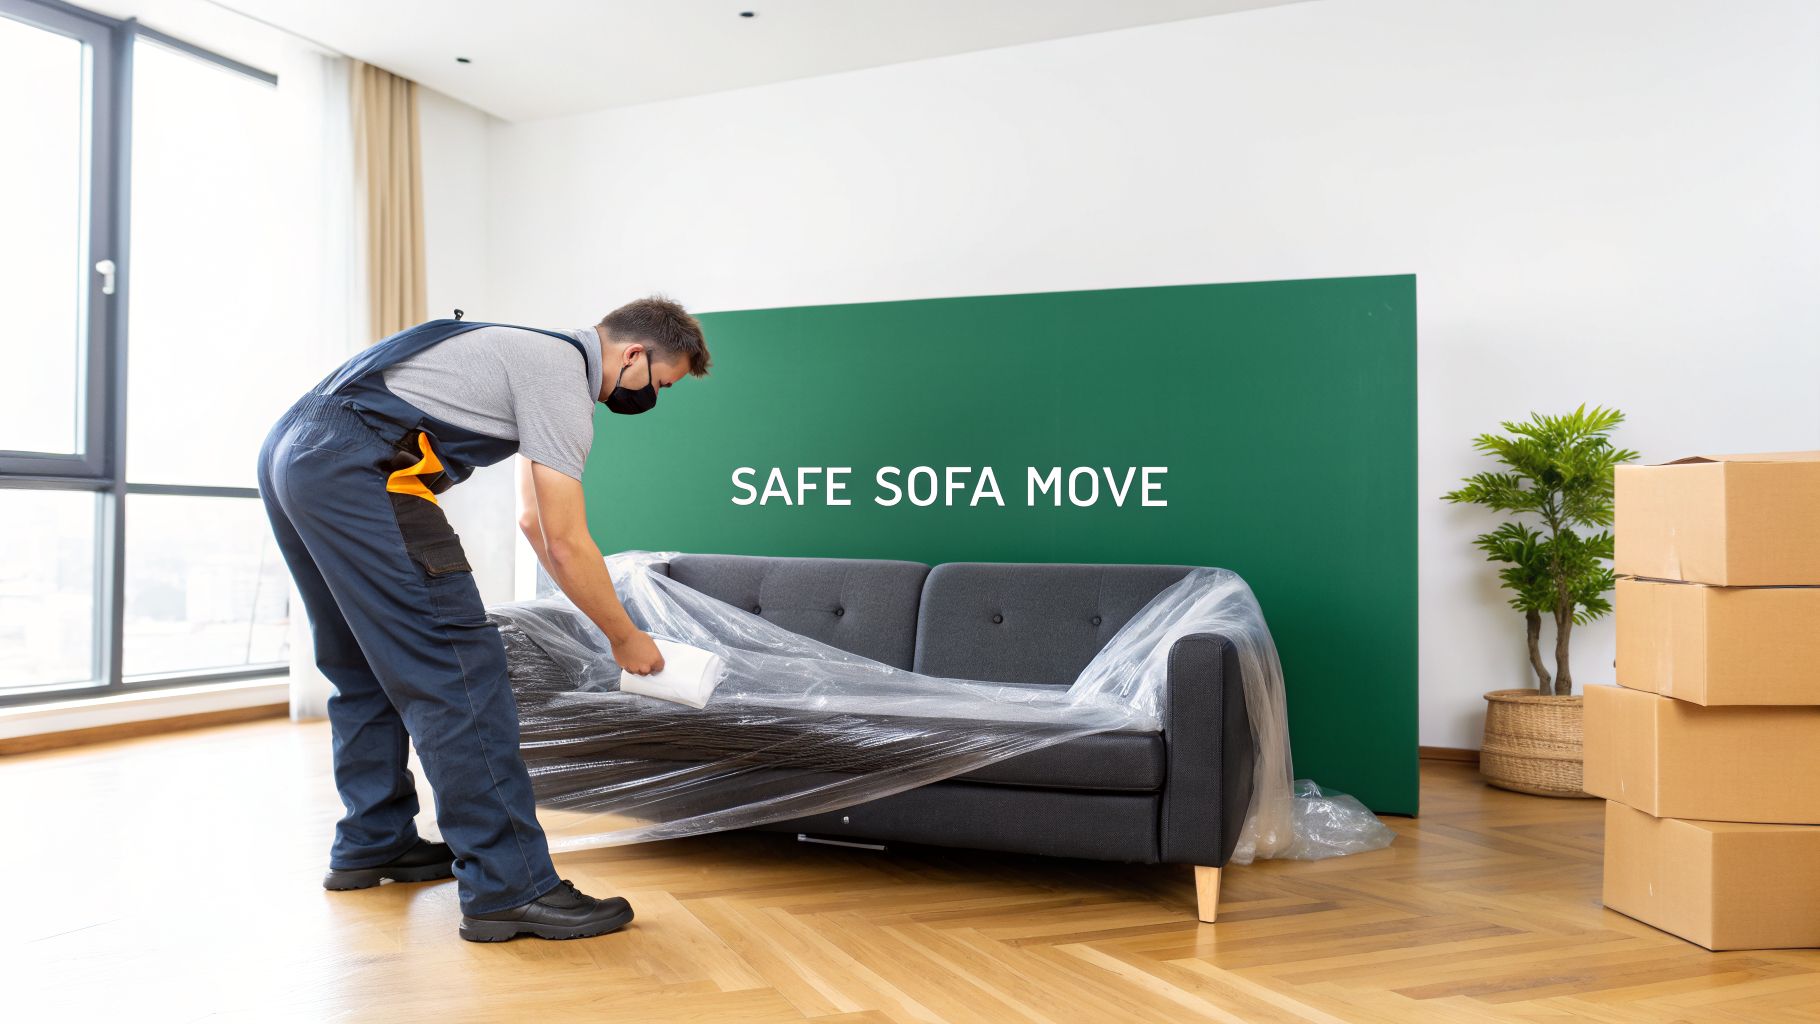
Let's be honest—moving a sofa is one of the most dreaded parts of any move. It’s bulky, awkward, and somehow always manages to get stuck in a doorway or stairwell. One wrong pivot, and you're staring at a new tear in the upholstery or a nasty scuff on the wall.
The best way to avoid that headache is to wrap your sofa like a pro. This means more than just tossing a dusty blanket over it. The proper method involves disassembling what you can, padding every inch with moving blankets, and then shrink-wrapping the entire thing into a tight, protective cocoon. This technique is what the experts use, and it's your best defense against rips, stains, and structural damage.
Your Essential Guide to a Damage-Free Sofa Move
Navigating a sofa through a home, especially a tight city apartment, can feel like a high-stakes puzzle. We've all been there, trying to squeeze a couch around a corner that seems physically impossible. This guide is here to cut through that stress by giving you a systematic, no-fail approach.
Think of this as your roadmap. We’ll cover everything you need to know, from gathering the right supplies to the final lift into the truck. Proper wrapping isn’t just for looks; it's the single most important step in protecting your investment.
Why a Proper Wrap Is Non-Negotiable
A simple sheet or blanket just won't stay put when your sofa is being tilted, turned, and jostled. A secure, multi-layer wrap does so much more than just cover the fabric.
- Structural Support: It locks the frame, arms, and back together, taking stress off the joints as the sofa is lifted and maneuvered.
- Surface Protection: It forms a barrier against dirt, moisture, and snags from sharp corners on other furniture inside the moving truck.
- Easier Handling: A tightly wrapped sofa is a solid, compact unit. There are no loose cushions or dangling legs, giving movers a much better grip and minimizing the risk of a drop.
The stakes are higher than you might think. Moving industry reports show that sofas are involved in nearly 25% of all furniture damage claims. Most of that damage—tears, scratches, and frame breaks—comes from simply not protecting it correctly. Digging into the sofa market data reveals just how common these preventable issues are.
A professionally wrapped sofa isn't just covered; it's armored for the move. In fact, data shows that using the right techniques can slash the risk of damage by as much as 70%, potentially saving you $500 or more in repair or replacement costs.
The Proven Method at a Glance
So, how do you get that professional-level protection? It all comes down to a three-part process that we'll break down step-by-step.
- Preparation: This is where you set yourself up for success. It starts with a quick clean of the sofa and gathering the right materials. If you skip this, you risk trapping grit under the wrap, which can scratch the fabric during transit.
- Wrapping: This is the core of the process. It’s all about strategic layering—first with soft moving blankets for padding, then with plastic stretch wrap to create a tough, tear-resistant outer shell.
- Handling: Even a perfectly wrapped sofa needs to be moved with care. We’ll touch on safe lifting techniques and using tools like furniture dollies to get it out of your home without injury or damage.
By following this proven method, you can have total confidence that your sofa is ready for the journey, whether it's going across town to a new home or into a secure facility with a service like Endless Storage.
Gathering Supplies and Preparing Your Sofa
Before you even think about wrapping your sofa, the real work begins with prep. A successful, damage-free move starts here. You wouldn't paint a dirty wall, right? The same idea applies to your sofa—getting it perfectly clean is the absolute first step.
Any lingering crumbs, pet hair, or dust can act like sandpaper when they're trapped under moving blankets. The vibrations from the truck can grind that debris right into the fabric, causing scuffs, pilling, or even permanent discoloration. Take a few minutes to vacuum the entire sofa, especially in the crevices and under the cushions.
Once it's clean and totally dry, it's time to gather your materials. Having everything you need on hand from the start makes wrapping the sofa a much smoother process.
Your Essential Supply Checklist
Not all supplies are up to the task. A thin bed blanket or cheap plastic wrap can lead to a moving day disaster. Here’s what you actually need to protect your sofa like a pro:
- Breathable Moving Blankets: These are the thick, padded quilts movers use, not your average throw blanket. They absorb impacts and prevent scuffs. Make sure you have enough to cover every inch of fabric, with a little extra for double-wrapping the corners.
- Plastic Stretch Wrap: This is the key to holding everything snugly in place. When getting your supplies, think about using durable packaging materials like specialized hand stretch film. An 80-gauge thickness is a good sweet spot—it’s strong enough to resist tears but not too difficult to work with.
- Packing Tape: You’ll need this to secure the loose ends of the stretch wrap and to attach labels. Never let packing tape touch the sofa's fabric directly. It can pull away the fibers or leave behind a sticky residue that’s a nightmare to remove.
- Furniture Sliders: These little discs are a lifesaver for your floors. Pop them under the sofa's feet before you move it, and you can glide it across the room without leaving deep, expensive scratches.
Preparation is crucial, especially for city moves. Shockingly, 35% of residential moves report damage to sofas, usually because of bad wrapping. Just using furniture sliders can reduce floor scratches by an incredible 90%.
Prepare the Sofa and Your Space
With your supplies ready, it's time for the final prep work. First, take everything off the sofa. That means all the seat and back cushions, decorative pillows, and any throws. It's far easier to wrap these items on their own, and it keeps them from getting squished or dirty. This also makes the main sofa frame much lighter and less awkward to handle.
Next up, if your sofa has removable legs, take them off. Most just screw off by hand or with a basic wrench. This simple step dramatically lowers the odds of a leg catching on a door frame or snapping off on the stairs. Put the legs and any hardware into a small plastic bag, label it, and tape it securely to the wrapped sofa frame later so nothing gets lost.
Finally, clear your exit route. Measure your doorways, hallways, and any tight corners to make sure the sofa will actually fit through. Move tables, lamps, and any other obstacles out of the way now. This prep work prevents that frantic, mid-move scramble when you’re stuck in a hallway holding a heavy sofa. For a complete list of materials for your entire move, take a look at our guide on the best packing supplies for moving.
The Professional Wrapping Technique for Full Protection
Alright, your sofa is clean and you’ve got your supplies. Now it’s time to wrap it like the pros do. This is about more than just tossing a blanket over your couch; we’re creating a protective shell that can handle the bumps and scrapes of moving day.
A proper wrap does two things: it pads the sofa against impacts and compresses it into a single, solid block. When done right, this can actually shrink the sofa's volume by as much as 30%, making it much easier to maneuver through tight spaces.
This quick visual guide sums up the prep work perfectly.
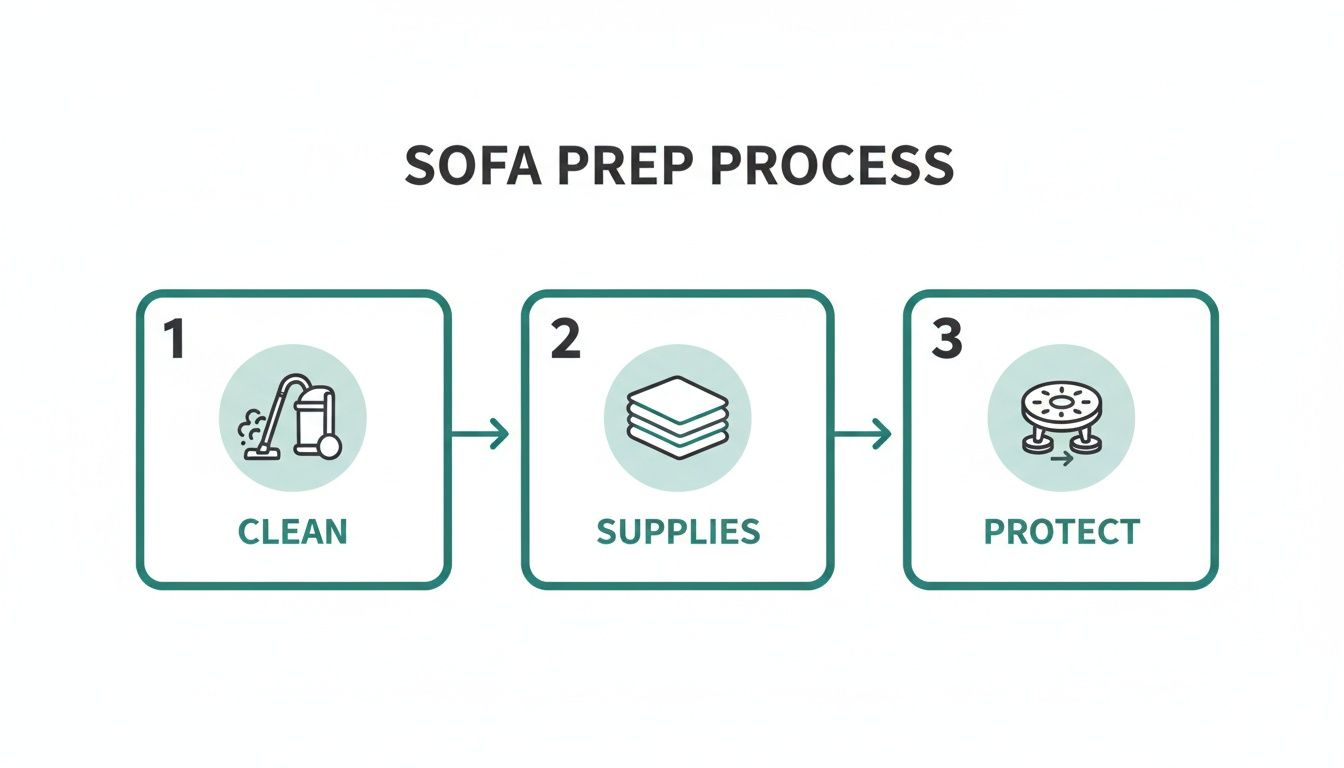
With those three things out of the way, you've set the stage for a damage-free move.
Disassembly and Initial Padding
The first real step is taking things apart. We already talked about removing the cushions and pillows, which is non-negotiable. If your sofa has removable legs, take them off now. It makes a world of difference when you're trying to pivot through a doorway and saves the legs from getting snapped off.
With the sofa stripped down, shift your focus to its most vulnerable points: the sharp corners, any wood or metal trim on the armrests, and the top corners of the back. These are the spots that always get banged up.
- Corner Protection: Grab some foam corner protectors or just bunch up packing paper and tape it securely around each hard corner of the sofa's frame. It seems simple, but this little bit of padding can absorb a surprising amount of force.
- Armrest Padding: If you have hard armrests, wrap them with a layer of bubble cushioning or a small, folded blanket before you add the main moving blanket.
Think of this as a base layer of armor. It ensures the most delicate parts are protected even if the outer wrap gets compromised.
The Art of Draping Moving Blankets
Now for the main event: the moving blankets. Don't just throw them on and hope for the best. The goal here is complete, overlapping coverage.
Start by draping one large blanket lengthwise down the sofa, covering the back, the seat, and the front. Let it hang over the sides evenly. Then, grab a second blanket and drape it across the width, making sure the arms are fully covered.
The trick is to create a double layer over the most exposed areas, like the arms and corners. You shouldn't be able to see any of the original fabric. This technique is a crucial part of learning how to protect furniture when moving, not just sofas.
A classic mistake is using a single, thin blanket that shifts around and leaves parts of the sofa exposed. You need 100% coverage with thick, padded moving blankets. Any gap is an open invitation for damage.
Mastering the Cross-Hatch Stretch Wrap
This is the final step that locks everything in place. The plastic stretch wrap provides a tough, water-resistant outer skin, and the secret to its strength is the cross-hatch pattern.
Begin by wrapping the sofa horizontally. Holding the roll of stretch wrap, walk around the sofa several times, pulling the film tight as you go. Overlap each pass by about 50%. Three or four complete trips around should be enough to hold the blankets snug.
Next, you'll switch directions and wrap vertically. Starting from the bottom on one side, pull the wrap up and over the top of the sofa, then down the other side. You'll need to pass the roll underneath—a helper makes this much easier—and repeat the process. Work your way from one end of the sofa to the other with these vertical bands.
To finish, do another two or three horizontal laps to lock the vertical strands in place. This horizontal-vertical-horizontal technique creates a super-strong web that keeps the blankets from budging and resists tearing much better than a simple one-direction wrap.
For an even deeper dive into protecting all your household goods, check out this guide on expert furniture protection.
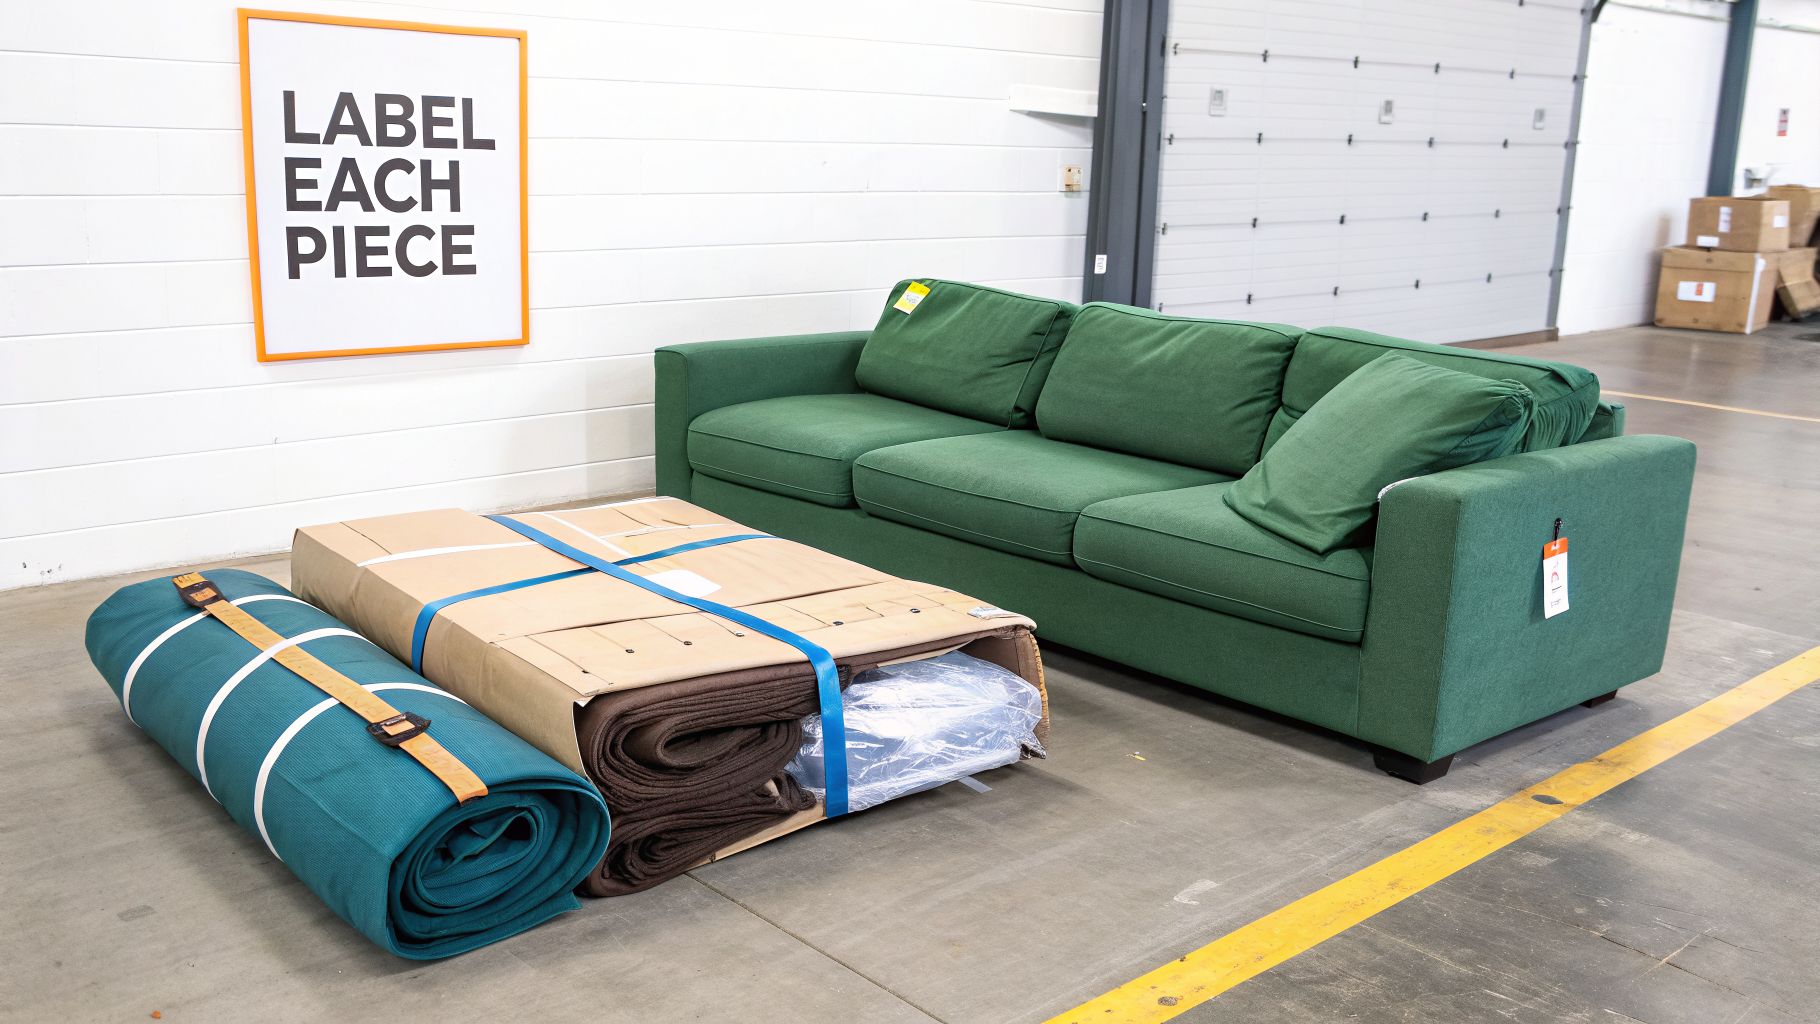
Your sofa is now a single, tightly-wrapped unit. The cushions and legs you removed earlier should be wrapped separately in plastic wrap and labeled. I like to tape the little bag of screws and hardware directly to the wrapped sofa frame—it’s the best way to make sure it doesn’t vanish on moving day.
Handling Complex Sofas Like Sleepers And Sectionals
Not every sofa is a straightforward three-seater. If you're moving a sectional, sofa bed, or recliner, your standard wrapping plan needs a serious upgrade. These pieces have moving parts, multiple sections, and weak spots that can lead to major damage if you're not careful.
Learning how to wrap these more complicated sofas is less about a single-step process and more about a smart plan for disassembly and protection. Let’s walk through the right way to handle each one.
How To Tackle Your Sectional Sofa
Sectionals are a dream in the living room but a real puzzle on moving day. The golden rule here is simple: treat each section like its own small sofa. Trust me, trying to move connected pieces together is a surefire way to break the connectors and strain your back.
First, locate the connection points, which are usually metal brackets hidden underneath. Most modern sectionals just slide apart with a good lift-and-pull, but you might find some older models are bolted together and will need a wrench.
Once they're apart, your job is to wrap and label every single piece. This is a step where a lot of people make mistakes.
- Wrap Individually: Give each section the full treatment. Pad it with moving blankets and then shrink-wrap it securely, just like you would a regular couch.
- Label Clearly: Use a marker on a piece of packing tape—and stick it to the plastic wrap, never directly on the fabric. Simple labels like "Left Arm," "Corner Piece," and "Right Chaise" will save you a massive headache when it’s time to put it all back together.
- Secure Hardware: If you removed any bolts, put them in a sealed plastic bag. Label it and tape it securely to the underside of the largest piece of the sectional so it doesn't get lost.
Securing a Sofa Bed or Sleeper
A sofa bed introduces a major hazard: that heavy, spring-loaded metal frame. If you don't secure this mechanism properly, it can spring open with surprising force during the move, damaging the sofa or even causing an injury.
Start by removing the mattress. Sleeper mattresses are usually thin enough to be rolled or folded easily. Wrap it in plastic to keep it clean and set it aside. This also makes the main sofa frame significantly lighter.
Next, and most importantly, you have to secure that folding mechanism. Open it just a crack and then close it again firmly, listening for the click to make sure it's fully latched. Then, use strong packing tape or a zip tie to bind the metal bar of the bed frame tightly to the main sofa frame. Your goal is to make sure it absolutely cannot pop open.
The biggest mistake you can make with a sleeper sofa is failing to tie down the bed mechanism. The force of it opening unexpectedly is enough to tear fabric, bend the frame, or even break a nearby window during a tricky maneuver.
Once the mechanism is completely immobilized, you can wrap the entire sofa frame with moving blankets and stretch wrap. Remember, sofa beds are incredibly heavy due to their dense construction, so get help when it's time to lift.
Protecting Your Reclining Sofa
Recliners, whether they're manual or electric, have moving parts that need a little extra care. The footrest and backrest mechanisms are the most common points of failure during a move.
For any type of recliner, the first step is to get it into the fully closed, upright position. Wrap a few bands of stretch wrap horizontally around the body of the sofa, making sure to secure the footrest. This prevents it from accidentally popping out while you're carrying it.
If you have an electric recliner, the power cord is your next focus.
- Unplug the power brick and all the cords from the sofa itself.
- Wrap the power brick and cords in bubble cushioning or packing paper. You can find more tips on protecting sensitive components in our guide to packing materials for fragile items.
- Put these electronic parts in a clearly labeled box that will travel with the sofa. Do not just tape them to the outside of the wrap, where they can easily get snagged or crushed.
Many recliners also have removable backs, a feature designed to make them easier to get through doorways. If yours does, slide the back off its tracks. Wrap the base and the back as two separate items. This drastically cuts down on the weight and awkwardness of each piece, making the entire move much safer and easier.
Safely Lifting and Moving Your Wrapped Sofa
Alright, your sofa is wrapped up like a pro—armored against dirt, scuffs, and tears. But getting the wrap right is only half the job. Now for the real challenge: wrestling that beast out of your house and onto the moving truck without wrecking the sofa, your walls, or your back.
Moving a sofa isn't about raw strength; it’s about having a game plan and using smart techniques. The pros make it look easy because they've done it a thousand times, and we're sharing their field-tested secrets with you.
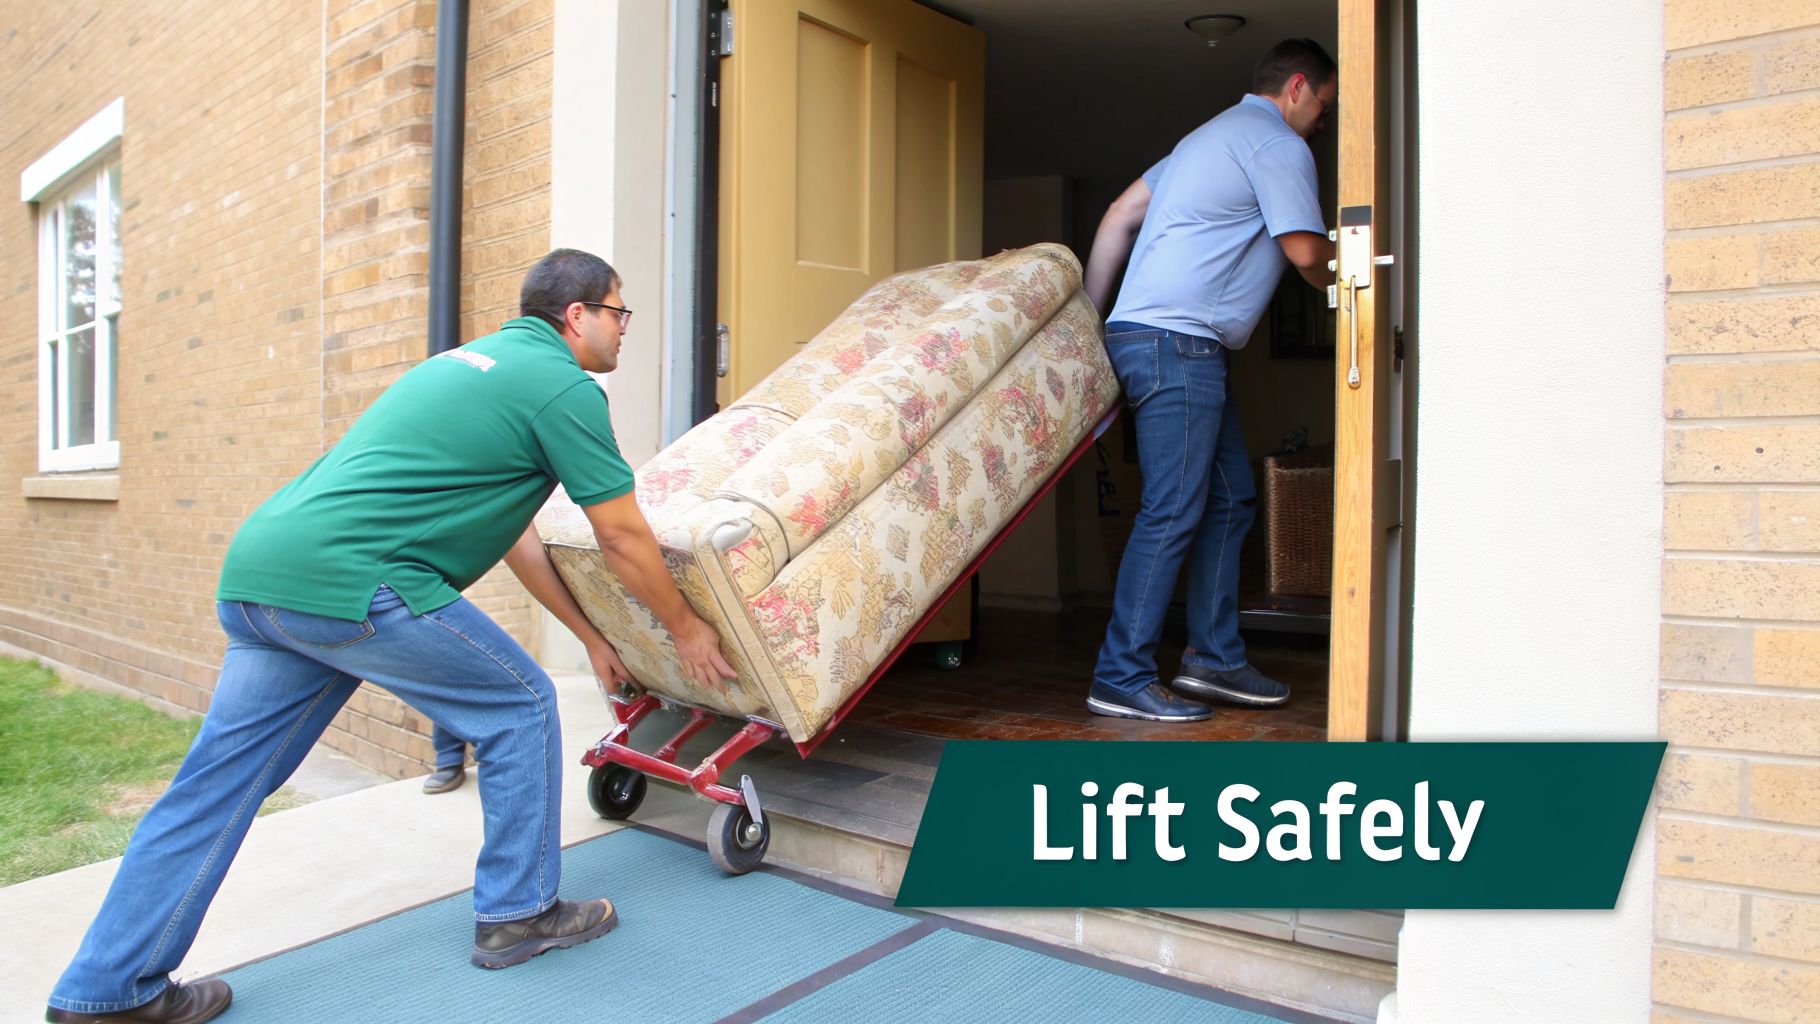
Proper Lifting Techniques and Body Mechanics
First things first: let's talk about safety. Lower back strain is the number one moving day injury, and it’s almost always preventable. The golden rule is simple: lift with your legs, not your back.
- Get a Solid Grip: Each person should grab the sofa by its sturdy frame on the bottom. Never lift by the arms or cushions—they can rip right off.
- Bend at the Knees: Squat down, keeping your back straight and your chest up.
- Lift With Your Legs: Drive through your heels to stand up, letting your powerful leg muscles do all the heavy lifting.
- Keep It Close: Hold the sofa close to your body. This helps you maintain your center of gravity and reduces strain.
This technique moves the pressure from your vulnerable spine to the muscles that were built for this kind of work. It’s a small adjustment that makes a massive difference.
Teamwork is everything. You absolutely need at least two people to move a sofa. Trying to "walk" or pivot a heavy sofa by yourself is a fast track to scratched floors, damaged furniture, and a visit to the chiropractor.
Smart Maneuvering for Tight Spaces
Let’s be honest, most homes weren’t designed for moving furniture. Tight corners, narrow hallways, and stubborn doorways are your main enemies. Here are a couple of pro tricks to get you through.
The "High-Low" Method for Hallways
When you reach a tight corner, one person should hold their end of the sofa low while the person in front lifts their end high. This angles the sofa, letting you "hook" it around the corner instead of trying to jam it through straight on.
The "Sofa-on-End" Trick for Doorways
If a doorway is just too narrow, don't give up. Stand the sofa up on its end. Carefully slide it through the doorway vertically, then gently lower it back down on the other side. This simple move works for most standard-sized sofas and can save you the headache of taking a door off its hinges.
Using Dollies and Sliders
Don't try to be a hero—use the right tools for the job. On moving day, furniture dollies and sliders are your best friends.
Once the sofa is out in the open, place a four-wheel furniture dolly under its center. This lets you roll it effortlessly down long hallways or out to the truck, saving a huge amount of physical effort. When it comes to loading, having the right strategy is key. For more on this, check out our guide on the best way to pack a moving truck to make sure everything fits securely.
Furniture sliders are those little discs you place under the feet. They are perfect for gliding the sofa across a room to get it into position for lifting, preventing deep gouges and scratches in your hardwood or carpet.
Preparing Your Wrapped Sofa for Storage
If your sofa isn’t going straight from your old place to your new one, that wrapping job becomes even more important. A well-wrapped sofa isn't just protected for the ride; it’s defended against the unique challenges of a storage unit—namely dust, humidity, and pests.
Think of the plastic stretch wrap as your sofa’s shield against dust and damp air. The moving blankets underneath act as a buffer against those annoying temperature swings. It’s this one-two punch that makes sure your sofa comes out of storage looking just as good as it did going in.
Short-Term vs. Long-Term Storage Prep
For a short stay in storage (less than three months), the wrapping you did for the move should be plenty. But if you’re planning on storing it for longer, a couple of extra steps can make all the difference. Toss a few silica gel packets inside the plastic wrap to soak up any moisture in the air. It’s a simple trick that goes a long way in preventing mildew from setting in.
Another pro tip: never let your wrapped sofa sit directly on a concrete floor. Get it up on some wooden pallets or even a few cinder blocks. This allows air to circulate underneath and saves it from potential water damage if the unit ever has a leak.
It's a shocking statistic, but an unfortunate 22% of consumers report damage to their belongings during a move due to improper wrapping. Fixing a sofa isn't cheap, either, with the average repair running a hefty $450. You can find more details on these figures by exploring the latest furniture market research.
For anyone needing a flexible, secure option without renting a whole unit, services like Endless Storage are a perfect fit. Once your sofa is wrapped, you can box up the cushions and accessories and store them for as low as $7.99/month. They even send you free shipping kits and let you manage everything online. It’s climate-controlled protection that’s ideal for those in-between periods. To learn more, check out our complete guide on how to store furniture correctly.
Common Questions About Wrapping a Sofa
Even with a solid plan, a few questions always seem to pop up right when you’re about to start wrapping the sofa. Let's get those sorted out so you can tackle the job with confidence.
One of the biggest questions I hear is whether it’s okay to use packing tape directly on the sofa. The answer is a hard no. Applying tape directly to upholstery—whether it’s fabric, velvet, or leather—is a recipe for disaster.
At best, it leaves behind a sticky mess that collects dirt. At worst, you could pull away the fabric’s fibers or even strip off the color when you remove it. Only apply tape to the plastic stretch wrap or the moving blankets, never the sofa itself.
Protecting Delicate Fabrics
What about delicate materials like leather or velvet? These need a little extra care to avoid damage that you just can't undo. Plastic stretch wrap should never touch these surfaces directly, as it can trap moisture and cause the material to "sweat," leading to mildew or discoloration.
For these sensitive fabrics, your best friends are soft, breathable moving blankets.
- Leather Sofas: Drape the entire sofa with clean, soft moving blankets. This creates a buffer that prevents scuffs and scratches while still allowing the leather to breathe.
- Velvet Sofas: The nap on velvet is notoriously easy to crush. Use plenty of padding and wrap it loosely. After covering it with blankets, use stretch wrap to hold them in place, but don’t pull so tight that it flattens the pile.
Remember, the goal with delicate fabrics is to create a soft, breathable barrier first. Only after the sofa is fully covered with blankets should you introduce the plastic stretch wrap for the final layer of protection.
Think of it this way: the blanket protects the finish, and the plastic wrap protects the blanket. It’s a simple two-step process that makes all the difference.
When your move involves a storage period, having a perfectly wrapped sofa is non-negotiable. For a flexible, climate-controlled solution that protects your furniture without the cost of a full storage unit, trust Endless Storage. Get a free quote and discover a smarter way to store at https://www.endless-storage.com.
Frequently Asked Questions
Unveiling the Secrets to Effortless Storage
Endless Storage is available nationwide. You pick a plan, tell us where to pickup, and we'll send a UPS van to collect, whichever state you're in.
Your shipping label will be sent to your email within a few minutes, if not instantaneously. It can also be accessed through your customer profile.
Your box will be shipped to one of our climate controlled self storage facilities in our closest self storage facility. Our manager will accept your package, notify you that your box has been received, and securely stored. Only our managers will have access to Endless Storage boxes.
Email us at admin@endless-storage.com click to live chat with us, or send us a message below.
Never! We're committed to transparent pricing with no surprises. You'll lock in your rate with no hidden fees and no long-term contracts.
Fast access guaranteed! Your boxes will arrive at your doorstep within 48 hours of requesting them back. Need to check on delivery? We provide tracking information for complete peace of mind.
Totally flexible! Store month-to-month with no long-term commitment and cancel anytime.
Everything's online! Use your account dashboard to:
• Set up automatic monthly payments
• Request box returns
• Update your address
• Order additional boxes
• Track shipments
Your boxes are insured up to $100 each. Our customer service team will help you file any necessary claims and resolve issues quickly.
Don't worry – we'll email you right away if there's a payment issue. Your items stay safe, though you may have temporary service interruption or late fees until payment is resolved.
When you request our free storage kits, you'll have 30 days to send in your boxes to activate your 3 months of free storage. Think of it like starting a gym membership – your activation window begins when you receive your kits, and your full free trial begins once you send in your first box. During your free months, you'll experience our complete storage service at no cost.
Your 30-day activation window begins when you receive your storage kits. We'll send you an email confirmation when your kits are delivered, marking the start of your activation period.
If you haven't sent any boxes for storage within your 30-day activation window, your free trial will expire and we'll begin charging the regular monthly rate of $9.99 per box. This helps ensure our storage kits go to customers who are ready to use our service.
A box costs $9.99 per month to store (plus sales tax). This price includes free shipping for standard boxes under 50 lbs. and smaller than 16"x16"x16"
Log into your Endless Storage account, locate the box you would like returned, and simply click Return My Box.
Yes, each box stored with us is insured for up to $100 throughout transit as well as the duration of storage within our facilities.
Your box will be at your doorstep within 48 hours of you requesting it back.
Store 10+ boxes? We'll pick them up for free! After your purchase, we'll contact you to schedule a convenient pickup time and arrange UPS collection.
We trust UPS with all shipments, and every box includes $100 insurance coverage. You'll receive tracking information to monitor your items' journey.
Yes! Visit any of our locations by appointment. Just bring a photo ID matching your customer profile.
For everyone's safety, we can't store hazardous materials, firearms, or perishables. All items must fit within our standard boxes.
It's easy! Order your storage kit online, and we'll ship it to you within 1-2 business days. Your shipping labels will be emailed instantly and available in your account.
We're here to help! Email us at admin@endless-storage.com, use our live chat, or send us a message through your account.
To cancel your storage service with Endless Storage, please email your cancellation request to admin@endless-storage.com. Our team will process your request within 2 business days and confirm your cancellation via email.
We understand packing takes time. However, to maintain your free trial benefits, you'll need to send at least one box within the 30-day activation window. If you need more time, you can always start with one box to activate your trial and send the rest later. You can always reach out to admin@endless-storage.com if you have any issues or concerns.
When you request our free storage kits, you're starting a 30-day window to begin using our storage service.
Important: To activate your free trial, send at least one box for storage within 30 days. If no boxes are sent within this 30-day window, a one-time $50 fee applies to cover materials and shipping costs. This fee is clearly disclosed before you sign up.
Think of it like reserving a hotel room – we're setting aside space and sending specialized packing materials for your use. The fee only applies if you request materials but don't begin storage, similar to a hotel's no-show charge.