
The secret to effectively storing kitchen utensils isn't about buying a bunch of fancy containers. It's about a simple, three-part strategy: decluttering what you don't need, grouping similar items, and using a smart mix of drawer organizers, countertop caddies, and vertical storage. The real key is keeping your most-used tools within easy reach, while the less-used gadgets can live happily in cabinets or deeper drawers.
Conquer Your Utensil Clutter for Good
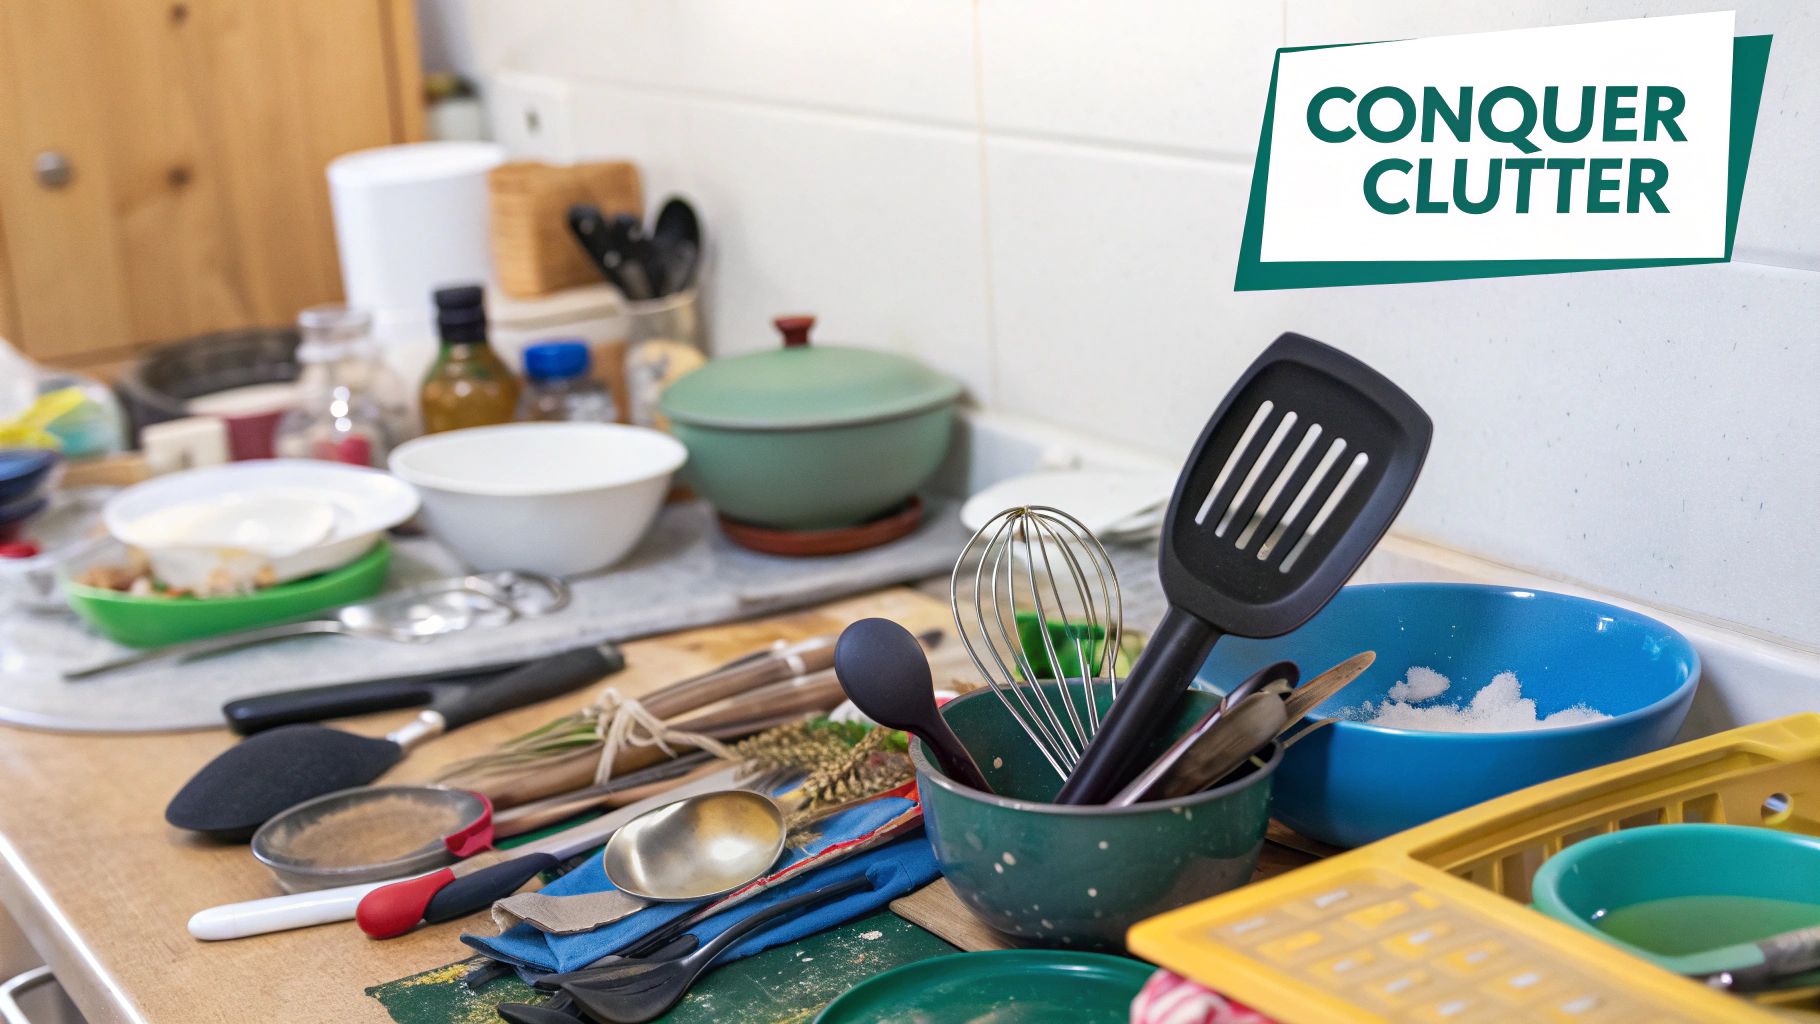
Does fighting with a drawer that just won't close sound familiar? Are your countertops slowly being overrun by an army of spatulas and whisks? You’re definitely not alone. With the explosion of interest in home cooking, we're all bringing more gadgets into our kitchens than ever before.
In fact, the global kitchen utensil market was valued at a whopping USD 15 billion in 2023 and is only expected to keep growing. That's a lot of stuff to find a home for! This isn't just about making things look tidy; it's about creating a system that makes cooking genuinely easier and more enjoyable. A well-organized kitchen can completely transform your workflow, turning meal prep from a chaotic scramble into a smooth, stress-free process.
The Foundation of Smart Utensil Storage
Before you rush out to buy any new organizers, the very first step—always—is to declutter. I mean it. Take everything out of the drawers and off the counters, and start grouping similar items together. This is your chance to be brutally honest about that melon baller you haven't touched in five years.
Here are the core principles I always come back to for success:
- Declutter First: Go through every single utensil. If it’s broken, a duplicate you never use, or hasn't seen the light of day in over a year, it’s time to let it go. For a deeper dive, check out our guide on https://www.endless-storage.com/blog-posts/how-to-declutter.
- Group by Function: Keep baking tools with other baking tools, grilling utensils together, and everyday cooking items in their own spot. This simple logic makes finding what you need completely intuitive.
- Prioritize Accessibility: Your go-to spatula and wooden spoon should be right next to the stove, no questions asked. The turkey baster you use once a year? It can live comfortably in the back of a cabinet.
The first step to an organized kitchen is often decluttering. If you're facing a larger organizational challenge, like an entire home, you might find general strategies for decluttering when preparing for a move helpful.
By starting with these fundamental steps, you'll build a utensil storage strategy that actually works for your space and the way you cook.
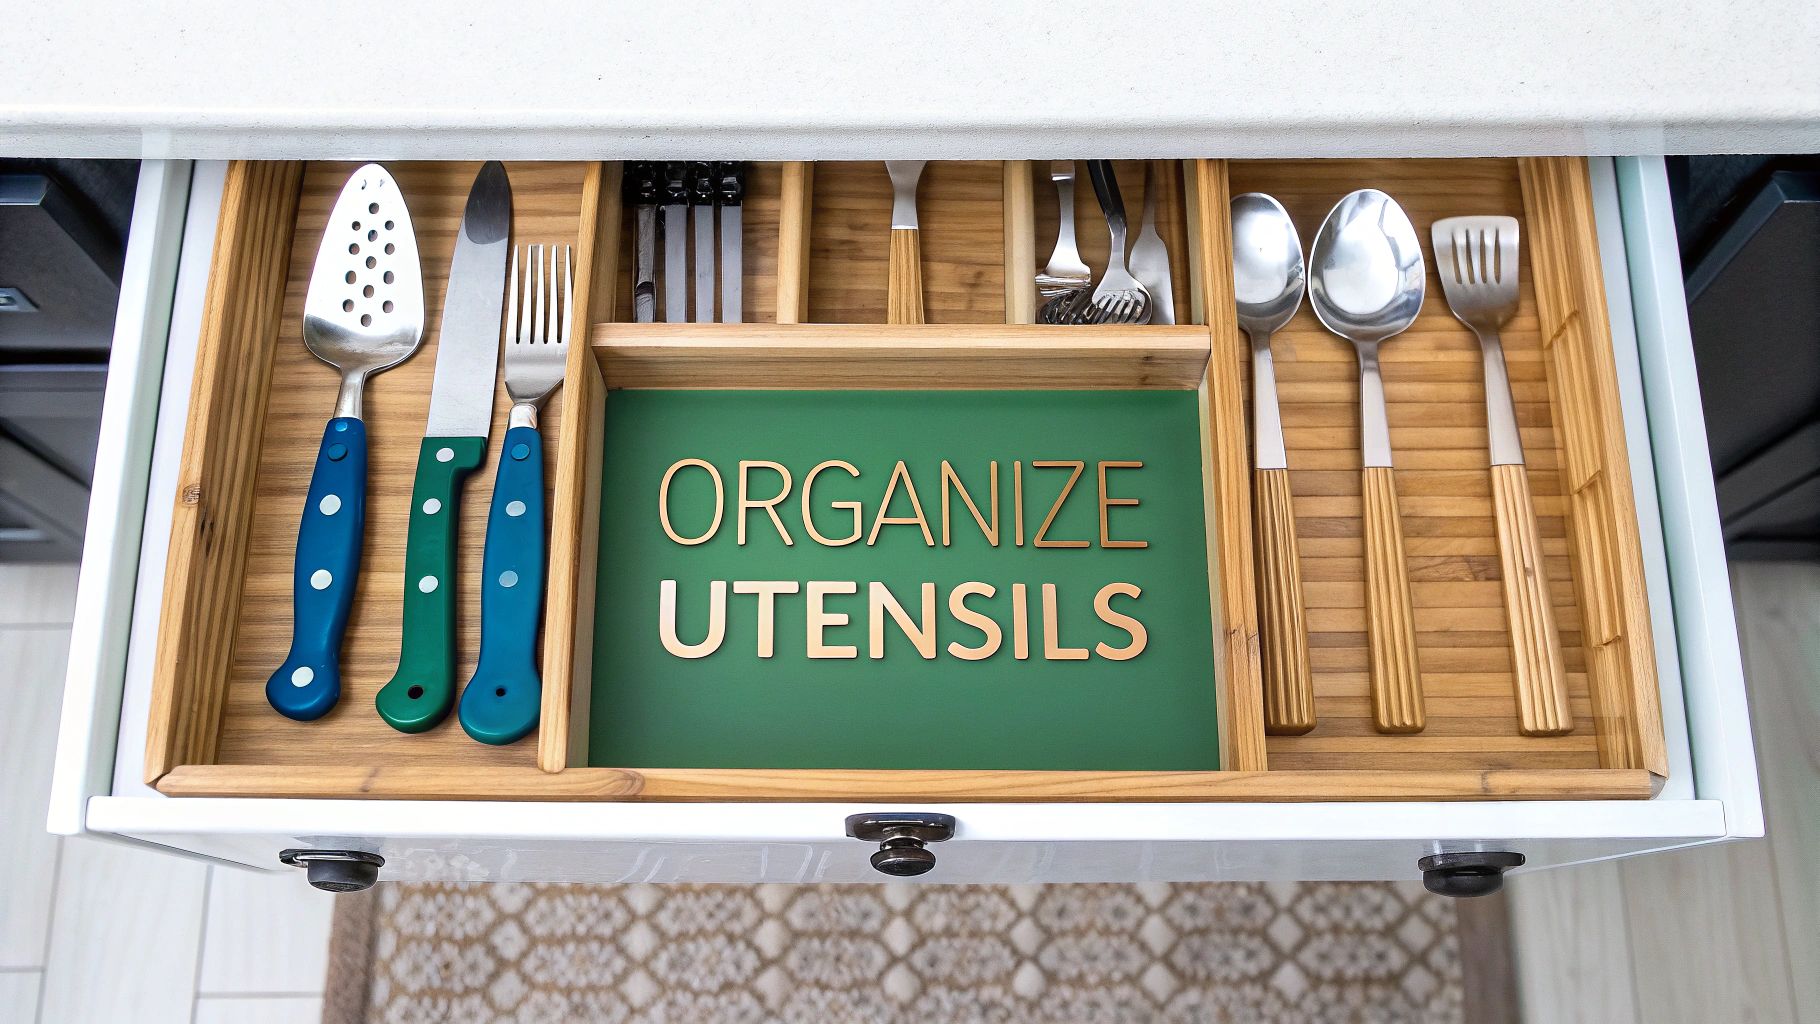
Rethink Your Drawer Storage Strategy
We’ve all been there. Dinner’s about to burn, and you’re frantically digging through a drawer trying to find the potato peeler. Let’s be honest: kitchen drawers are the default home for utensils, but that flimsy, sliding plastic tray that came with the house just isn’t cutting it anymore.
It’s time to move beyond that basic setup and truly optimize this prime real estate. The real goal is to give every single item a designated home, eliminating that dreaded utensil jumble for good. For most people, this is the single most impactful change you can make.
Maximize Every Inch of Drawer Space
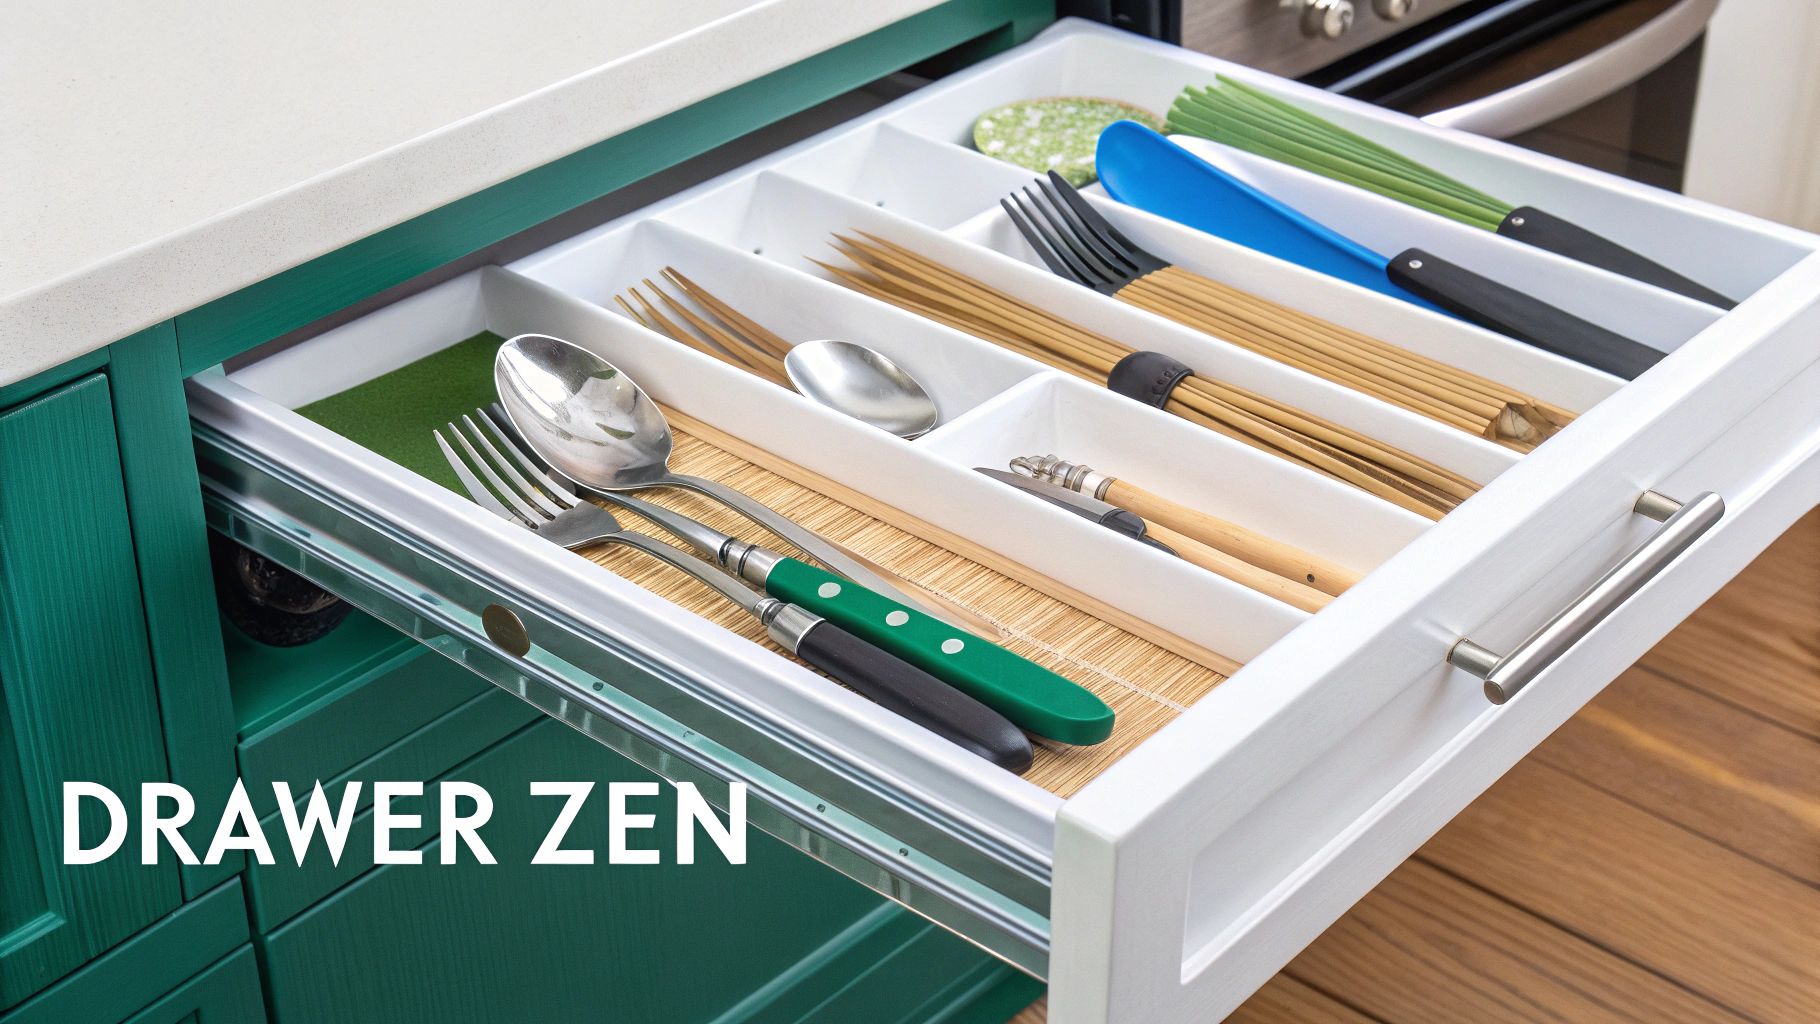
To really transform your drawers, look for inserts and dividers that use the entire space, from front to back and side to side. Expandable bamboo trays are fantastic because they adjust to fit your drawer’s exact width, leaving no wasted gaps on the sides.
But for deeper drawers, the real game-changer is a two-tier organizer. This simple addition instantly doubles your storage capacity. The logic is simple but brilliant:
- Top Tier: This is for your everyday heroes—the forks, spoons, and knives you reach for multiple times a day.
- Bottom Tier: This becomes the perfect hideout for less-used items, like corn cob holders, appetizer forks, or that one specialty cheese knife.
Once you implement a system like this, exploring more advanced storage organization ideas for other parts of the kitchen becomes way less intimidating.
Simple Hacks for a Tidy Drawer
Beyond inserts, a few small additions can make a surprisingly big difference. Before adding your organizer, lay down a non-slip liner. It’s a small step, but it stops the entire unit from sliding to the back every single time you close the drawer.
What about those awkward, oversized tools like rolling pins or long-handled ladles? Don't be afraid to create your own custom sections. A couple of spring-loaded tension rods can partition a deep drawer perfectly, keeping bulky items from rolling around and creating chaos.
Master Countertop and Vertical Storage

When your drawers are packed to the gills, the only way to go is up. Moving your storage vertical doesn't just clear out that precious drawer real estate; it puts your most-used tools exactly where you need them. This simple shift can make your kitchen feel so much more efficient.
The classic utensil crock is a solid starting point. My advice? Go for one with a heavy, wide base to keep it from toppling over every time you grab a whisk. Materials like ceramic or marble look great and add the stability you need. Just arrange your tools with the handles up, and maybe group similar items together so you can grab what you need without a second thought.
Embrace Modern Wall-Mounted Solutions
Look beyond the countertop, and you'll see a world of opportunity on your walls. Wall-mounted systems are a lifesaver, especially if you're trying to figure out how to store kitchen utensils in a kitchen that feels small or crowded.
Here are a few of my go-to options:
- Magnetic Strips: These aren't just for knives anymore. They are absolutely brilliant for any metal utensil—think spatulas, whisks, and even measuring spoons. You get sharp items safely out of drawers and can see everything at a glance.
- Rail Systems: A simple wall-mounted rail with a handful of S-hooks is incredibly versatile. I've used them to hang everything from ladles to small colanders. The best part is you can customize the layout to perfectly fit your collection.
- Pegboards: For the person who loves ultimate flexibility, nothing beats a pegboard. You can constantly rearrange hooks, tiny baskets, and even small shelves to hold pretty much any tool you own.
This is also a fantastic way to put your favorite tools on display. High-quality utensils are becoming more common, with the stainless steel market alone expected to hit USD 1.28 billion by 2033. Their durability and sleek design make them perfect for showing off. For more inspiration on how to build out your wall space, you can check out some great DIY floating shelf ideas that work beautifully with these systems.
A quick pro tip: When you're installing any kind of wall-mounted storage, always use the right wall anchors for your wall type, whether it's drywall, plaster, or tile. Taking a few extra minutes to secure the system properly will keep both your utensils and your walls safe. It’s a small step that prevents a big mess down the road.
Find a Home for Awkward and Bulky Utensils
Every kitchen seems to have them—the rolling pin that always ends up in the back of the drawer, the ladle with a handle just a bit too long, and that bulky potato masher. Let’s be honest, these awkwardly shaped tools are usually the main culprits behind our utensil clutter.
They just don't play well with standard drawer organizers.
So, the trick is to start thinking beyond the drawer. I always tell people to look for those forgotten, underused spots in their kitchen. My personal favorite? The inside of a cabinet door. It’s the perfect, out-of-the-way place to mount a small rack for that rogue rolling pin or add a few adhesive hooks for measuring cups and spoons.
This little strategy gets those cumbersome items out of your prime drawer real estate without burying them where you'll never find them again.
Taming Deep Cabinets and Open Spaces
Deep cabinets can sometimes feel like a black hole where your longer utensils disappear forever. Instead of just laying them flat, try standing them up. A tall, slender bin or even a slim vase works wonders for keeping whisks and tongs upright, making everything easy to see and grab. For a more built-in solution, installing a pull-out organizer can bring the back of the cabinet right to your fingertips.
If you’re short on cabinet space altogether, it’s time to get a little creative with your decor.
A beautiful ceramic pitcher sitting on an open shelf doesn't just have to look pretty. It can easily double as a stylish and functional holder for wooden spoons, spatulas, and other long-handled tools, blending your storage seamlessly into your kitchen’s vibe.
This approach not only keeps your most-used tools handy but also adds a personal touch to your space. Finding clever spots for these bigger items is just as crucial as organizing your forks and knives. On a similar note, if you're looking for solutions for even larger items, our guide on how to store kitchen appliances has some great ideas to help you reclaim even more of your kitchen.
Keep Your Newly Organized Utensil System in Check
Let's be real: an organized kitchen isn't a one-and-done project. The real secret to keeping your utensils easy to find and use is building a few simple habits into your routine. This is what keeps your space functional and enjoyable long after the big clean-out is over.
A great place to start is the "one-in, one-out" rule. It's beautifully simple. Every time you bring home a new gadget—whether it’s a fancy new spatula or an avocado slicer—an old or unused one has to go. This single habit is your best defense against the slow creep of duplicate peelers and whisks, keeping your collection perfectly streamlined.
Create a Simple Maintenance Rhythm
To avoid another massive decluttering session down the road, it's smart to schedule some quick check-ins. A simple, consistent routine prevents chaos from taking hold again, making the upkeep feel almost effortless.
This infographic breaks down a simple yet effective annual maintenance schedule.
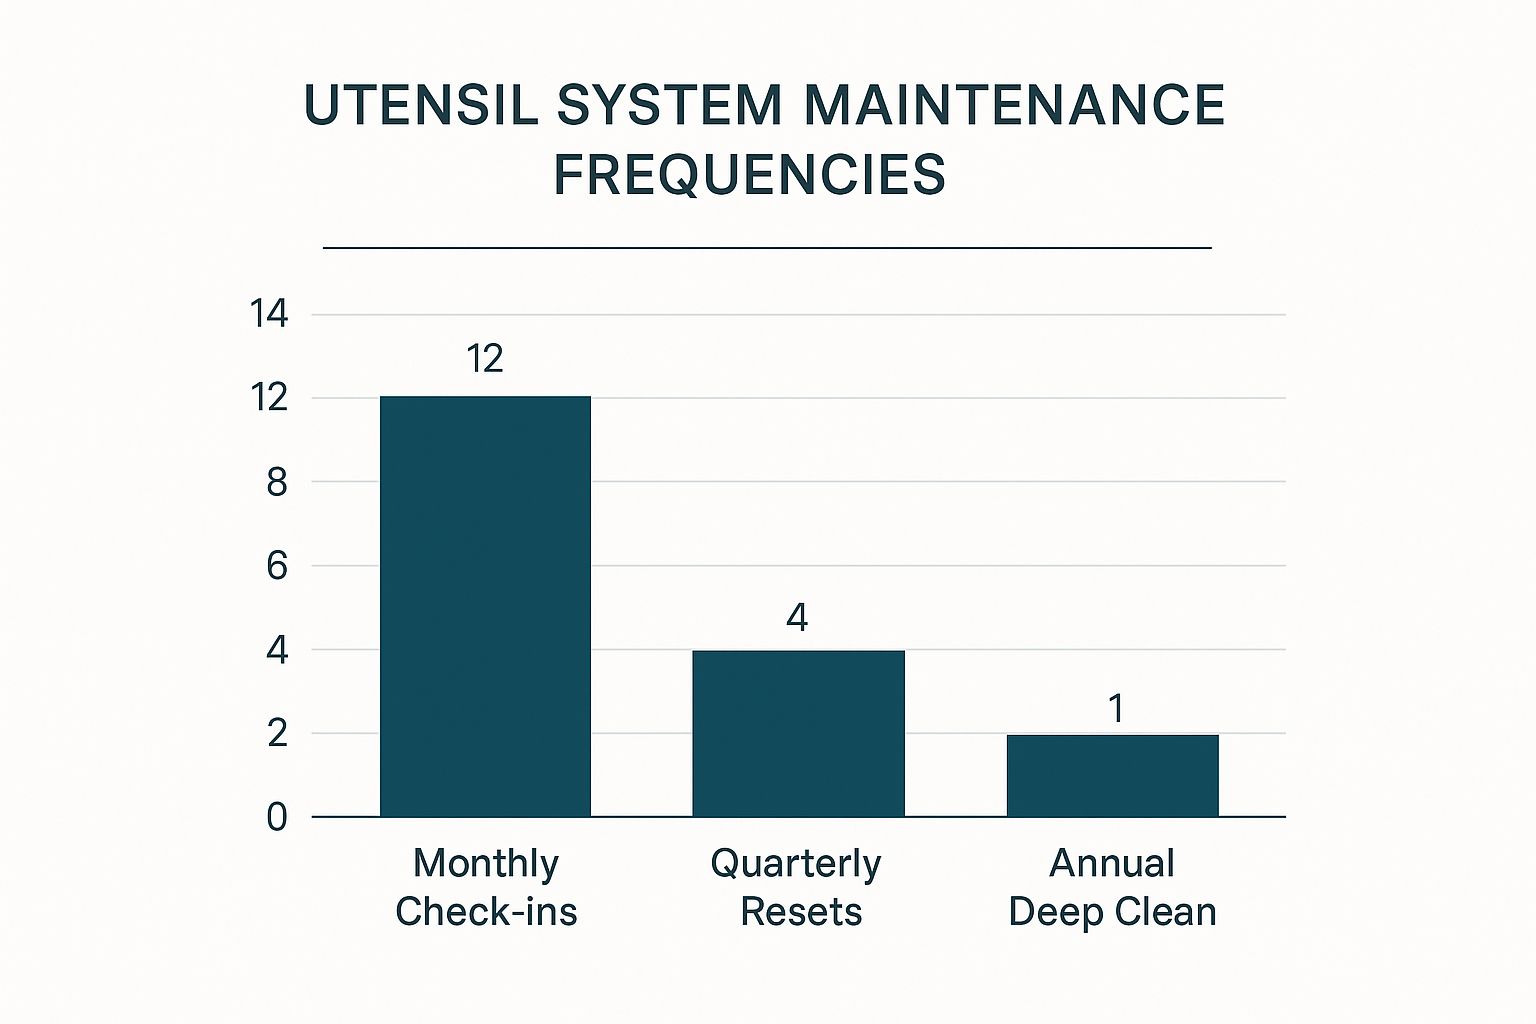
As you can see, frequent, small touch-ups are far more manageable than one huge annual overhaul. This proactive approach is exactly why the market for home organization products is booming, valued globally at USD 131.43 billion in 2023.
Pro Tip: During your quarterly resets, take an extra five minutes to wipe down your organizers. A wooden utensil tray just needs a quick wipe with a damp cloth, while a countertop crock might need a good wash with hot, soapy water to stay fresh and hygienic.
Folding these small tasks into your regular cleaning schedule is the key. For a truly sparkling space, you can integrate your utensil maintenance into an ultimate kitchen deep clean guide. And if you're looking to bring this level of order to the rest of your home, check out our tips on the https://www.endless-storage.com/blog-posts/best-way-to-label-storage-bins.
Your Top Kitchen Utensil Questions, Answered
Even with a solid plan, a few tricky questions always seem to pop up when it's time to actually organize those utensils. Let's dig into some of the most common ones I hear from people who are serious about finally conquering their kitchen clutter.
Getting these little details right is often what separates a system that lasts for a week from one that keeps you organized for years. A bit of troubleshooting now will save you a world of frustration down the road.
What Is the Best Way to Organize Utensils in a Small Kitchen?
When you're working with a small kitchen, your new mantra is "think vertically." The main goal is to get as much as you can off of your precious counter space and out of those shallow drawers. Your walls are about to become your new best friend.
For tight spaces, these are the tactics that really work:
- Magnetic Strips: These are an absolute must for knives and any other metal tools. Just like that, you've freed up an entire drawer block.
- Rail Systems: A simple rail with a few S-hooks is perfect for hanging spatulas, ladles, and whisks. They stay easy to grab but are completely out of the way.
- Slim Organizers: On the counter, go for a tall, narrow utensil crock. Inside drawers, two-tier organizers are a total game-changer, literally doubling your storage capacity without taking up any more space.
- Cabinet Doors: Don't forget about this hidden real estate! The inside of a cabinet door is the perfect spot for mounting small racks to hold measuring spoons or other flat tools.
How Often Should I Declutter My Kitchen Utensils?
When it comes to decluttering, consistency beats intensity every time. I always recommend doing one big decluttering session a year where you pull everything out and really assess what you're using. But to keep things from getting out of hand between those deep dives, a quick 10-minute spot-check every three or four months works wonders.
An even better habit to build? The "one-in, one-out" rule. Every single time you bring a new utensil into your kitchen, an old or duplicate one has to go. This simple practice is the single best way to stop clutter before it even starts.
Are Countertop Utensil Holders Unhygienic?
Not at all—as long as you take care of them properly. A countertop holder is perfectly hygienic if you follow a couple of simple rules. The most critical one is making sure your utensils are 100% dry before you put them away. This stops moisture from pooling at the bottom, which is what can lead to bacteria growth.
You should also give the holder itself a good cleaning with hot, soapy water about once a month. Of course, if you ever spot any food residue, clean it right away. For the best results, look for holders made from non-porous materials like ceramic, stainless steel, or sealed wood—they're much easier to keep clean and sanitized.
Frequently Asked Questions
Unveiling the Secrets to Effortless Storage
Endless Storage is available nationwide. You pick a plan, tell us where to pickup, and we'll send a UPS van to collect, whichever state you're in.
Your shipping label will be sent to your email within a few minutes, if not instantaneously. It can also be accessed through your customer profile.
Your box will be shipped to one of our climate controlled self storage facilities in our closest self storage facility. Our manager will accept your package, notify you that your box has been received, and securely stored. Only our managers will have access to Endless Storage boxes.
Email us at admin@endless-storage.com click to live chat with us, or send us a message below.
Never! We're committed to transparent pricing with no surprises. You'll lock in your rate with no hidden fees and no long-term contracts.
Fast access guaranteed! Your boxes will arrive at your doorstep within 48 hours of requesting them back. Need to check on delivery? We provide tracking information for complete peace of mind.
Totally flexible! Store month-to-month with no long-term commitment and cancel anytime.
Everything's online! Use your account dashboard to:
• Set up automatic monthly payments
• Request box returns
• Update your address
• Order additional boxes
• Track shipments
Your boxes are insured up to $100 each. Our customer service team will help you file any necessary claims and resolve issues quickly.
Don't worry – we'll email you right away if there's a payment issue. Your items stay safe, though you may have temporary service interruption or late fees until payment is resolved.
When you request our free storage kits, you'll have 30 days to send in your boxes to activate your 3 months of free storage. Think of it like starting a gym membership – your activation window begins when you receive your kits, and your full free trial begins once you send in your first box. During your free months, you'll experience our complete storage service at no cost.
Your 30-day activation window begins when you receive your storage kits. We'll send you an email confirmation when your kits are delivered, marking the start of your activation period.
If you haven't sent any boxes for storage within your 30-day activation window, your free trial will expire and we'll begin charging the regular monthly rate of $9.99 per box. This helps ensure our storage kits go to customers who are ready to use our service.
A box costs $9.99 per month to store (plus sales tax). This price includes free shipping for standard boxes under 50 lbs. and smaller than 16"x16"x16"
Log into your Endless Storage account, locate the box you would like returned, and simply click Return My Box.
Yes, each box stored with us is insured for up to $100 throughout transit as well as the duration of storage within our facilities.
Your box will be at your doorstep within 48 hours of you requesting it back.
Store 10+ boxes? We'll pick them up for free! After your purchase, we'll contact you to schedule a convenient pickup time and arrange UPS collection.
We trust UPS with all shipments, and every box includes $100 insurance coverage. You'll receive tracking information to monitor your items' journey.
Yes! Visit any of our locations by appointment. Just bring a photo ID matching your customer profile.
For everyone's safety, we can't store hazardous materials, firearms, or perishables. All items must fit within our standard boxes.
It's easy! Order your storage kit online, and we'll ship it to you within 1-2 business days. Your shipping labels will be emailed instantly and available in your account.
We're here to help! Email us at admin@endless-storage.com, use our live chat, or send us a message through your account.
To cancel your storage service with Endless Storage, please email your cancellation request to admin@endless-storage.com. Our team will process your request within 2 business days and confirm your cancellation via email.
We understand packing takes time. However, to maintain your free trial benefits, you'll need to send at least one box within the 30-day activation window. If you need more time, you can always start with one box to activate your trial and send the rest later. You can always reach out to admin@endless-storage.com if you have any issues or concerns.
When you request our free storage kits, you're starting a 30-day window to begin using our storage service.
Important: To activate your free trial, send at least one box for storage within 30 days. If no boxes are sent within this 30-day window, a one-time $50 fee applies to cover materials and shipping costs. This fee is clearly disclosed before you sign up.
Think of it like reserving a hotel room – we're setting aside space and sending specialized packing materials for your use. The fee only applies if you request materials but don't begin storage, similar to a hotel's no-show charge.