
Figuring out how to pack for college really comes down to one simple rule: start early and stay organized. The best way to tackle it is by creating a plan at least a month before move-in day. This starts with the simple stuff, like coordinating big-ticket items with your roommate and checking your dorm's rules to avoid bringing anything you’re not supposed to. This little bit of strategy turns a massive task into something you can actually manage without losing your mind.
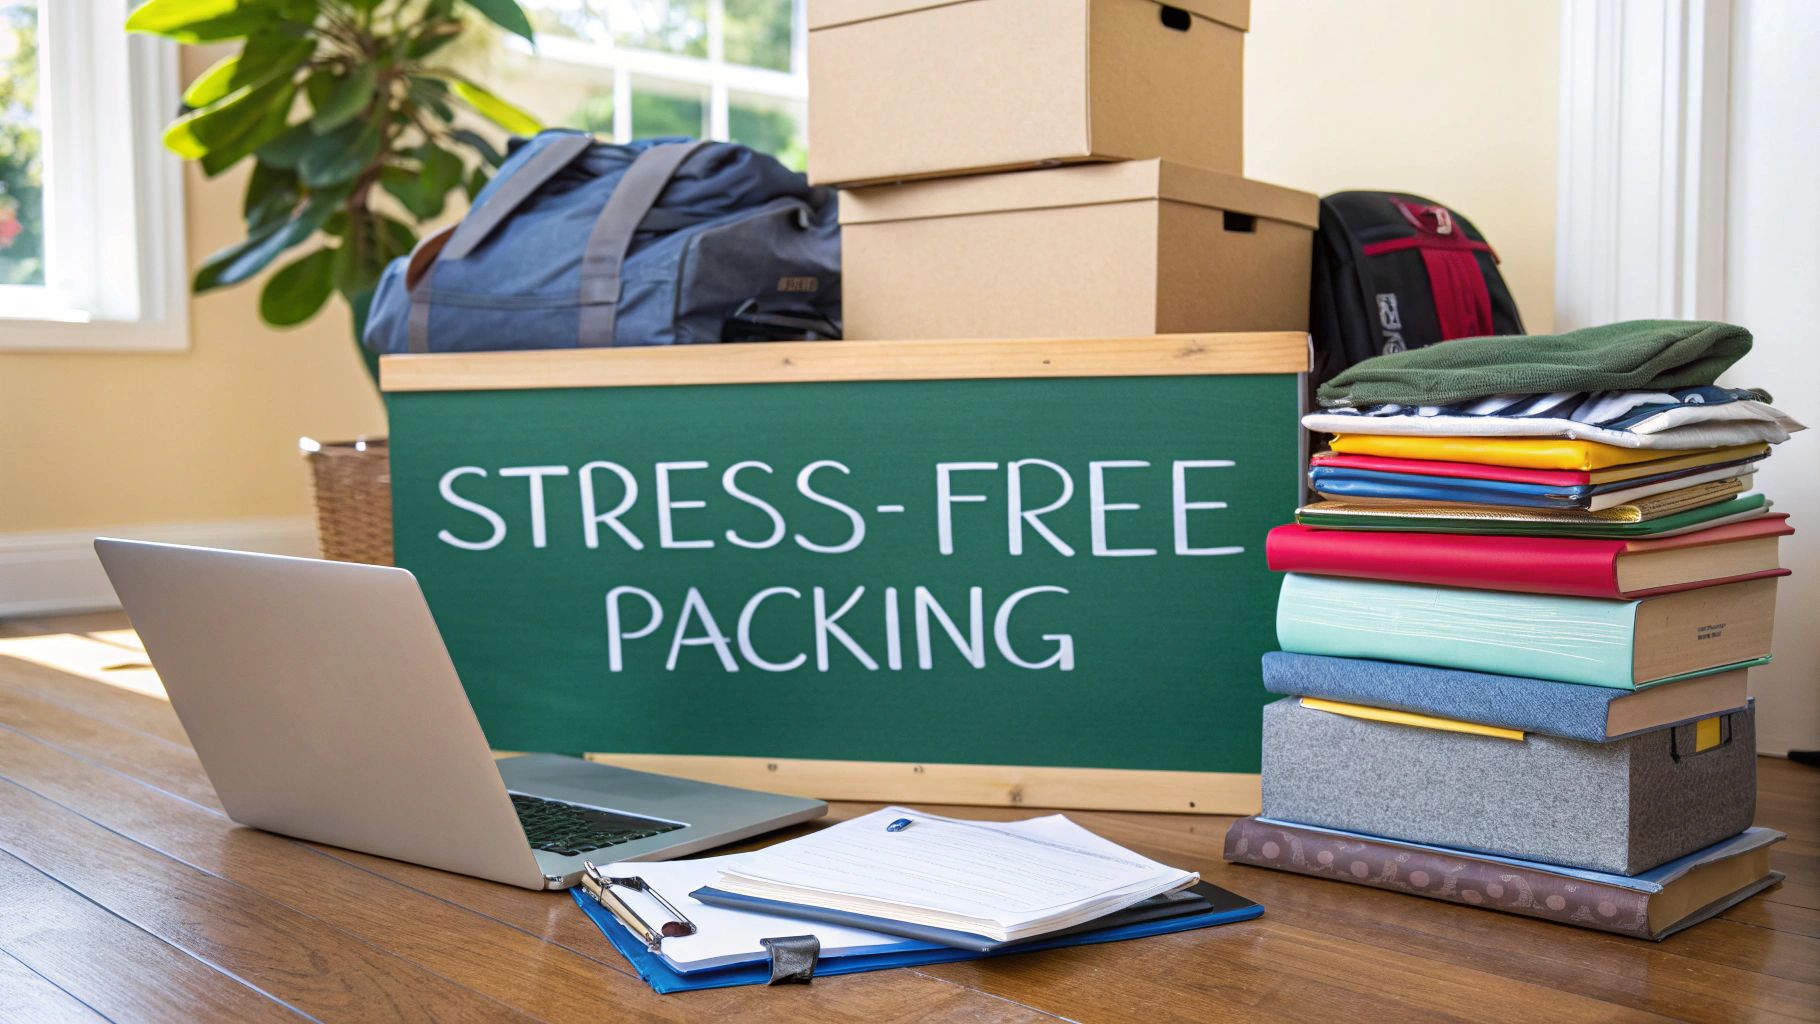
Your Smart Start To College Packing
The move to college is exciting, but let’s be real—the sheer volume of packing can quickly become a major stressor. The secret to a smooth move isn't a magic checklist; it’s all about your timeline. Procrastination is the enemy here.
By starting the process weeks in advance, you give yourself the breathing room to think clearly, make smart decisions, and avoid that frantic, last-minute scramble.
This early start lets you tackle packing in smaller, more manageable chunks. Instead of facing a mountain of your stuff the weekend before you leave, you can set aside a few hours each week to sort, purge, and organize. This method isn't just about reducing stress; it's about being more intentional. You’ll have time to really consider if you need those extra decorative pillows or if you can survive a semester without your entire video game collection.
Plan Before You Pack
Believe it or not, the most effective first step has nothing to do with boxes or tape. It’s all about communication and a little bit of research.
- Connect with Your Roommate: As soon as you get their contact info, reach out. The goal is to avoid showing up on move-in day with two mini-fridges, two microwaves, and two clashing area rugs. A shared online list is a great way to decide who brings what. This simple chat saves money, space, and a lot of potential frustration.
- Consult the College Website: Every university has a housing section that lists exactly what is and isn't allowed in the dorms. Are candles a no-go? Is there a wattage limit for your appliances? Knowing these rules upfront keeps you from packing something you’ll just have to send right back home.
Starting the packing process at least one month before you leave isn't just a suggestion—it's a proven strategy for a better experience. It gives you the space to inventory what you have, identify what you need, and methodically prepare for your new life on campus.
Create Your Phased Timeline
Research actually shows that starting to pack at least a month ahead can lower reported stress levels by as much as 30%. Breaking it down helps you get organized gradually and spot any gaps in your essentials with plenty of time to go shopping.
The whole process can be visualized as a simple flow of core steps.
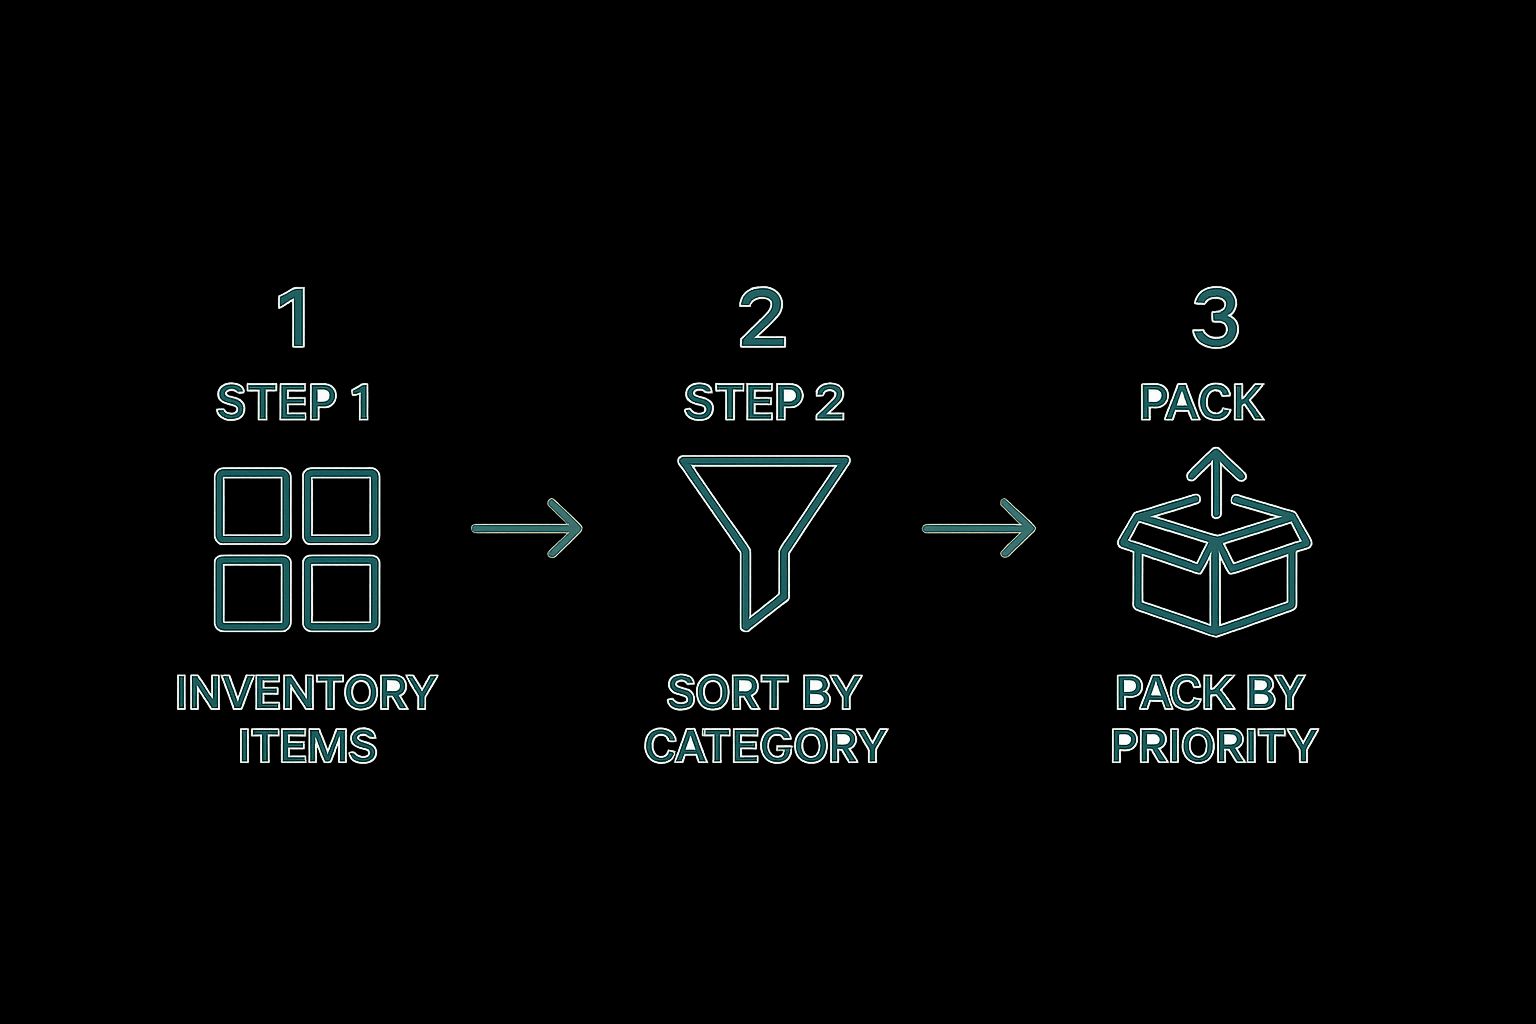
This just goes to show that smart packing is a sequence of inventory, sorting, and prioritizing—not just random stuffing.
To make it even easier, here’s a week-by-week plan to keep you on track and prevent any last-minute chaos.
The Four-Week College Packing Timeline
This timeline is a solid framework to follow. For a more granular breakdown, check out our comprehensive moving checklist and timeline to keep you on track.
Building Your Essential College Packing List
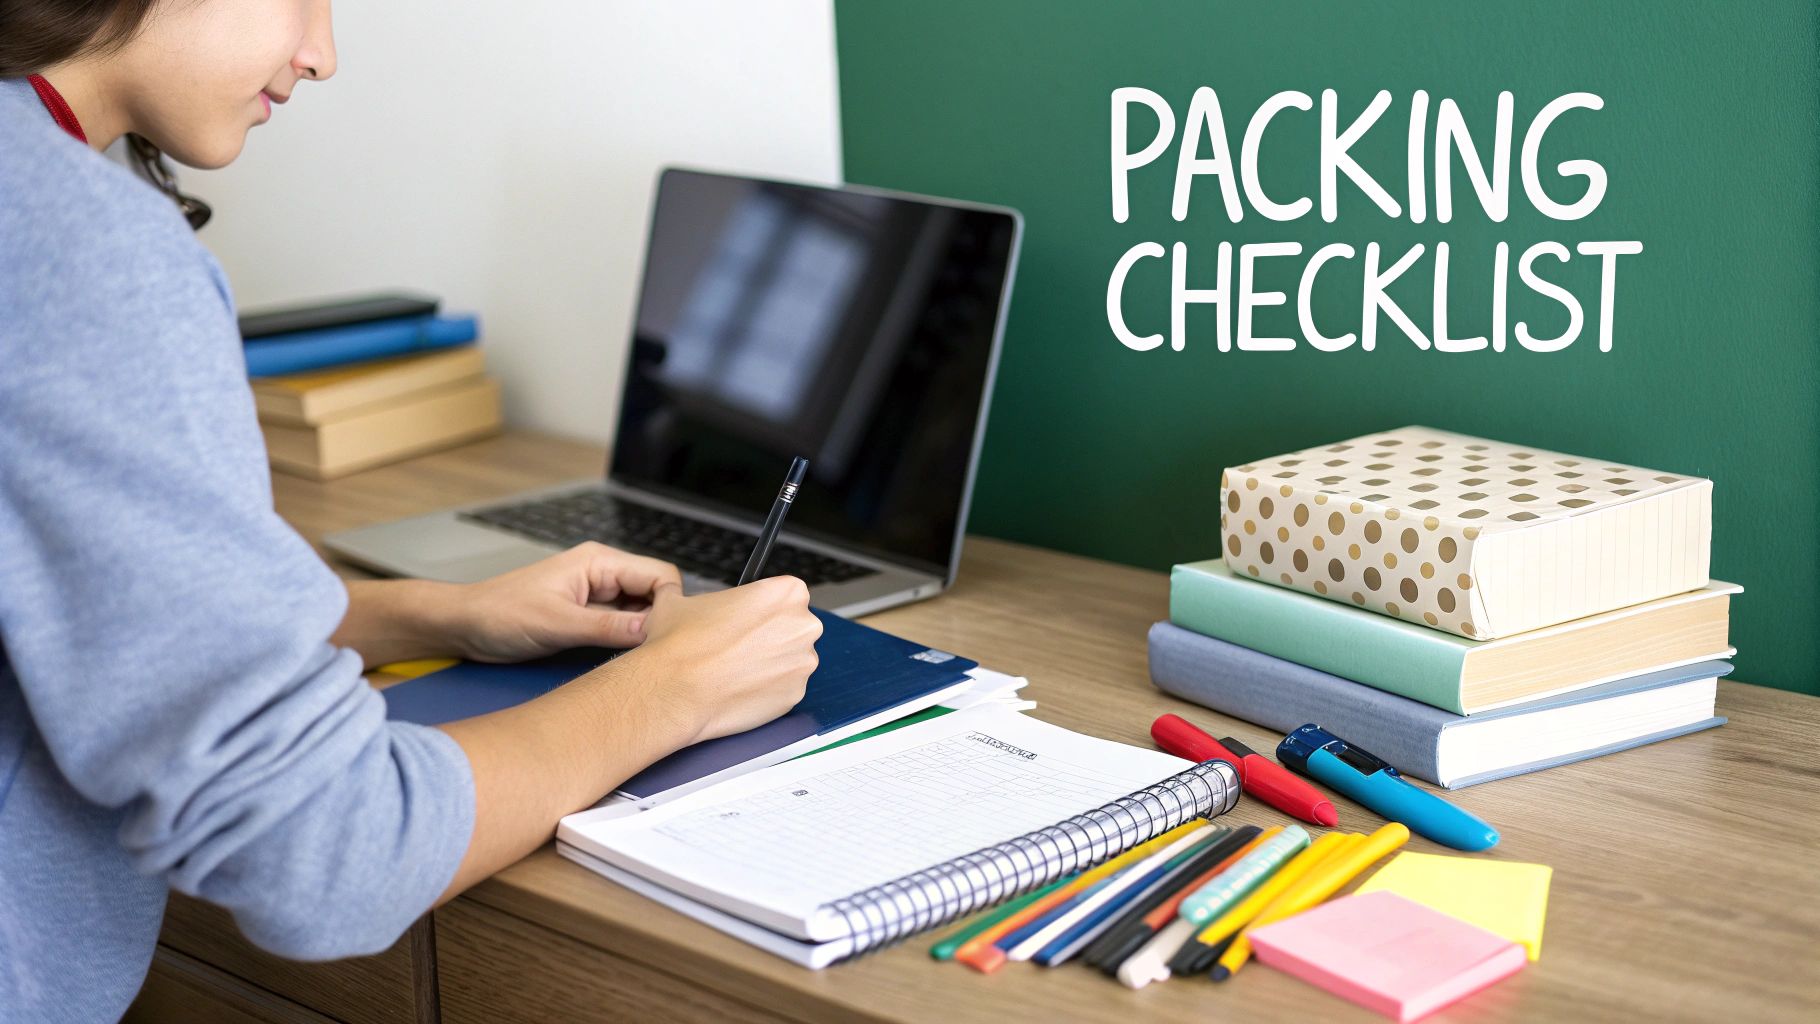
Let's be real: a generic checklist you find online is a decent starting point, but it’s not going to get you through the semester. The best college packing list is one you build around your specific needs, your dorm, and your lifestyle. Thinking through these details is the secret to avoiding the classic mistake of showing up with way too much stuff.
Packing for college is basically a masterclass in prioritization. The average dorm room is only about 12x18 feet, and you’re probably sharing that tiny footprint with a roommate. This means every single item you bring needs to earn its spot. To get started, let's break your list down into a few core areas.
Dorm Room Necessities
This is everything that turns your small space into a functional and comfortable home base. It’s where you’ll sleep, study, and unwind, so you need to balance comfort with pure practicality.
Your bed is the main event here, and most colleges use Twin XL mattresses, so make sure you get the right size bedding.
- Bedding Basics: You'll want two sets of Twin XL sheets (one for the bed, one for laundry day), a good comforter, a mattress topper for extra comfort, and a couple of quality pillows. A cozy blanket for late-night study sessions is also a game-changer.
- Smart Storage: With space at a premium, vertical and under-bed storage are your best friends. Think about getting stackable drawers, over-the-door shoe organizers, and slim hangers to maximize every inch of your closet.
- Room Comfort: A small fan is a non-negotiable, as many dorms don’t have individual climate control. Also, a sturdy power strip with surge protection is essential for keeping all your electronics juiced up.
Don't stress about creating a perfectly decorated room on day one. Just focus on the absolute essentials for sleeping and studying. You can always add the fun, decorative touches after you've settled in and actually know the space.
Bathroom and Personal Care
Whether you're sharing a bathroom with the whole floor or just a few suitemates, organization is key. A shower caddy is non-negotiable for hauling your shampoo, soap, and other toiletries back and forth.
And please, remember to pack shower shoes—flip-flops are perfect—for hygiene in those shared spaces. It’s also a good idea to bring two sets of towels, so you always have a clean one ready. Beyond that, a small first-aid kit with basics like bandages, pain relievers, and any personal medications is a smart move.
This category is full of small things that are easy to forget but a pain to live without, so making a detailed sub-list for these items can save you a last-minute scramble.
Academic and Tech Supplies
Even with so many classes going digital, you’ll still need some old-school supplies. A sturdy backpack is a given, but also think about what helps you study best. This might be a few notebooks, your favorite pens and highlighters, and a planner to stay on top of deadlines.
Your tech is your lifeline to your classes and your social life. Make sure you have your laptop, phone, and all the right chargers. An external hard drive is a wise investment for backing up important papers, and a good pair of noise-canceling headphones will be your savior in a bustling dorm or library.
Packing for college involves a lot of planning, and students often spend four to six weeks getting ready. To keep things straight, labeling your boxes is a trick endorsed by over 75% of college move-in coordinators. It makes unpacking a thousand times easier.
Clothing and Personal Items
This is the category where overpacking runs rampant. Instead of hauling your entire wardrobe, think seasonally. Pack what you’ll need for the first few months, and plan to swap clothes out during a trip home or over a break.
Pay close attention to the climate where your college is located. If you're going from a warm place to a cold one, you’ll need to pack layers, including a real winter coat, gloves, and a hat. Don't forget to have options for different situations.
- Everyday Wear: Jeans, t-shirts, and sweaters.
- Activewear: For the gym or intramural sports.
- Something Formal: For class presentations or special events.
- Loungewear: As you build your packing list, don't forget a few comfortable loungewear options for just relaxing in your dorm.
While this list is geared toward dorm life, most of these ideas apply to off-campus apartments, too. For more tips on that, check out our guide to first apartment essentials. The core concept is always the same: be intentional and prioritize what you'll actually use.
Master the Art of Space-Saving Packing
Let's be real: dorm rooms are tiny. Every last square inch is prime real estate. If you want to win the battle against clutter before it even starts, you have to pack like a pro. This isn't about leaving things behind; it's about fitting more into less space with smart techniques that will make unpacking a total breeze.
Your entire move-in experience can change based on how you pack. It all begins with rethinking how you handle your clothes, which are almost always the biggest space hogs in any suitcase.
The Military Roll Is Your Best Friend
Forget folding your clothes flat like you’re just putting them in a drawer. The military roll is a complete game-changer when you're packing for college. By rolling items like t-shirts, jeans, and sweatshirts into tight, compact logs, you compress them way more than you'd think possible.
This method works wonders for two reasons. First, it squeezes out all the extra air, shrinking the volume of each piece of clothing. Second, it lets you pack your bins or suitcases like you’re playing a game of Tetris. You can fit these little clothing logs snugly next to each other, filling in every gap. You will be genuinely shocked at how much more you can fit.
Embrace the Power of Vacuum Sealing
Some things are just plain bulky, no matter how you fold or roll them. This is where vacuum-seal bags come in as your secret weapon. For your winter coat, a fluffy comforter, extra pillows, or that stack of thick sweaters, these bags are absolutely essential.
They work like magic:
- Serious Compression: Just toss your items inside, seal the bag, and use any standard vacuum cleaner to suck all the air out.
- Incredible Space Savings: You can literally watch a mountain of bedding shrink down to a thin, flat pancake, often reducing bulk by up to 80%.
- Added Protection: As a bonus, these bags also keep your stuff safe from dust, moisture, and pests while it’s on the move or in storage.
Vacuum-seal bags turn the most awkward, space-eating items into perfectly flat, manageable packages. For a student moving into a tiny dorm, this is more than a convenience—it’s a strategic advantage.
These bags make the impossible possible, like fitting an entire winter wardrobe into a single bin. If you're wondering which ones to get, our guide to the best vacuum storage bags has some solid recommendations.
Choose Smart, Dual-Purpose Packing Supplies
The containers you pack everything in are just as important as how you pack them. If you opt for supplies that can pull double duty, you'll thank yourself on move-in day and for the rest of the semester.
Think beyond those flimsy cardboard boxes. Instead, go for sturdy, clear plastic bins with lids. Not only do they hold up better during the move, but they can slide right under your bed or stack neatly in a closet for instant, organized storage. That means less time spent unpacking and a cleaner room from the get-go.
You can also get creative with how you cushion your fragile items.
- Wrap with Clothes: Use soft things like sweaters or t-shirts to wrap breakables like a desk lamp or picture frames.
- Use Towels for Electronics: Your laptop, speakers, or gaming console will be much safer wrapped snugly in a few bath towels.
- Fill Your Shoes: Stuff socks, chargers, or small toiletries inside your shoes to take advantage of that otherwise wasted space.
This approach means you don't have to buy packing peanuts or bubble wrap, and it makes every single item work for you. Each of these small adjustments adds up, turning the overwhelming task of packing into a puzzle you can actually solve. The goal here is to work smarter, not harder, so you can fit your life into a new, smaller space without leaving the important stuff behind.
Managing the Budget for Your Dorm Setup
Setting up your first dorm room is an incredible feeling, but the sticker shock can hit you hard. Between the bedding, tech, decor, and all those little things you didn't think of, the costs pile up fast. Suddenly, the excitement of independence gets tangled up with financial stress.
But creating a smart budget isn't about sucking the fun out of it. It’s about being strategic so you get everything you need without starting the semester in a financial hole. A little planning now really does pay off later. It helps you prioritize, hunt down deals, and sidestep those impulse buys that drain your account before you’ve even been to a single lecture.
Breaking Down the Costs
Getting a student ready for college isn't cheap. Families spend, on average, around $1,300 on back-to-school items. This covers everything from furniture and electronics to clothes and other must-haves. It’s wild, but electronics like laptops and small appliances can eat up nearly 40% of that initial budget. This is exactly why coordinating with your new roommate is one of the biggest money-savers right out of the gate.
To get a real handle on your own spending, the first thing to do is categorize everything you think you'll need. This gives you a clear picture of where your money is actually going.
- Big-Ticket Items: This is your laptop, a really good mattress topper (don't cheap out on this!), and maybe a mini-fridge. These are the heavy hitters and will be your largest single purchases.
- Mid-Range Necessities: Think bedding sets, desk organizers, a decent lamp, and storage bins. They don't seem like much on their own, but they add up surprisingly fast.
- Small Essentials & Decor: This bucket holds everything from toiletries and cleaning supplies to posters and throw pillows. It’s also the easiest category to accidentally overspend in.
Smart Strategies for Saving Money
Once you have a list, it’s time to get resourceful. You absolutely do not need to buy everything brand new or all at once. Patience and savvy shopping are your best friends here.
One of the smartest first moves? Have an honest chat with your future roommate. Set up a shared Google Doc and start divvying up the big, shared items—the microwave, the area rug, the coffee maker. Just like that, you’ve cut your costs on those items in half.
The goal isn't to be cheap; it's to be resourceful. Every dollar you save on a desk lamp is a dollar you can use for textbooks, late-night pizza, or building an emergency fund.
Next, become a deal hunter. Summer is primetime for back-to-school sales everywhere from Target to Bed Bath & Beyond. Sign up for student discounts wherever you can; a valid student ID can get you huge markdowns on tech and clothing.
And don't sleep on thrift stores or Facebook Marketplace for gently used things like lamps, storage drawers, or even a mini-fridge. You can also explore our guide on budget storage ideas for more clever ways to get organized without draining your bank account.
What to Buy Now vs. What Can Wait
One of the biggest mistakes I see students make is feeling like they need a perfectly curated, Instagram-worthy dorm room on day one. You don't. Focus on what you absolutely need for the first couple of weeks, and plan to pick up the rest as you go.
Buy Before You Go:
- Bedding: You need a comfortable place to crash from the very first night. A quality mattress topper is non-negotiable for those awful dorm mattresses.
- Laptop and Chargers: Your classes will start right away, so this is essential from the jump.
- Medications and Toiletries: Bring enough of your personal care items to last you at least the first month while you get settled.
Buy After You Arrive:
- School Supplies: Wait until you get your syllabi. You'll save money by not buying notebooks for a class that ends up being all digital.
- Bulky Storage Bins: These take up a ton of space in the car. It’s much easier to buy them locally once you see the actual layout of your room.
- Most Decorative Items: Hold off on decor until you and your roommate have settled in and can decide on a vibe together.
- Cleaning Supplies: Easy to grab at a nearby store, and you can split the cost with your roommate.
For anyone on a really tight budget, learning how to make homemade fabric softener is a surprisingly practical way to cut down on recurring laundry costs. Little DIY hacks like this can genuinely make a difference over a whole semester. Phasing your purchases not only spreads out the financial hit but also keeps you from buying stuff you ultimately realize you don't even need.
Your Move-In Day Survival Guide

After all the planning and packing, move-in day is finally here. It’s an exciting, slightly chaotic whirlwind of crowded parking lots, packed elevators, and a whole lot of heavy lifting. The secret to surviving the mayhem is having a solid game plan before you even pull up to the curb.
That plan starts with something you might not expect: how you load the car. It sounds like a tiny detail, but a strategically packed vehicle is the difference between a smooth setup and a frustrating treasure hunt for your toothbrush. Trust me, you don’t want your bedding buried under a mountain of sweaters you won't need until November.
The Art of Loading Your Car
Think about loading the car like a reverse-order puzzle. The stuff you'll need last gets packed first, shoved all the way to the back. This is where you put things like out-of-season clothing, extra school supplies, or those big storage bins filled with non-essentials. They’ll form the base layer of your move-in Tetris game.
Then, the items you'll need right away should be the very last things loaded into the car, keeping them right by the door for easy access. This simple trick ensures your most critical supplies are the first ones out, letting you tackle the big tasks without having to unpack every single box at once. This little shift in strategy is a core part of packing for college efficiently.
Assembling Your 'First Night' Box
One of the best tools you can have on move-in day is the 'First Night Box'. This should be a clearly labeled, maybe even an open-top bin, that holds everything you need to get through the first 24 hours in your new room. Critically, this box stays with you—it doesn't get buried in the car.
The First Night Box is your immediate relief kit. It prevents that late-night panic when you're exhausted and realize your phone charger, pillow, and medications are still somewhere in a pile of identical brown boxes.
So, what should go in this essential kit? You can tailor it to your needs, but here are the absolute must-haves:
- Bedding Essentials: A set of sheets, a pillow, and a blanket. After a long day, you'll be so grateful for a comfortable place to crash.
- Basic Toiletries: Don’t forget your toothbrush, toothpaste, soap, deodorant, and a towel.
- Important Medications: Any prescriptions you need, plus some basic pain relievers just in case.
- Tech Lifelines: Your phone charger and a portable power bank are non-negotiable.
- Simple Tools: A small toolkit with a screwdriver and scissors is super helpful, along with paper towels and cleaning wipes for a quick wipe-down of dusty surfaces.
- Comfort Items: A reusable water bottle and some of your favorite snacks will keep your energy up.
Having these items separate and accessible means you can make your bed and feel a little more settled long before the real unpacking begins. This one box brings a sense of calm to an otherwise overwhelming day.
Navigating the Check-In and Unload Process
When you get to campus, be ready for a flurry of activity. You'll likely be sent to a temporary unloading zone with a strict time limit. This is where your smart car-packing strategy really shines.
Work as a team with your family to get everything out of the car and onto the curb as fast as you can. As soon as the car is empty, one person should immediately go move it to a designated long-term parking spot. The others can start guarding the pile and figuring out the elevator situation. Expect long lines; if your room is on a lower floor, taking the stairs for lighter boxes will save a ton of time.
Once you’re in the room, the goal isn't to unpack everything at once. Just start with the basics.
- Wipe down dusty surfaces like the desk and inside the drawers.
- Use the items from your First Night Box to assemble and make your bed.
- Try to get larger furniture pieces into their final positions before the room fills up with boxes.
Getting these fundamentals handled first creates a functional home base to work from. You can tackle the rest of your boxes over the next few days. For a more detailed walkthrough, our complete moving-in checklist can guide you through the entire process. This approach helps you manage the day's tasks without getting stressed, letting you actually enjoy the excitement of starting this new chapter.
Common Questions About Packing for College
Even with the best packing list on the planet, questions always pop up. The whole process is filled with little details that can make you second-guess everything. Let's tackle some of the most common questions to give you that final boost of confidence before move-in day.
Getting these answers straight can help you sidestep some classic rookie mistakes and make your transition to campus life feel a whole lot smoother. Think of this as the final check-in before you hit the road.
What Is the Biggest Packing Mistake Students Make?
Hands down, the single biggest mistake is overpacking. It’s so tempting to bring every little piece of home with you, but you have to remember that dorm rooms have brutally limited storage. The usual suspects? Clothing and decorative items.
You really don't need your entire wardrobe for all four seasons on day one. The smartest approach is to pack for the current weather and plan to swap things out during a visit home or over a school break. As for decor, hold off until you see the actual space. It's much easier to coordinate with your roommate and create a cool, uncluttered vibe once you're both there.
Should I Buy Everything Before I Leave?
Absolutely not. In fact, it's way smarter to buy a lot of your stuff after you get to campus. This strategy alone saves a massive amount of precious car space on what's already going to be a chaotic move-in day.
Bulky items are prime candidates for this "buy it there" approach:
- Storage bins and drawer units
- Snacks and drinks
- Most school supplies
- Certain toiletries like shampoo and soap
Buying these things locally also gives you a chance to see what you genuinely need after checking out your room’s layout. Focus your pre-packing energy on the absolute essentials you'll need for that critical first week.
"The most common mistake is overpacking, especially clothing and decorative items. Dorm rooms have extremely limited closet and storage space. Before buying a lot of decor, wait to see the actual space and coordinate with your roommate."
How Should I Coordinate with My Roommate?
The minute you get your roommate’s contact info, reach out. Seriously. A quick, friendly introduction can set a positive tone for the entire year. Once you've broken the ice, you can shift the conversation to logistics.
A shared Google Doc or Sheet is perfect for this. Make a list of the bigger items you'll both use—things like a mini-fridge, microwave (if your dorm allows it), an area rug, a TV, or a coffee maker. Then, just assign who will bring what. This simple step prevents you from showing up with two of everything, saves a surprising amount of money and space, and marks your first successful collaboration.
What Essential Documents Should I Not Forget?
This one is critical. Amidst all the boxes of bedding and clothes, it’s shockingly easy to forget the one small folder of paperwork that is absolutely essential. Keep these documents together in a secure, easily accessible place—not buried at the bottom of a random box.
Your "can't-forget" documents folder should include:
- Identification: Your driver’s license or state ID, plus a copy of your social security card and birth certificate.
- Health Information: Health and dental insurance cards are a must for any medical needs that pop up.
- Financial Records: Any financial aid award letters or scholarship documents you might need to reference.
- College Paperwork: Your housing confirmation, registration papers, and any other official letters from the university.
Having these on hand will save you from a major headache if you need them for on-campus jobs, financial aid questions, or unexpected doctor visits.
Navigating the complexities of packing, moving, and storing your belongings between semesters can be a challenge. At Endless Storage, we simplify the process with our convenient storage-by-the-box service, delivering everything you need right to your door. Learn how we can make your college transitions seamless at https://www.endless-storage.com.
Frequently Asked Questions
Unveiling the Secrets to Effortless Storage
Endless Storage is available nationwide. You pick a plan, tell us where to pickup, and we'll send a UPS van to collect, whichever state you're in.
Your shipping label will be sent to your email within a few minutes, if not instantaneously. It can also be accessed through your customer profile.
Your box will be shipped to one of our climate controlled self storage facilities in our closest self storage facility. Our manager will accept your package, notify you that your box has been received, and securely stored. Only our managers will have access to Endless Storage boxes.
Email us at admin@endless-storage.com click to live chat with us, or send us a message below.
Never! We're committed to transparent pricing with no surprises. You'll lock in your rate with no hidden fees and no long-term contracts.
Fast access guaranteed! Your boxes will arrive at your doorstep within 48 hours of requesting them back. Need to check on delivery? We provide tracking information for complete peace of mind.
Totally flexible! Store month-to-month with no long-term commitment and cancel anytime.
Everything's online! Use your account dashboard to:
• Set up automatic monthly payments
• Request box returns
• Update your address
• Order additional boxes
• Track shipments
Your boxes are insured up to $100 each. Our customer service team will help you file any necessary claims and resolve issues quickly.
Don't worry – we'll email you right away if there's a payment issue. Your items stay safe, though you may have temporary service interruption or late fees until payment is resolved.
When you request our free storage kits, you'll have 30 days to send in your boxes to activate your 3 months of free storage. Think of it like starting a gym membership – your activation window begins when you receive your kits, and your full free trial begins once you send in your first box. During your free months, you'll experience our complete storage service at no cost.
Your 30-day activation window begins when you receive your storage kits. We'll send you an email confirmation when your kits are delivered, marking the start of your activation period.
If you haven't sent any boxes for storage within your 30-day activation window, your free trial will expire and we'll begin charging the regular monthly rate of $9.99 per box. This helps ensure our storage kits go to customers who are ready to use our service.
A box costs $9.99 per month to store (plus sales tax). This price includes free shipping for standard boxes under 50 lbs. and smaller than 16"x16"x16"
Log into your Endless Storage account, locate the box you would like returned, and simply click Return My Box.
Yes, each box stored with us is insured for up to $100 throughout transit as well as the duration of storage within our facilities.
Your box will be at your doorstep within 48 hours of you requesting it back.
Store 10+ boxes? We'll pick them up for free! After your purchase, we'll contact you to schedule a convenient pickup time and arrange UPS collection.
We trust UPS with all shipments, and every box includes $100 insurance coverage. You'll receive tracking information to monitor your items' journey.
Yes! Visit any of our locations by appointment. Just bring a photo ID matching your customer profile.
For everyone's safety, we can't store hazardous materials, firearms, or perishables. All items must fit within our standard boxes.
It's easy! Order your storage kit online, and we'll ship it to you within 1-2 business days. Your shipping labels will be emailed instantly and available in your account.
We're here to help! Email us at admin@endless-storage.com, use our live chat, or send us a message through your account.
To cancel your storage service with Endless Storage, please email your cancellation request to admin@endless-storage.com. Our team will process your request within 2 business days and confirm your cancellation via email.
We understand packing takes time. However, to maintain your free trial benefits, you'll need to send at least one box within the 30-day activation window. If you need more time, you can always start with one box to activate your trial and send the rest later. You can always reach out to admin@endless-storage.com if you have any issues or concerns.
When you request our free storage kits, you're starting a 30-day window to begin using our storage service.
Important: To activate your free trial, send at least one box for storage within 30 days. If no boxes are sent within this 30-day window, a one-time $50 fee applies to cover materials and shipping costs. This fee is clearly disclosed before you sign up.
Think of it like reserving a hotel room – we're setting aside space and sending specialized packing materials for your use. The fee only applies if you request materials but don't begin storage, similar to a hotel's no-show charge.