Packing electronics isn't just about bubble wrap and boxes. It’s a whole strategy. You need to think about backing up your data, getting the right anti-static materials, and, my personal favorite tip, taking photos of your cable setups before you unplug a single thing. Trust me, this little bit of prep work now saves a mountain of headache when you're trying to reassemble everything in your new home.
Your Pre-Move Electronics Packing Strategy
Before you even think about grabbing the packing tape, you need a game plan. Seriously, thinking through this process now will save you from costly mistakes and that sinking feeling of "where does this wire go?" later. Your electronics—from your work-from-home command center to your weekend entertainment system—are valuable, fragile, and demand a bit more respect than a box of old T-shirts.
A successful tech move starts long before the boxes appear. The absolute first thing you need to do? Protect your digital life. Hard drives can get bumped and devices can get damaged, making a solid backup a complete non-negotiable.
Safeguard Your Data First
Picture this: you've just unpacked in your new place, you go to boot up your computer, and… nothing. The hard drive was damaged in transit, and with it, years of family photos and critical documents are just gone. It's a nightmare scenario, but it's also entirely avoidable.
Before you disconnect a single cable, do a complete backup of your computers, laptops, and any external hard drives. I always recommend using a two-pronged approach: use a cloud service and a physical external drive that you personally keep with you during the move.
An essential part of your pre-move strategy is ensuring the security of your personal data; learn how to protect personal data before selling old phones, as many of the same principles apply to devices you're keeping but moving.
Declutter Your Tech
A move is the perfect excuse to finally take inventory of all those gadgets. Do you really need that old DVD player? What about that printer that’s been collecting dust for three years? Culling your obsolete or broken electronics not only saves you packing time but also prevents you from cluttering up your new space. For a complete rundown, check out our guide on how to https://www.endless-storage.com/blog-posts/declutter-before-moving—it has a fantastic room-by-room strategy.
As you sort through your tech, divide everything into three piles:
- Keep and Pack: These are your daily drivers, the essential items you can't live without.
- Donate or Sell: Got something that still works but you just don't use anymore? Give it a new life.
- Recycle: Make sure you dispose of broken or ancient electronics responsibly at a certified e-waste facility.
This initial phase of backing up data and decluttering your gear sets the stage for a much smoother packing process. Once you know your digital files are safe and you've streamlined your inventory, you can confidently start gathering the right supplies for the tech you're actually taking with you.
Gathering Your Essential Packing Supplies
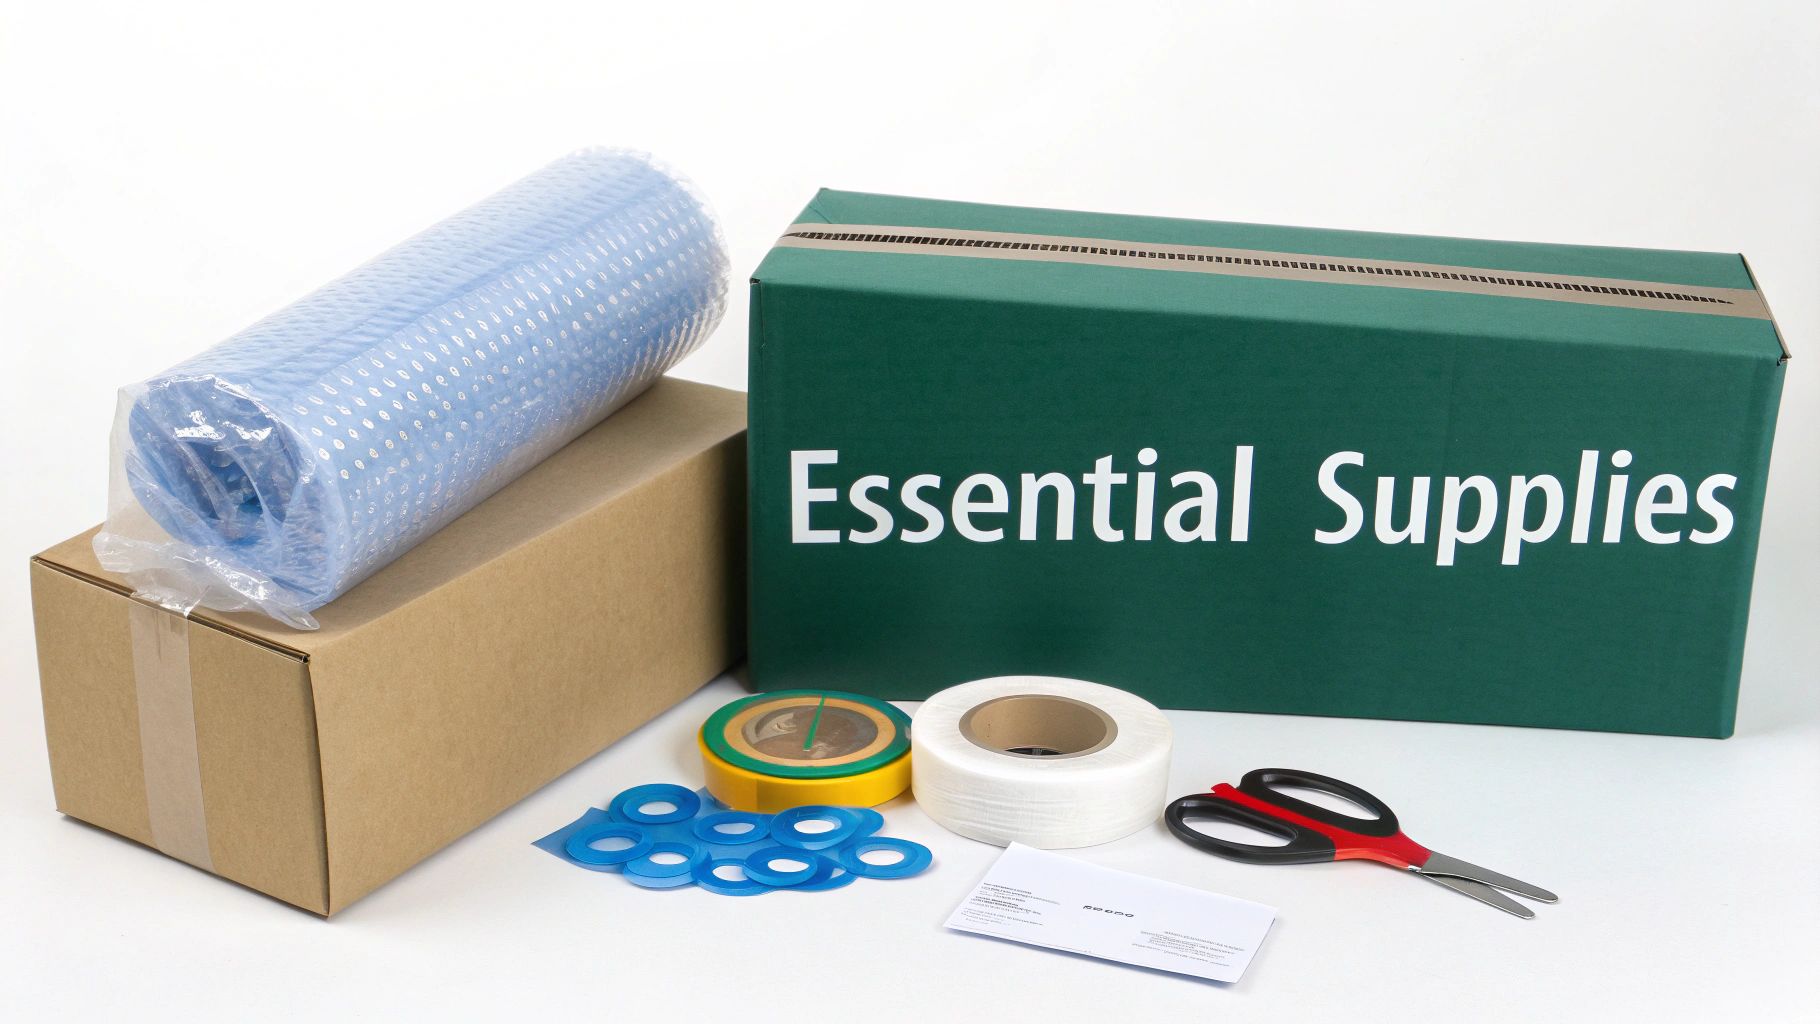
Trying to pack expensive electronics with the wrong supplies is a gamble you don't want to take. Before you even think about unplugging your TV or laptop, you need to get your toolkit ready. This is about more than just grabbing a few spare boxes; it's about creating a bulletproof shield for your valuable tech.
The consumer electronics market is on track to hit an incredible $1.42 trillion by 2033. But here’s a more sobering number from the moving industry: roughly 15-20% of electronics packed without the right materials get damaged in transit. Using the right gear is your best defense against becoming part of that statistic. You can see the full scope of the industry in this Data Bridge Market Research report.
Strong Boxes and Smart Cushioning
The box you choose is probably the single most important decision in this process. You'll want sturdy, double-walled cardboard boxes that are just a bit larger than the device itself. That extra room isn't for sloshing around—it's for adding a protective buffer.
When it comes to that buffer, not all cushioning is created equal. For sensitive electronics, you need materials that do two things: absorb shock and prevent static electricity.
- Anti-Static Bubble Wrap: This is a non-negotiable for things like internal computer parts, motherboards, or anything with exposed circuitry. You'll know it by its signature pink color, which means it’s designed to dissipate static that can easily fry delicate components.
- Standard Bubble Wrap: Perfect for the outside of your laptop, monitor, gaming console, or printer. It provides that classic, reliable shock absorption you need for the inevitable bumps and jostles of moving day.
- Packing Peanuts or Foam Inserts: Once your item is wrapped and in the box, use these to fill every last inch of empty space. Any movement inside the box is a potential disaster waiting to happen.
Pro Tip: Whatever you do, never use newspaper to wrap screens. The ink can easily transfer and stain the surface, and the paper itself is abrasive enough to cause tiny scratches on your beautiful displays.
The Gold Standard: Original Packaging
Do you still have the original box your TV or computer came in? If so, use it. Seriously, there is no better option.
Manufacturers spend a lot of money designing that packaging—with its custom-fit foam inserts—to perfectly cradle and protect that exact item. It was made to survive the journey from the factory to the store, so it’s more than ready for your move.
If you tossed the original box years ago, don’t sweat it. You can find specialty moving kits for things like flat-screen TVs or iMacs. These kits are designed to mimic the security of the original packaging, complete with heavy-duty boxes and custom-fit foam corners.
Must-Have Organizational Tools
Finally, let's talk about the small stuff that makes a huge difference. An organized move is a smooth move, especially when it comes time to unpack and set everything back up.
- Cable Ties or Velcro Straps: Tame the dreaded "cable spaghetti."
- Ziploc Bags: Keep all the cords, screws, and remotes for one device together in a single, labeled bag.
- Markers and Labels: Clearly mark every box with what's inside, which room it belongs in, and a big, bold "FRAGILE."
To help you get started, I've put together a quick checklist of the essentials. Think of this as your shopping list for a damage-free move.
Electronics Packing Supply Checklist
Having this gear on hand makes the whole process smoother and gives you peace of mind that your expensive tech will arrive in one piece.
Gathering these specific items is the first real step in mastering how to pack electronics for moving. If you need more ideas on what to get, check out our in-depth guide to the best packing supplies for moving. With the right tools laid out, you're ready to start prepping your devices.
With your supplies gathered, it's time to turn your attention to the electronics themselves. Every gadget in your home, from that beast of a gaming PC to the paper-thin screen on your OLED TV, needs its own specific packing strategy. This isn't a one-size-fits-all job.
Think of this part as a pre-packing ritual. It’s where you go through each device, one by one, to make sure it's protected from drops, bumps, static shock, and even internal leaks.
Desktop Computers and Monitors
Your desktop computer is probably one of the most valuable and complex items you'll move. The first step is simple: power it down completely and unplug everything. But before you start yanking cables, snap a quick photo of the back of your PC. Trust me, having a visual map of where everything plugs in will save you a massive headache later.
Next, gather all the cables—power, monitor, keyboard, etc.—and bundle them together with a zip tie. Pop them into a Ziploc bag and label it "PC Cables." Now for the tower. If you've got a massive graphics card or a heavy aftermarket CPU cooler, it's a smart move to take them out. The bumps and vibrations of a moving truck can put a surprising amount of stress on the motherboard slots, which can lead to heartbreaking damage. Wrap these parts separately in anti-static bubble wrap.
Monitors are notoriously fragile, especially the new curved and ultra-wide models. Always detach the stand and wrap it on its own. Protect the screen itself with a layer of foam sheeting or a few layers of bubble wrap. Use packing tape to hold it in place, but make sure the tape only sticks to the wrap, never directly to the screen.
Televisions and Entertainment Systems
Packing a modern flat-screen TV can be a truly nerve-wracking experience. Those screens are unbelievably thin and can crack under the slightest pressure. If you were smart enough to keep the original box, you’re golden—that’s your best bet. If not, investing in a specialty TV moving box with foam corner protectors is absolutely worth the money.
Apply that same careful approach to the rest of your entertainment setup:
- Gaming Consoles: Make sure to eject any discs first, then unplug all the cables. Again, the original box is ideal, but any snug-fitting box with plenty of padding will do the trick.
- Speakers: The cones on speakers are easily dented, so wrap them thoroughly. If you have high-end audio gear, keeping the specific cables paired with their corresponding devices is key to a smooth setup in your new place.
- Remotes and Controllers: Always take the batteries out. This prevents them from leaking and causing corrosion during the move. If you do find any existing gunk, it's a good idea to learn how to fix battery corrosion before packing everything away.
Considering the global electrical and electronics market is worth around $3.84 trillion, it's clear our homes are filled with valuable tech. Protecting these items from shocks, static, and humidity isn't just a good idea—it's essential for avoiding expensive replacements. Using anti-static materials and foam inserts is the best insurance policy you can have.
Laptops, Tablets, and Small Devices
When it comes to smaller, portable electronics, the name of the game is snug protection. Laptops should always go into their padded sleeves or cases first. Then, place the cased laptop inside a sturdy box with cushioning on all sides. Whatever you do, don't just toss a loose laptop in a box with a bunch of other stuff.
The same logic applies to tablets, e-readers, and handhelds like the Nintendo Switch. Use their original cases if you have them, or wrap them securely in bubble wrap. Place them in a small box with enough padding so they can't shift around. And if you plan on putting any of these devices away for a while after the move, it pays to prep them for storage properly. You can check out our guide on how to store electronics safely for the long term for more tips.
A Critical Reminder: Before you pack your printer, always take out the ink or toner cartridges. Place them in a sealed bag to prevent a messy leak. Look for the manufacturer's instructions on securing the printer's moving parts with tape—this stops them from rattling around and breaking during the trip.
Mastering How to Box Your Electronics
Okay, with all your devices prepped and ready, it's time to get them into their moving boxes. This is where the real magic happens. Properly boxing your electronics is a bit of an art form, balancing a snug fit with just the right amount of cushioning. Done right, a simple cardboard box becomes a protective vault for your most valuable gear.
The absolute biggest enemy of electronics during a move is empty space. It's that simple. Any gap inside a box lets your items shift, vibrate, and slam against the sides, which is exactly how things get broken. Your main mission here is to make sure nothing can move an inch.
This quick flow chart breaks down the essential steps you'll take before anything even touches a box.
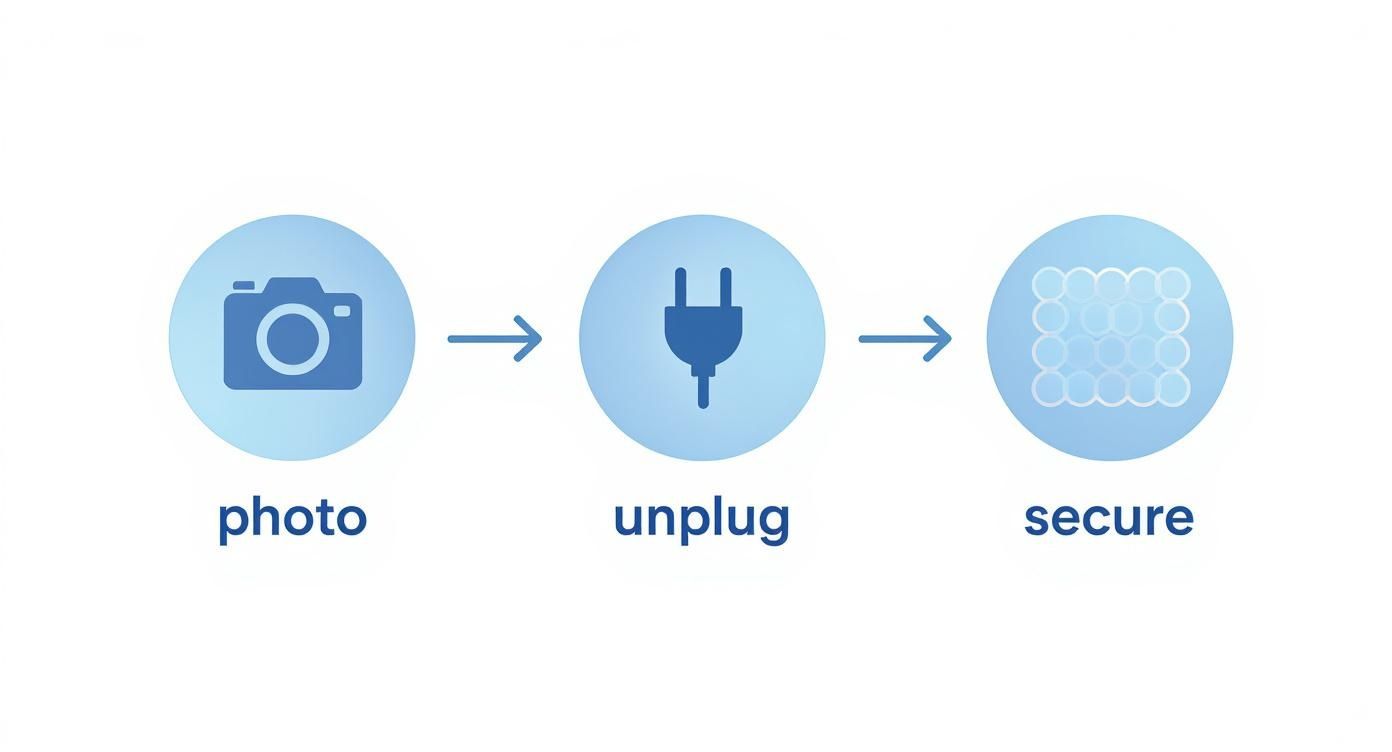
As you can see, it really boils down to three core actions: documenting how everything connects, unplugging it all, and then securely wrapping the device itself.
Creating a Protective Base
Before a single item goes into the box, you need to build a shock-absorbing foundation. Start by lining the bottom with a generous layer—at least two inches—of crushed packing paper, packing peanuts, or even a foam insert. This base layer is your first line of defense against unexpected bumps and drops.
Once that cushioned base is in place, set your main wrapped electronic item right in the center of the box. Now you can place any related components around it, like its stand or that Ziploc bag of bundled cables. Just make sure there's at least a two-inch buffer of space on all sides between the device and the box walls.
The Box-in-a-Box Method for Ultimate Safety
For those really delicate or high-value items—think a custom-built gaming PC or a pricey turntable—the standard approach might not feel like quite enough. This is where the box-in-a-box method comes in to provide an unbeatable layer of security.
- First, pack your electronic device into a snug-fitting box (we'll call it Box A), using all the proper cushioning techniques we've talked about.
- Next, grab a larger, sturdier box (Box B) that's at least two to three inches bigger than Box A on all sides.
- Create a cushioned base in Box B, place Box A inside, and then carefully fill all the surrounding empty space with packing peanuts or bubble wrap until it's completely immobilized.
This technique essentially creates a floating, shock-proof chamber that can absorb even the roughest handling. It's the same principle professionals use to ship sensitive scientific instruments, making it the gold standard for protecting your most precious tech.
By mastering a few core techniques, you can ensure your electronics arrive safely. The principles of cushioning, filling void space, and proper sealing are universal. For a deeper dive, check out our complete guide on how to pack fragile items for safe shipping, which shares many of the same strategies.
Filling the Void and Sealing the Deal
With your main items nestled in their cushioned base, the final and most critical step is to fill every single remaining gap. Use packing peanuts, air pillows, or wadded-up packing paper to stuff the space around, beside, and on top of your electronics until absolutely nothing can budge.
A great way to test this is to seal the box and give it a gentle shake. If you feel or hear anything shifting inside, you need to open it back up and add more packing material.
Finally, it's time to seal the box securely using what's called the "H-tape" method. This just means you run a strip of packing tape along the center seam and then add two more strips along the edge seams, forming the shape of an 'H'. This simple trick dramatically reinforces the box's structural integrity, ensuring it stays sealed and strong for the entire journey.
Labeling and Inventory for a Smooth Unpacking
You’ve done the hard part. Every device is cushioned, every cord is wrangled, and every box is sealed like Fort Knox. But all that careful work can unravel in an instant if you spend the first week in your new place playing a frustrating game of "guess the box."
This is where a smart labeling and inventory system becomes your best friend. We're not just talking about scrawling "Computer" on the top with a marker. A truly bulletproof system is your roadmap to a sane unpacking process, and it’s critical documentation if anything goes missing or gets damaged along the way.
Develop a Clear Labeling System
Your future self will thank you for this. A good label should tell you three things at a quick glance: which room it belongs in, what’s inside, and how to handle it. This simple system makes life easier for both you and your movers.
An easy win is to use color-coded labels for each room. Grab a pack of multi-colored masking tape or stickers and assign one to each space—blue for the office, green for the living room, you get the idea. This visual shorthand helps movers drop boxes in the right spot without having to read a single word.
Get specific on the label. "TV Stuff" is not your friend when you're desperate to find the remote. Instead, write "Living Room TV - Cords, Remote & Apple TV." Or, instead of just "Computer," try "Office PC Tower & Keyboard." That tiny bit of extra detail will save you from tearing your hair out later.
Finally, make the handling instructions impossible to miss. Plaster these on at least three sides of the box in big, bold letters:
- FRAGILE - ELECTRONICS
- THIS SIDE UP ↑
- DO NOT STACK
Taking an extra ten minutes to label correctly is the difference between a chaotic mess and having your home office up and running in under an hour. It transforms unpacking from a chore into a methodical, satisfying process.
Create a Simple Digital Inventory
For your most expensive electronics, a quick digital inventory is non-negotiable. This doesn't need to be some complex database—a simple spreadsheet or even just a photo album on your phone will do the trick. Trust me, this little bit of prep is invaluable if you need to file an insurance claim.
For each of your big-ticket items, just log a few key details:
- Item Name: "65-inch LG OLED TV"
- Serial Number: Snap a quick photo of the sticker on the back.
- Pre-Pack Condition: Take a clear picture showing it works and is free of damage.
This simple record provides undeniable proof of what you own and what condition it was in before the move. To make it even easier, you can grab our moving inventory list template to keep everything organized. It’s a small step that provides a massive amount of peace of mind.
Common Questions About Packing Electronics
Even with the best plan, you’ll probably run into a few tricky situations when packing up your electronics. It happens. Knowing how to handle these common hiccups ahead of time means you can tackle anything the move throws at you, keeping your valuable gear safe from start to finish. Let's dig into some of the questions we hear most often.
What Should I Do Without the Original Boxes?
Don't panic—this is an incredibly common problem. Very few of us hang on to the original packaging for every gadget we own. The goal is simply to recreate that snug, protected environment using the right materials.
Grab a sturdy, double-walled cardboard box that's just a little bit bigger than the device itself. First, wrap your electronic item completely in anti-static bubble wrap and use packing tape to keep it secure. Before you place it inside, create a soft landing by putting at least two inches of packing peanuts or foam at the bottom of the box.
Now, set your wrapped device right in the center. The next part is crucial: fill every single gap around it with more cushioning material. You want to eliminate any possibility of it shifting around. For bigger items like a TV, you can find specialty moving boxes at most hardware or moving supply stores—they're worth the investment.
Think of it this way: your goal is to suspend the item in the middle of the box, cushioned on all sides. Any empty space is an invitation for damage during transit.
Is Moving Insurance for Electronics Worth It?
In almost every scenario, the answer is a resounding yes. The standard liability coverage that moving companies offer is usually based on an item's weight—typically around $0.60 per pound. This provides virtually no real protection for something lightweight but expensive, like a laptop or tablet. For perspective, a ten-pound, $1,500 laptop might only be covered for $6. That’s barely enough for a cup of coffee.
Before moving day, take a look at your homeowner's or renter's insurance policy. Some policies cover personal belongings while they're in transit, but many don't. If your coverage is lacking, your best bet is to purchase "full value protection" from your movers or a third-party insurer.
Pro tip: Always document your high-value electronics with photos and serial numbers beforehand. Having this on hand will make any potential claim process much smoother.
What Is the Best Way to Manage Cables and Cords?
A tangled nest of cords is the last thing you want to deal with when you’re trying to set up your new space. A little bit of organization before you unplug anything will save you a massive headache later.
- Take a photo: Before you disconnect anything, snap a quick picture of the back of your computer or entertainment center. It’s the perfect visual guide for reassembly.
- Bundle and bag: Neatly wrap the cords for each device using zip ties or velcro straps. Then, pop them into a Ziploc bag and label it (e.g., "Living Room TV Cords").
- Keep them together: The easiest way to avoid losing cords is to tape the labeled bag directly to the wrapped electronic it belongs to. If that's not possible, make sure it's packed in the very same box.
This simple system keeps everything tidy and guarantees you won't be on a scavenger hunt for a power cord when you’re ready to get back online.
When you're dealing with a move, the last thing you need is clutter. If you've sorted through your electronics and found items you need to store, Endless Storage offers a hassle-free solution. We provide the boxes, pick them up, and store your items securely, delivering them back whenever you need them. Free up space and simplify your move by visiting us at https://www.endless-storage.com.
Frequently Asked Questions
Unveiling the Secrets to Effortless Storage
Endless Storage is available nationwide. You pick a plan, tell us where to pickup, and we'll send a UPS van to collect, whichever state you're in.
Your shipping label will be sent to your email within a few minutes, if not instantaneously. It can also be accessed through your customer profile.
Your box will be shipped to one of our climate controlled self storage facilities in our closest self storage facility. Our manager will accept your package, notify you that your box has been received, and securely stored. Only our managers will have access to Endless Storage boxes.
Email us at admin@endless-storage.com click to live chat with us, or send us a message below.
Never! We're committed to transparent pricing with no surprises. You'll lock in your rate with no hidden fees and no long-term contracts.
Fast access guaranteed! Your boxes will arrive at your doorstep within 48 hours of requesting them back. Need to check on delivery? We provide tracking information for complete peace of mind.
Totally flexible! Store month-to-month with no long-term commitment and cancel anytime.
Everything's online! Use your account dashboard to:
• Set up automatic monthly payments
• Request box returns
• Update your address
• Order additional boxes
• Track shipments
Your boxes are insured up to $100 each. Our customer service team will help you file any necessary claims and resolve issues quickly.
Don't worry – we'll email you right away if there's a payment issue. Your items stay safe, though you may have temporary service interruption or late fees until payment is resolved.
When you request our free storage kits, you'll have 30 days to send in your boxes to activate your 3 months of free storage. Think of it like starting a gym membership – your activation window begins when you receive your kits, and your full free trial begins once you send in your first box. During your free months, you'll experience our complete storage service at no cost.
Your 30-day activation window begins when you receive your storage kits. We'll send you an email confirmation when your kits are delivered, marking the start of your activation period.
If you haven't sent any boxes for storage within your 30-day activation window, your free trial will expire and we'll begin charging the regular monthly rate of $9.99 per box. This helps ensure our storage kits go to customers who are ready to use our service.
A box costs $9.99 per month to store (plus sales tax). This price includes free shipping for standard boxes under 50 lbs. and smaller than 16"x16"x16"
Log into your Endless Storage account, locate the box you would like returned, and simply click Return My Box.
Yes, each box stored with us is insured for up to $100 throughout transit as well as the duration of storage within our facilities.
Your box will be at your doorstep within 48 hours of you requesting it back.
Store 10+ boxes? We'll pick them up for free! After your purchase, we'll contact you to schedule a convenient pickup time and arrange UPS collection.
We trust UPS with all shipments, and every box includes $100 insurance coverage. You'll receive tracking information to monitor your items' journey.
Yes! Visit any of our locations by appointment. Just bring a photo ID matching your customer profile.
For everyone's safety, we can't store hazardous materials, firearms, or perishables. All items must fit within our standard boxes.
It's easy! Order your storage kit online, and we'll ship it to you within 1-2 business days. Your shipping labels will be emailed instantly and available in your account.
We're here to help! Email us at admin@endless-storage.com, use our live chat, or send us a message through your account.
To cancel your storage service with Endless Storage, please email your cancellation request to admin@endless-storage.com. Our team will process your request within 2 business days and confirm your cancellation via email.
We understand packing takes time. However, to maintain your free trial benefits, you'll need to send at least one box within the 30-day activation window. If you need more time, you can always start with one box to activate your trial and send the rest later. You can always reach out to admin@endless-storage.com if you have any issues or concerns.
When you request our free storage kits, you're starting a 30-day window to begin using our storage service.
To avoid any charges, simply send at least one box for storage within 30 days to activate your 3-month free trial. If you decide not to use our service and don't send any boxes within the 30-day window, a one-time $50 fee will apply to cover the costs of materials and shipping. This helps ensure our storage kits go to customers who are ready to use our service.
Think of it like reserving a hotel room – we're setting aside space and sending specialized packing materials for your use. The fee only applies if you request materials but don't begin storage, similar to a hotel's no-show charge.
