8 Options for the Best Way to Organize Photos in 2025

In an era where every smartphone user is a prolific photographer, the sheer volume of our digital memories can quickly become overwhelming. We capture thousands of moments, from milestone events to fleeting daily joys, creating a vast, often chaotic, digital archive. The challenge isn't just storing these images; it's about making them accessible, meaningful, and enjoyable for years to come. Finding the single best way to organize photos can feel like an impossible task because the ideal system is deeply personal, depending on your goals, collection size, and technical comfort level.
This guide moves beyond generic advice to present a curated roundup of eight powerful, distinct methodologies. We will explore everything from automated AI systems to meticulous manual folders, providing the actionable details you need to transform your sprawling photo library into a beautifully organized collection. Each method offers a unique approach to managing your images, ensuring you can find any photo you need, whenever you need it. Whether you're dealing with a lifetime of snapshots or just a few years of smartphone pictures, these strategies will help you regain control. For those focusing on family pictures, these principles are crucial; you can find more specific tips in this guide on How to Organize Family Photos Easily and Effectively.
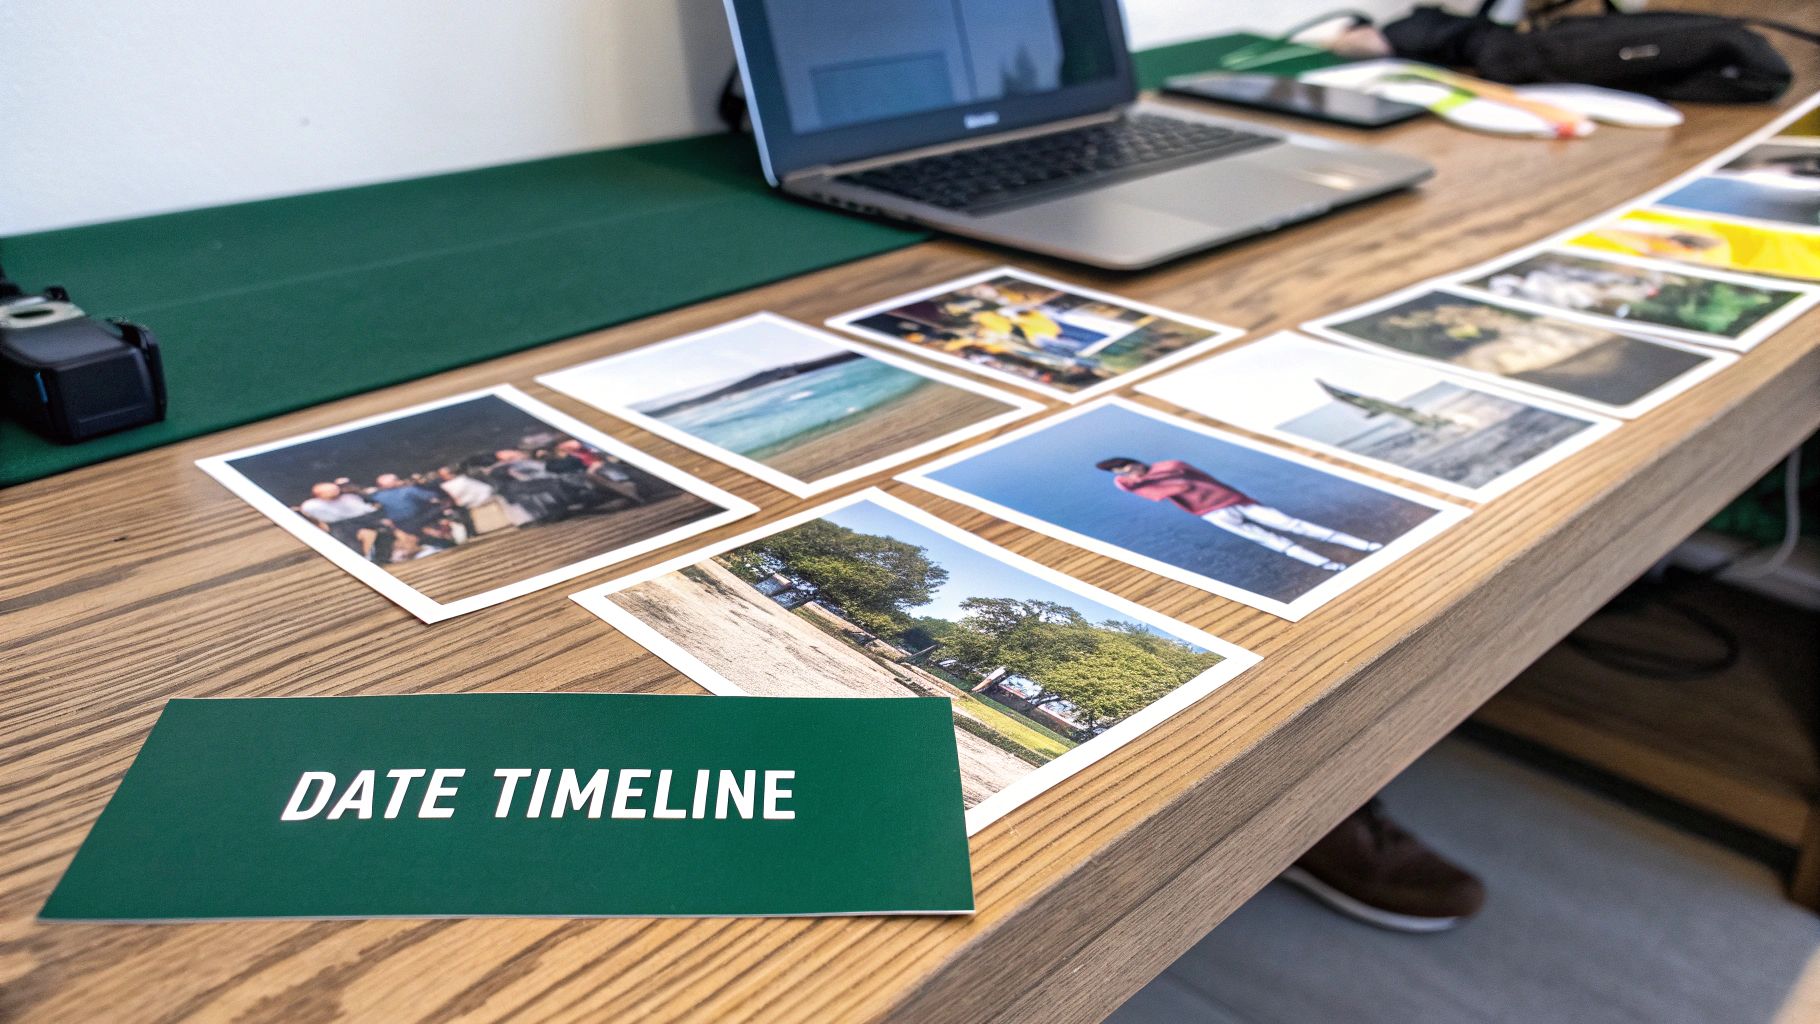
1. Method 1: The Chronological Dating System for a Seamless Timeline
The chronological dating system is arguably the most intuitive and foundational method for organizing photos. It arranges your images in the order they were taken, creating a seamless and linear story of your life. This approach leverages the EXIF data, which is the timestamp information automatically embedded into every digital photo by your camera or smartphone.
Most modern photo management software, including Google Photos, Apple Photos, and even the basic Windows Photos app, defaults to this timeline view. This makes it an incredibly low-effort starting point. You can instantly scroll back through months and years to find images from a specific period, making it perfect for revisiting memories exactly as they unfolded. This method provides an immediate, coherent structure without requiring you to manually sort thousands of files.
How to Implement a Chronological System
To elevate this simple timeline, create a structured folder hierarchy on your computer or external hard drive. This manual step adds a layer of clarity that automated timelines sometimes lack. The best way to organize photos using this system is with a consistent naming convention.
- Start with the Year: Create a top-level folder for each year (e.g.,
2024,2025). - Add the Month: Inside each year folder, create subfolders for each month. A good format is
YYYY_MM_Month(e.g.,2025_07_July). - Specify the Event: Within the month folder, create folders for specific events using the format
YYYY_MM_DD_EventName(e.g.,2025_07_04_Independence_Day_BBQ).
This structure combines the automatic sorting of chronology with the powerful clarity of named events, offering a straightforward yet highly effective foundation for any personal photo library.
Pro Tip: Before you start, ensure the date and time settings are correct on all your cameras and devices. For older, scanned photos without EXIF data, use a batch date correction tool (like Adobe Lightroom or a standalone EXIF editor) to assign an approximate date. This will ensure they slot into your timeline correctly.
2. Event and Occasion Based Organization
Beyond a simple timeline, organizing photos by specific events or occasions creates meaningful, story-driven collections. This method groups all images from a single experience, like a wedding, vacation, or birthday party, into a dedicated folder or album. It shifts the focus from when a photo was taken to what the photo is about, making it incredibly easy to find and relive complete moments.
This approach is perfect for sharing, as an entire event can be sent as a single link or folder. It mirrors how we naturally recall memories-not as isolated dates but as holistic experiences. This is one of the best ways to organize photos because it provides context and narrative, transforming a jumble of pictures into a cohesive story you can easily revisit.

How to Implement Event-Based Organization
The key to this system is creating a consistent and descriptive naming convention for your event folders. This ensures you can quickly identify the contents without having to open them. While it requires more manual effort than a purely chronological system, the payoff in accessibility is immense.
- Use a Clear Naming Formula: A highly effective format is
YYYY_MM_DD_EventName_Location(e.g.,2024_08_15_Summer_Vacation_Hawaii). - Be Descriptive: Include key details in the folder name. Instead of just "Birthday," use "2025_03_22_Johns_5th_Birthday_Party."
- Nest Within Years: For optimal structure, place these event folders inside their corresponding year folder (e.g.,
2024 > 2024_08_15_Summer_Vacation_Hawaii). - Create Immediately: Get into the habit of creating the event folder right after you upload photos from a specific occasion to prevent them from getting lost in a general "imports" folder.
This method excels for both digital libraries and physical photo albums, making it a versatile strategy for anyone looking to add narrative structure to their collection. If you're also managing physical albums and prints, you may want to investigate some budget storage ideas on endless-storage.com to keep everything tidy.
Pro Tip: Set a minimum photo threshold to decide if an occasion warrants its own folder. For example, a quick lunch with a friend (5-10 photos) might just live in the monthly folder, while a weekend trip (50+ photos) definitely gets its own event folder. This prevents you from creating too many small, unnecessary folders.
3. Keyword Tagging and Metadata System
The keyword tagging and metadata system is a powerful, database-style approach that transforms your photo library into a highly searchable and flexible collection. Instead of relying on a single organizing principle like time or event, this method uses descriptive keywords, people tags, and location data to create multiple access points to every image. This is the best way to organize photos if you need to find specific images quickly, such as "all photos of Mom smiling at the beach in 2023."
This system is the engine behind professional tools like Adobe Lightroom and consumer platforms like Google Photos, which uses AI to automatically tag objects, people, and scenes. By enriching your photos with this data, you move beyond simple folders and create a dynamic, filterable archive. You can instantly pull up every picture of your dog, every landscape from a trip to Italy, or every photo taken with a specific lens, regardless of when they were taken.
How to Implement a Keyword and Metadata System
Effective tagging relies on consistency. The goal is to build a structured vocabulary that you can apply systematically across your entire library. Using photo management software like Adobe Lightroom, digiKam, or even the built-in capabilities of modern cloud services is essential for efficiency.
- Develop a Keyword Hierarchy: Start broad and get specific. For example, a top-level keyword could be
Travel, with sub-keywords likeEurope,Italy, and finallyRome. - Tag People and Places: Consistently tag the people in your photos. Most software uses face recognition to speed this up. Likewise, ensure location data (geotags) is either captured by your camera or added manually.
- Use Batch Tagging: Don't tag one photo at a time. Select all photos from an event (e.g., a birthday party) and apply common keywords like the event name, location, and key people all at once. For more details on this topic, learn more about organizing your family photos.
This method requires an initial time investment, but the payoff is an incredibly precise and searchable photo collection that serves your needs for years to come.
Pro Tip: Create keyword templates or presets for recurring photo types. If you frequently photograph your child's soccer games, a preset could automatically apply tags like "[Child's Name]," "Soccer," "[Team Name]," and the season year, saving you significant time.
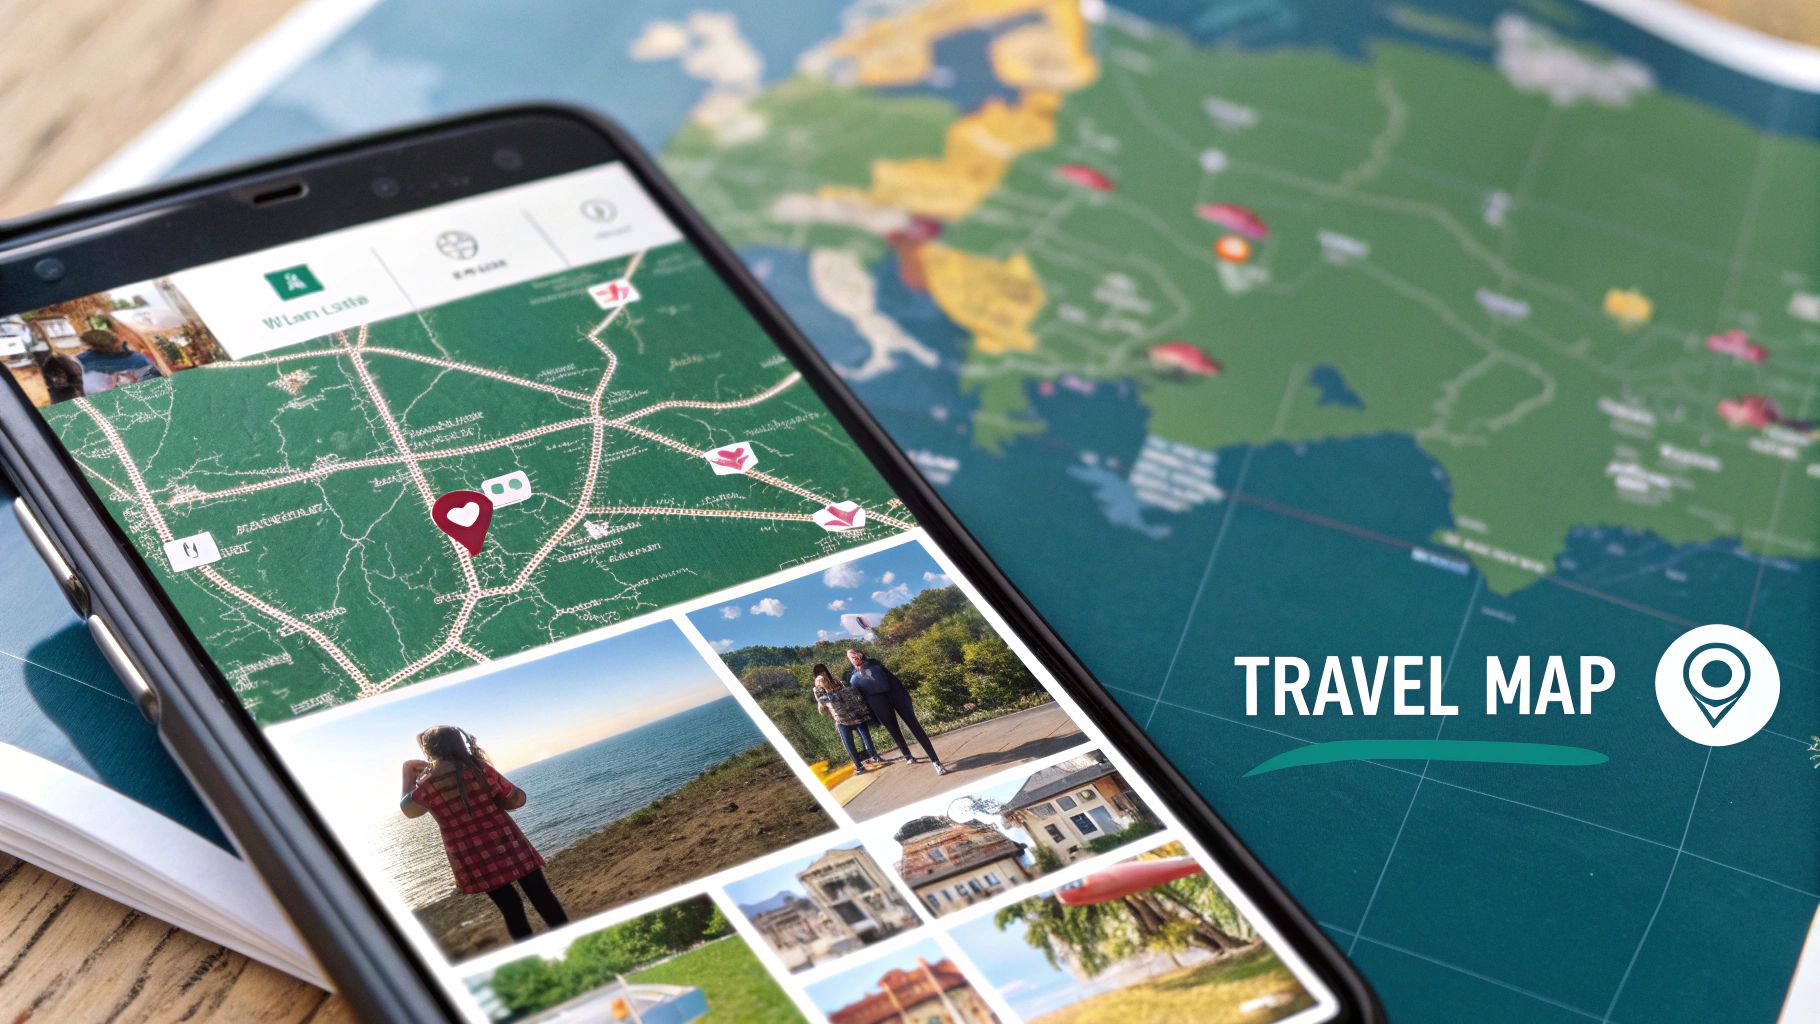
4. Geographic Location-Based Organization
For those whose memories are intrinsically tied to places, the geographic location-based organization method offers a compelling and visual way to archive photos. This approach categorizes your images primarily by where they were taken, transforming your collection into an interactive map of your life's journeys. It leverages GPS metadata automatically embedded in photos by modern smartphones and cameras, allowing you to instantly see all the pictures you took in a specific city, national park, or even a particular restaurant.
This system is perfect for avid travelers, real estate photographers, or anyone who thinks of their memories in terms of destinations rather than dates. Software like Apple Photos and Google Photos excel at this, automatically generating interactive maps where you can zoom into different regions to find your images. It’s a powerful and intuitive way to rediscover your adventures, providing a bird's-eye view of all the places you've captured.
How to Implement a Geographic System
While automated tools are fantastic, a manual folder structure can provide greater control and offline accessibility. This is one of the best ways to organize photos if you want a system that doesn't rely solely on software. A logical hierarchy is key to making this method work effectively, especially for large, international collections.
- Start with the Continent or Country: Create top-level folders for broad regions, like
Europe,North America, or specific countries likeItaly. - Add the State or City: Inside each country folder, create subfolders for the next logical division, such as a state, province, or city (e.g.,
Tuscany). - Specify the Venue or Landmark: Within the city folder, create folders for specific landmarks or events (e.g.,
Florence_Uffizi_GalleryorRome_Colosseum).
This approach creates a clear, browsable map of your travels right in your file system. It’s a highly effective technique for keeping your adventure photos in order, much like organizing physical items in a small space requires a logical system. You can learn more about creating order on endless-storage.com.
Pro Tip: Always enable GPS or location services on your smartphone and cameras before you start shooting. For photos without location data, you can use software like Adobe Lightroom or GeoSetter to manually add GPS coordinates, ensuring they integrate seamlessly into your location-based library.
5. Subject and Theme Classification for a Content-Driven Library
Shifting from a timeline-based approach, subject and theme classification organizes photos based on what they depict. This method groups images by their primary content, such as portraits, landscapes, architecture, animals, or even abstract concepts. It's a highly effective way to create a content-driven library, making it easy to find specific types of images regardless of when they were taken.
This system is particularly valuable for photographers, designers, and content creators who need to locate assets for specific projects quickly. Instead of scrolling through years of photos to find all your best landscape shots, you can navigate directly to a "Landscapes" folder. This approach transforms your archive from a simple historical record into a searchable, theme-based resource, offering one of the best ways to organize photos for professional or creative use.
How to Implement a Subject and Theme System
Effective implementation requires establishing clear, consistent categories from the outset. You can use folders, tags, or a combination of both to build your thematic structure.
- Define Core Categories: Start by creating top-level folders for broad subjects you frequently capture (e.g.,
Portraits,Landscapes,Travel,Family,Architecture). - Create Sub-Categories: Within each main folder, create more specific sub-folders. For example, under
Landscapes, you might haveMountains,Beaches, andForests. - Use Keywords and Tags: For even greater detail, use software like Adobe Lightroom or DigiKam to add keywords. A single photo in the
Portraitsfolder could be tagged with "outdoor," "golden hour," and the person's name, making it discoverable through multiple search criteria.
This method allows for a multi-dimensional organization that a purely chronological system cannot offer, ensuring you can find the exact type of photo you need with minimal effort.
Pro Tip: Create a simple style guide for yourself that defines the criteria for each category. For instance, decide what qualifies as "Architecture" versus "Street Photography." This consistency is crucial as your collection grows and prevents overlap or confusion between categories.
6. People-Centric Face Recognition System
For many, the true value of a photo lies in the people it captures. The people-centric system leverages powerful AI-driven facial recognition technology to automatically identify and group photos based on who is in them. This method transforms your library from a simple collection of images into a rich, interconnected archive of your relationships and social history.
Platforms like Google Photos, Apple Photos, and even social media sites like Facebook pioneered this approach. They scan your library, cluster similar faces, and allow you to assign names. Once tagged, you can instantly pull up every photo of a specific person, from their childhood to the present day. This is an incredibly effective way to organize photos, especially for creating albums dedicated to family members or chronicling a friendship over the years.
The diagram below illustrates the hierarchical structure of this system, showing how automated processes, manual inputs, and essential controls work together.
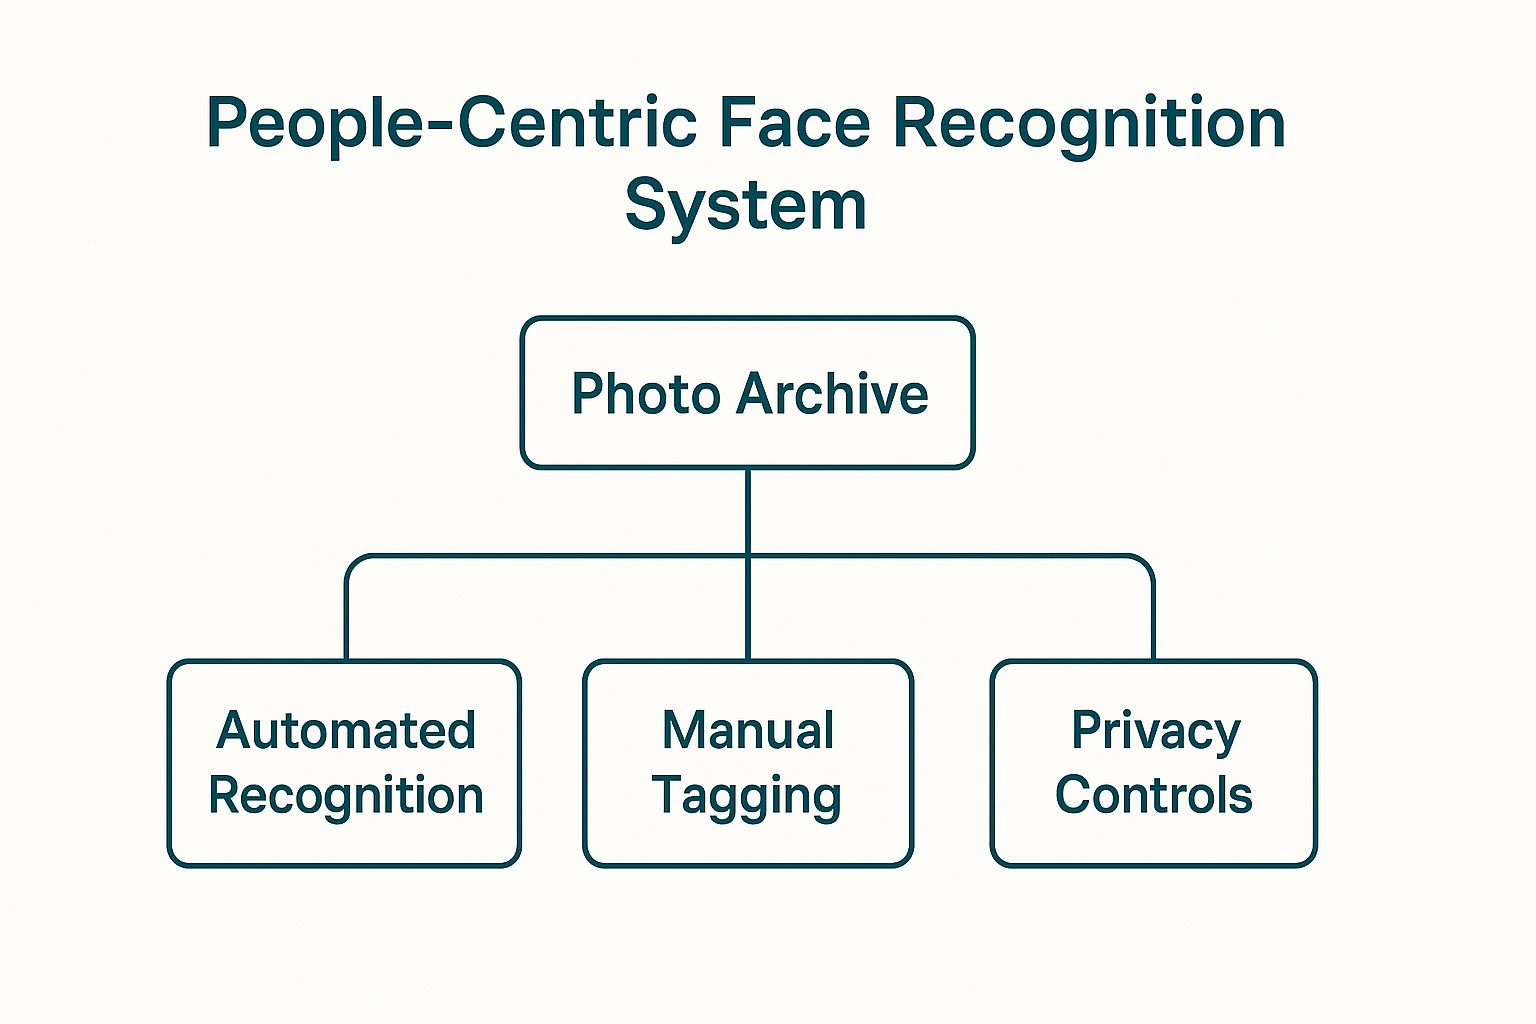
This visualization highlights that a successful people-centric archive depends on both the initial automated sorting and your ongoing manual refinement to ensure accuracy and respect for privacy.
How to Implement a People-Centric System
To make this automated method work for you, a little manual effort is required to train the software and maintain accuracy. This hands-on approach ensures the technology serves your personal archival needs perfectly.
- Train the AI: Start by confirming the software’s suggestions. The more photos of a person you confirm, the more accurate its future identifications will become. Don't forget photos from different angles and ages.
- Review and Correct: Periodically check the automatically generated albums for each person. Correct any misidentifications to keep your collections clean and reliable.
- Establish Naming Conventions: For consistency, decide on a naming format, such as
Firstname_LastnameorFirstname (Family_Role)(e.g.,Jane_SmithorGrandma_Sue).
This system offers one of the best ways to organize photos for anyone who values the human connections within their images, making it easy to find pictures of loved ones instantly.
Pro Tip: Always be mindful of privacy. When sharing photos that have been tagged with facial data, check your platform’s settings to control whether that tag information is visible to others. It’s important to respect the privacy of the people in your photos.
7. Hierarchical Folder Structure for Ultimate Control
A hierarchical folder structure is a powerful, systematic method that creates a tree-like organization for your digital photos. It goes beyond a simple chronological system by nesting folders based on multiple criteria, such as date, event, location, and subject. This approach provides a highly logical and scalable framework, making it one of the best ways to organize photos, especially for large and diverse collections.
This method is the backbone of professional media asset management and is perfect for anyone who wants absolute control over their file locations. Instead of relying solely on software, you build a logical map on your hard drive that is platform-independent. Whether you're managing a personal archive or a corporate library, this structure ensures every photo has a specific, findable home.
How to Implement a Hierarchical System
The key to a successful hierarchy is planning your structure before you begin moving files. The goal is to create a clear path to any photo. A common and effective approach combines chronology with event-based categorization.
- Level 1 (Top): Start with broad categories. This could be by year (
2024), by major life area (Work,Personal), or by general subject (Travel,Family). - Level 2 (Sub-Category): Add a more specific layer. Inside
2024, you might have2024_08_August. InsideTravel, you might have folders for countries likeItalyorJapan. - Level 3 (Specific Event/Project): This is the most detailed level. For example:
2024 > 08_August > 2024_08_15_Beach_DayorTravel > Italy > 2023_09_Rome_Trip.
This layered system is incredibly flexible, allowing you to drill down from a broad category to a specific set of images with ease. For more insights on building effective organizational frameworks, you can explore various home organization systems that share similar principles.
Pro Tip: Keep your folder depth to a maximum of 3-4 levels. Deeper hierarchies can become cumbersome to navigate. Use a consistent naming convention throughout and consider adding a
README.txtfile in your main photo folder to document your organizational logic for future reference.
8. Cloud-Based AI Smart Organization
Leveraging cloud-based AI is one of the most powerful modern methods for organizing photos, as it automates the heavy lifting of sorting and categorization. This approach uses artificial intelligence and machine learning to analyze your images, automatically identifying people, pets, places, and objects. Platforms like Google Photos, Amazon Photos, and Apple's iCloud Photos can group similar faces, detect scenes like "beaches" or "sunsets," and make your entire library searchable using natural language.
Instead of manually tagging every picture, you can simply search for "dog at the park" or "birthday cake" and get instant results. This system works in the background, continuously learning and refining its organization as you add more photos. When deciding to embrace this method, a key consideration for many is whether cloud backup is secure and the right choice for their precious memories. This automated intelligence provides a dynamic and effortless way to find specific moments without a rigid folder structure.
How to Implement AI-Powered Organization
Getting started with AI organization is remarkably simple, as most of the work is done for you. The key is to choose a platform and enable its intelligent features to maximize its potential.
- Choose Your Service: Select a cloud service like Google Photos, Microsoft OneDrive, or Amazon Photos. Upload your photo library to begin the automatic analysis process.
- Enable AI Features: In the settings, ensure that features like face grouping, object recognition, and location-based sorting are turned on.
- Review and Refine: The AI isn't perfect. Regularly review its auto-created albums and face tags. Correcting mistakes (e.g., merging two different tags for the same person) helps train the algorithm to be more accurate over time.
- Use Search Extensively: The true power of this system is its searchability. Test it by searching for specific objects, colors, or combinations like "red car in snow" to discover how capable the AI is at finding your photos. For those managing vast digital collections, this approach can be a game-changer, much like finding smart storage ideas for small spaces can transform a physical room.
Pro Tip: Combine AI organization with your own manual curation. While the AI can create a "Best of 2024" album, you can duplicate it and then refine it further by removing blurry shots or adding a few missed favorites. This hybrid approach gives you the best of both automated efficiency and personal touch.
Top 8 Photo Organization Methods Compared
Crafting Your Perfect Hybrid System
The journey through the various methods of photo organization, from chronological dating to cloud-based AI, reveals a crucial truth: there is no single, universally "best way to organize photos." The most powerful and sustainable solution is not a rigid, one-size-fits-all template. Instead, it’s a personalized, hybrid system that you design to fit your life, your memories, and your specific needs.
Attempting to force all your memories into one box, whether it’s a simple chronological folder or a complex tagging system, often leads to frustration and abandonment. The real magic happens when you thoughtfully combine the strengths of different approaches. This multi-layered strategy creates a resilient, flexible framework that is both meticulously organized and easily searchable.
Building Your Personalized Framework
Think of the methods we've covered as building blocks. Your task now is to select and assemble them into a structure that works for you. A highly effective approach often involves creating a foundational layer and then adding complementary systems on top.
For example, a Hierarchical Folder Structure (e.g., YEAR > MONTH > EVENT_NAME) can serve as your core digital archive. This provides a logical, browseable backbone for your entire collection. On top of this, you can layer a powerful tool that uses People-Centric Face Recognition and Cloud-Based AI, like Google Photos or Apple Photos. This combination gives you the best of both worlds: a manually curated, permanent archive and an intelligent, searchable interface for daily use and discovery.
Key Takeaway: Your foundational system should be simple and logical, creating a reliable archive. Your secondary systems should add power and convenience, enabling you to find and enjoy your photos effortlessly.
Integrating Physical and Digital Memories
This hybrid philosophy is equally critical for managing physical prints and albums, a common challenge for those in smaller urban spaces. The goal is to create a unified system where your tangible memories mirror the organization of your digital ones. If your digital files are sorted by event, your photo boxes should be too.
- Mimic Your Digital Structure: Use the same
EventorChronologicalsystem for your physical photos. Clearly label acid-free storage boxes (e.g., "Summer Vacation 2018," "Maria's College Graduation"). - Prioritize and Digitize: Not every physical photo needs to be kept. Curate your absolute favorites and consider digitizing them to integrate them into your primary digital library.
- Create a "Master Index": For truly important albums or boxes, consider creating a simple text document that lists the key contents. This digital index makes it easy to know what's in a box without having to physically open it.
By building this bridge between your physical and digital collections, you create a cohesive and comprehensive life archive. Mastering this hybrid approach is the ultimate secret to finding the best way to organize photos for your life. It transforms a chaotic digital and physical clutter into an accessible, joyful, and enduring celebration of your most cherished moments.
Ready to declutter your home and secure your physical photo albums and memory boxes? Endless Storage provides secure, climate-controlled storage with convenient pickup and delivery, making it the perfect partner for your photo organization project. Visit Endless Storage to learn how you can protect your tangible memories without sacrificing your living space.