
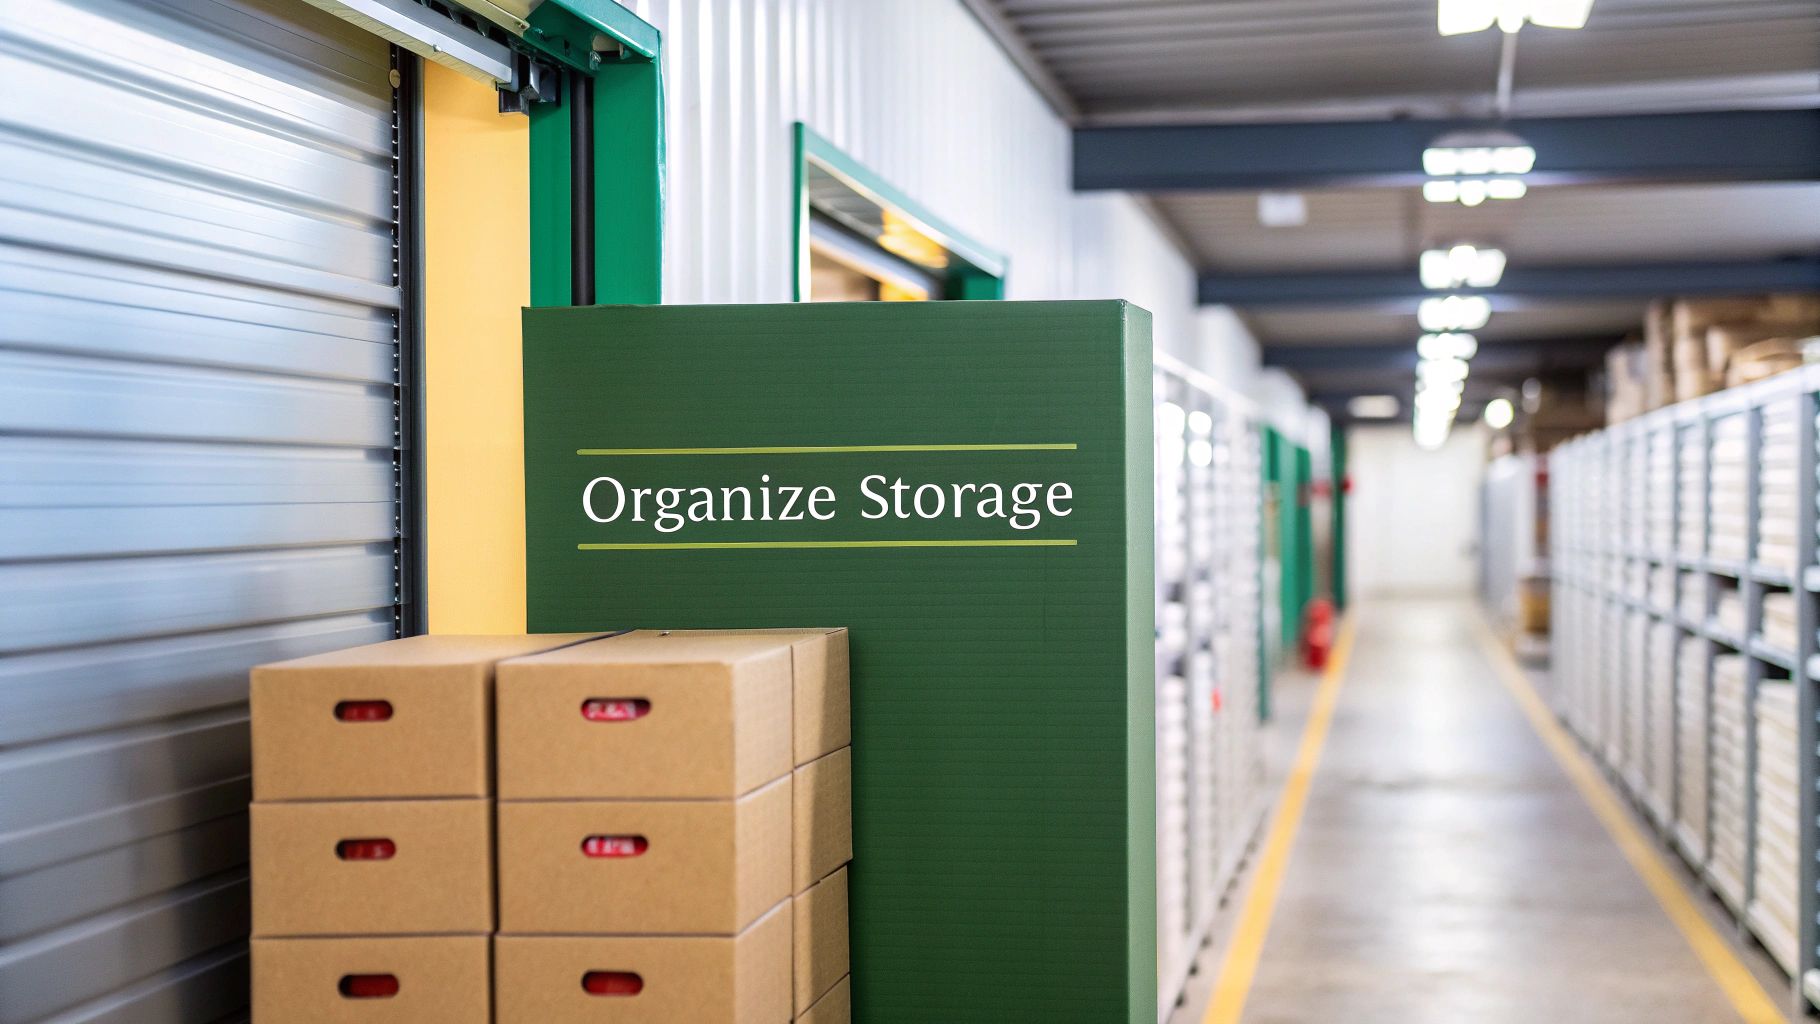
Getting your storage unit organized doesn't start the day you move in. The real work happens before you even lift a box. It all comes down to a smart plan. The whole point is to create a system where you can find anything you need, anytime you need it, without digging for hours. This means taking a good, hard look at your stuff, picking the right gear, and mapping out your unit for easy access down the road.
Laying the Groundwork for an Organized Unit
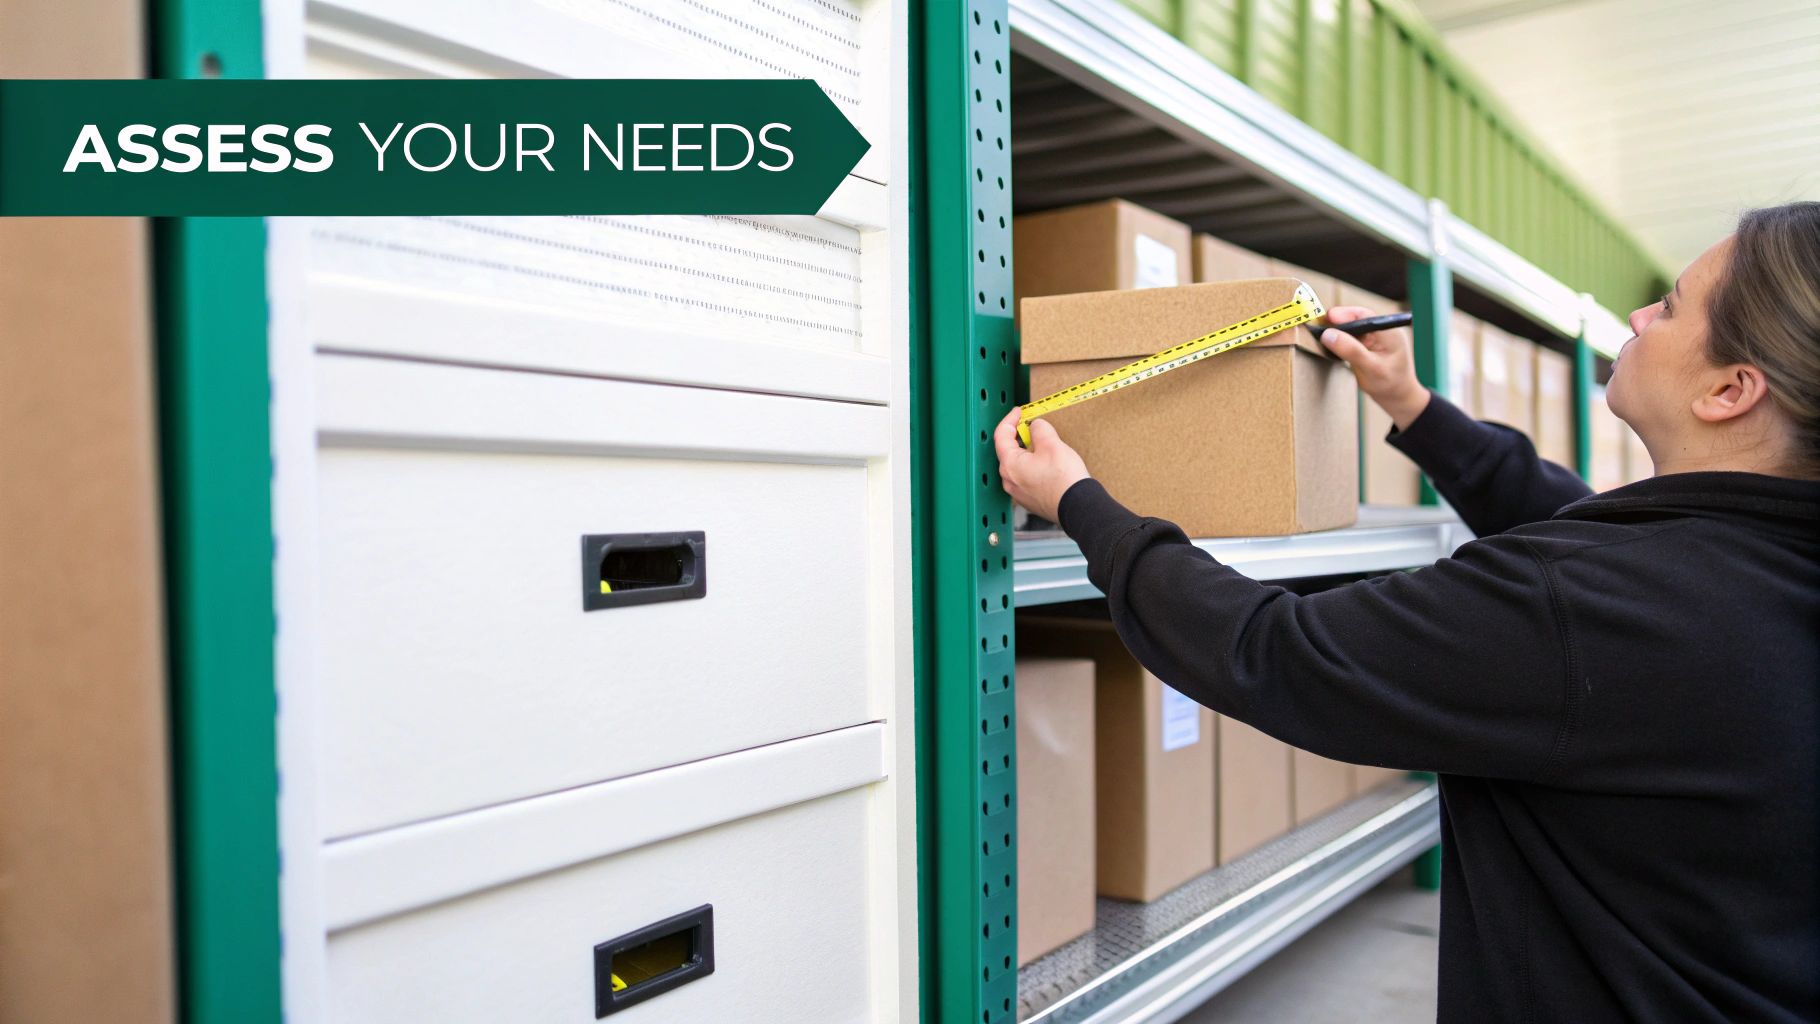
A perfectly organized storage unit is more about brain than brawn. Before you even think about moving, the very first thing to do is create a detailed inventory list. I’m not talking about a quick mental rundown—I mean a physical or digital document that forces you to acknowledge exactly what you're putting away.
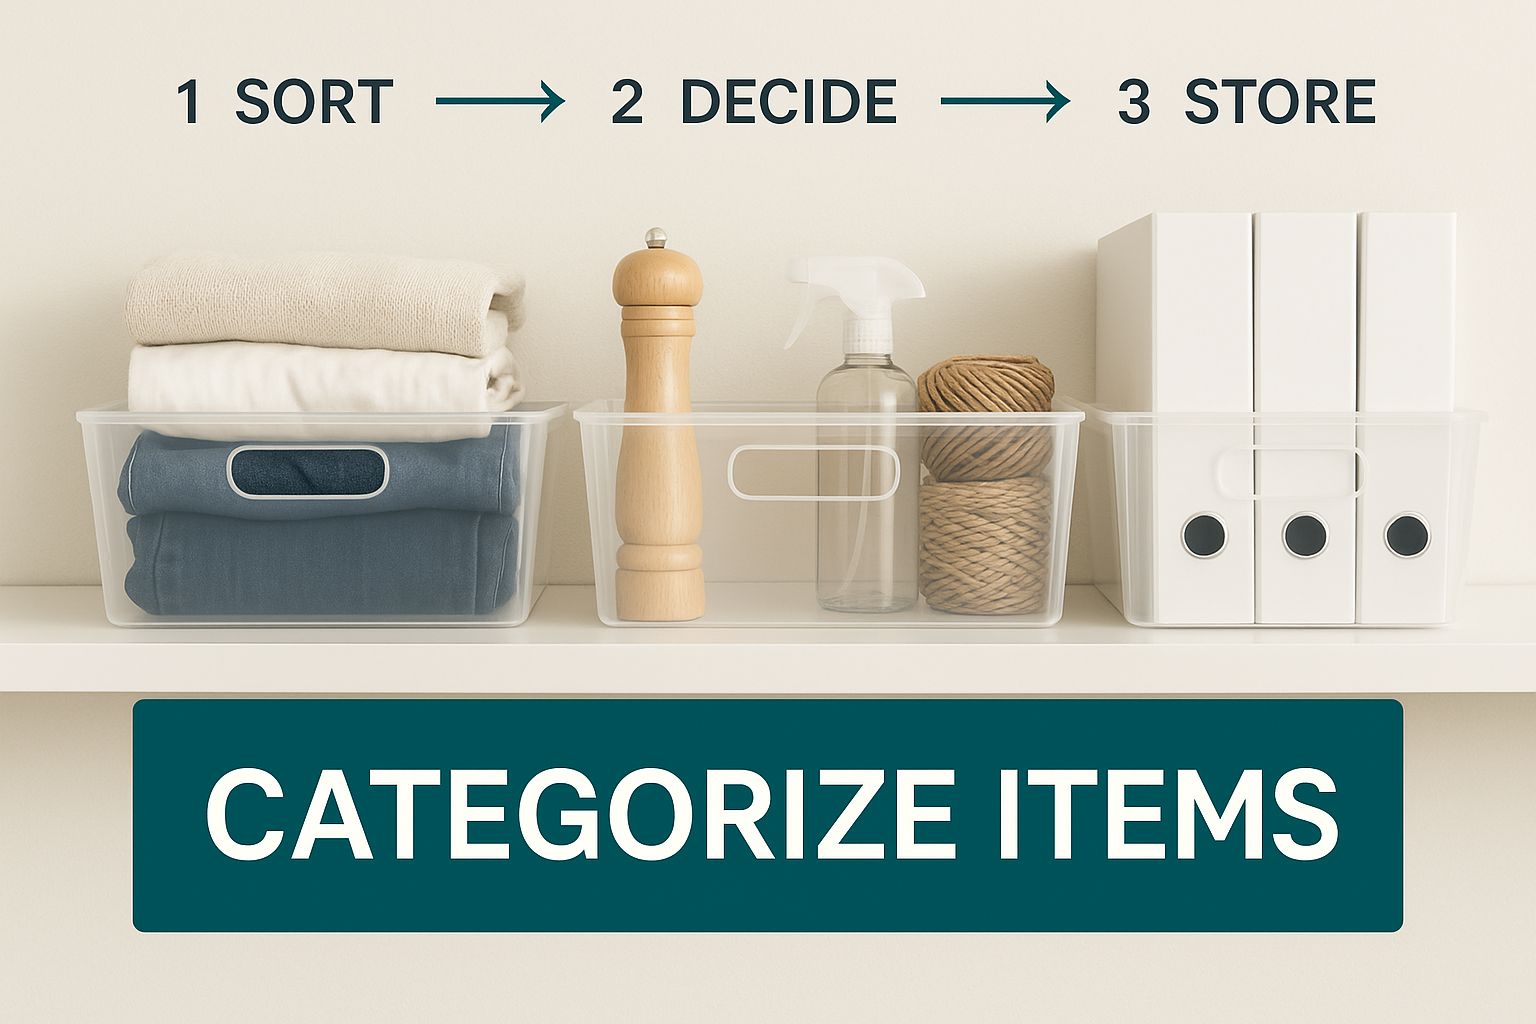
This simple act is a game-changer. It helps you categorize everything based on how often you'll actually need it. Holiday decorations? They can go to the back. That extra inventory for your side hustle or the kids' seasonal sports gear? That stuff needs to be front and center.
This kind of strategic thinking is more critical than ever. Self-storage isn't some niche service anymore; it's a mainstream solution for millions. In 2024 alone, the industry added nearly 62.3 million square feet of new space. That’s an area roughly the size of Central Park. With about one-third of Americans using self-storage and the average 10'x10' unit running about $123 a month, you want to make sure you're getting your money's worth. You can dive deeper into these industry trends to see just how big the market has become.
Choose the Right Supplies
Once you know what you're storing, you have to figure out how you're storing it. The supplies you pick will make or break both your organization and the safety of your belongings. Before you start packing, make sure you have the essentials on hand.
Here's a quick checklist of what I always recommend clients gather before they pack a single box. Having these items ready from the start saves a ton of headaches later.
Essential Supplies for Organizing a Storage Unit
Getting these supplies sorted out first is one of the most important steps. It lays the foundation for a packing process that's efficient and keeps your items safe.
A common mistake I see all the time is people underestimating the power of uniform boxes. Stacking a random assortment of free grocery store boxes is like building a wall with uneven bricks—it’s just not stable or efficient. Stick to a few standard sizes to use your vertical space safely and effectively.
Select the Perfect Unit Size
Picking the right unit size is a classic Goldilocks problem. Go too small, and you’ll end up with a cramped, inaccessible pile of stuff. Go too large, and you’re just throwing money away on empty space.
This is where that inventory list you made comes in handy. It gives you a realistic idea of the volume you're working with.
As a rule of thumb, a 5'x5' unit feels like a big walk-in closet, perfect for a handful of boxes and maybe a small piece of furniture. A 10'x10' unit can generally handle the contents of a one-bedroom apartment. If you’re on the fence, always go one size up. That little bit of extra space for an aisle will make organizing the storage unit a thousand times easier. It’s the difference between a functional space and a frustrating game of Tetris every time you visit.
Packing and Labeling for Effortless Retrieval
The real difference between a storage unit that works for you and one that's just a black hole of forgotten stuff? It all comes down to how you pack and label. This isn't just about tossing things into boxes; it’s about being smart now so you don't lose your mind later trying to find that one specific item.
Good packing protects your belongings from damage, while a solid labeling system means you can grab what you need in five minutes, not five hours.
Strategic Packing for Protection and Space
Think about packing a box like you're loading a grocery bag. You wouldn't put the eggs under the watermelon, right? The same logic applies here. Always place heavier, sturdier items at the bottom of a box, with lighter, more delicate things on top. A classic example is packing a box with books and glassware—the books form a solid foundation, ensuring the glassware doesn't get crushed.
Got big, bulky furniture like a dining table or bed frame? Take a few extra minutes to disassemble it. You’ll be shocked at how much floor space this frees up. Just be sure to put all the screws, bolts, and tiny hardware into a Ziploc bag, label it clearly, and tape it securely to the largest piece of that furniture. Trust me, you'll thank yourself when it's time to put it all back together.
A common mistake I see all the time is either under-packing or over-packing. Under-packed boxes collapse when you stack them. Over-packed ones are a nightmare to lift and can burst at the seams. Aim for a sweet spot of around 30-40 pounds per box—sturdy enough to stack but light enough for one person to handle safely.
The Game-Changing Power of a Labeling System
Your labeling system is the roadmap to everything you own. A box with a vague label is almost as useless as one with no label at all. The goal is simple: know exactly what's inside a box without ever having to open it.
A detailed labeling strategy is your secret weapon. And we've come a long way from just scribbling "Kitchen Stuff" on the side with a marker. For a clean, professional look, you can even order custom online labels.
To really step up your organization game, try one of these methods:
- Color-Coding: This is a visual and incredibly fast system. Assign a specific color of label or tape to each room. Think blue for the kitchen, red for the bedroom, and green for holiday decorations. It lets you spot an entire category from across the room.
- Detailed Content Lists: Get specific. Instead of just "Clothes," write something like, "Men's Winter Sweaters & Coats." The more detail, the better.
- QR Code Inventory: For the truly organized, this is the ultimate hack. Create a unique QR code for each box that links to a digital spreadsheet. One scan with your phone, and you can see a complete inventory of every single item inside.
These techniques turn your storage from a static closet into a searchable extension of your home. For an even deeper dive, check out our complete guide on how to label storage bins.
How to Strategically Load Your Storage Unit
Loading a storage unit is more than just a workout; it’s a real-life game of Tetris where a little foresight pays off big time. A smartly loaded unit doesn't just mean you've crammed everything in. It means you can actually find and retrieve your stuff later without a full-blown excavation project.
The secret? Building a stable, logical, and accessible layout from the very first box you carry in.
Your first move should always be to create a clear pathway. A central aisle, even a narrow one, is absolutely non-negotiable if you plan on accessing anything before you move out. This simple walkway is the difference between a functional, miniature warehouse and a chaotic mess you'll dread dealing with.
The image below shows the basic principle in action—grouping similar items together is the foundation of an organized unit.
As you can see, using uniform, clearly marked containers makes finding things a breeze. It’s all about creating an intuitive system.
Building Your Foundation
How well your unit is organized all comes down to the foundation. The number one rule is simple: heavy and sturdy items always go on the bottom. We’re talking about things like solid wood dressers, desks, and those surprisingly heavy boxes of books. They create a solid base that prevents your lighter, more fragile items from getting crushed.
Think of your large furniture as the structural anchors of your unit. A heavy dresser can double as a retaining wall to stack lighter boxes against. To really maximize your floor space, take apart bigger things like bed frames and tables. Just be sure to keep all the screws and hardware in a labeled Ziploc bag taped securely to the largest piece.
One of the most common mistakes I see is people stacking different-sized boxes on top of each other. This creates wobbly, unstable towers that are just waiting to topple over. Do yourself a favor and stick to uniform box sizes to build secure stacks that take full advantage of your unit’s height.
Arranging Items for Accessibility and Protection
With your heavy base in place, you can start building upwards and filling in the space. Make sure to place the items you'll need most often right at the front, near the door. This could be seasonal decor, your golf clubs, or maybe a box of important files. This one move will save you a world of frustration later.
For even better results, keep these pro tips in mind:
- Elevate Your Belongings: Never, ever place boxes or furniture directly on a concrete floor. Use a couple of wooden pallets or even just thick plastic sheeting to create a buffer. This protects your valuables from any potential moisture seeping up from the ground.
- Leave Breathing Room: Don’t cram everything flush against the unit's metal walls. Leaving just a few inches of space all around promotes air circulation, which is critical for preventing mold and mildew.
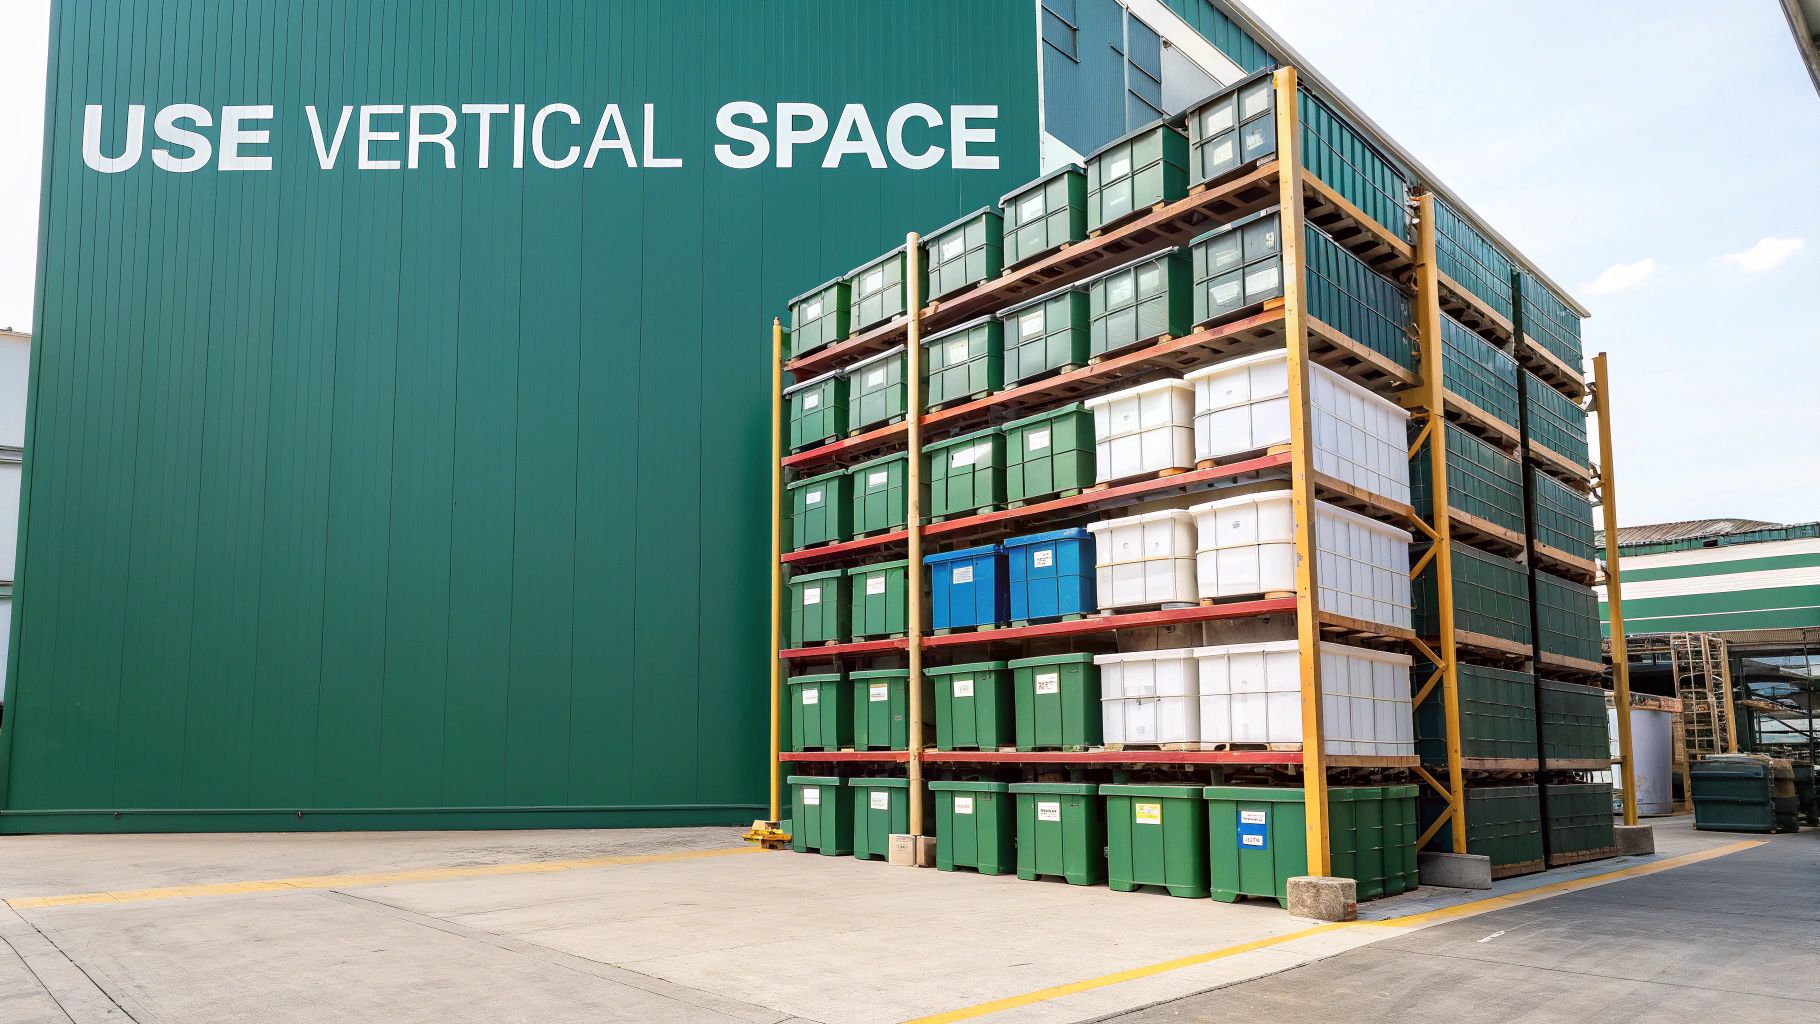
- Use Vertical Space: Freestanding shelving units are a game-changer for storage organization. They let you stack things high without putting all that weight on the boxes at the bottom, and everything stays visible and easy to grab.
This level of detail is more important than ever. The U.S. self-storage market is valued at a massive $66.75 billion in 2024, and 65% of renters use a unit when they move. Knowing how to pack smart helps you get the most out of your investment. To dive deeper into refining your system, check out our complete guide on how to organize storage for more advanced strategies.
Protecting Your Items From Damage and Pests
Getting your storage unit perfectly stacked and organized is a great feeling. But if your belongings don’t come out in the same condition they went in, all that effort was for nothing. Protecting your items from common threats like moisture, pests, and extreme temperatures isn't just a good idea—it's a critical part of the process.
The first line of defense is simply knowing what should never end up in a storage unit. You have to be smart about what you pack, avoiding anything that could attract pests or create a safety hazard.
- Perishable Foods: This seems obvious, but it includes things people forget, like canned goods, pantry items, or pet food. To a mouse or an insect, it's an all-you-can-eat buffet.
- Hazardous Materials: Anything flammable or corrosive is a hard no. This means items like paint, gasoline, propane tanks, and harsh cleaning chemicals are strictly forbidden for safety reasons.
- Live Plants: They won’t make it, and as they decompose, they become a magnet for bugs.
The best defense against pests is a good offense. Taking the time to understand a little about preventative pest control can save you a world of headaches. For more specific advice, our guide on how to keep mice out of storage boxes is a lifesaver.
Creating a Secure Environment
Once you've sorted out the risky items, it's time to create a fortress for your valuables. Your choice of container makes a huge difference here. Cardboard boxes are cheap, but they act like a sponge for moisture and are ridiculously easy for pests to chew through.
A much better long-term choice is clear plastic bins with solid, latching lids. They create a solid barrier against humidity and dust, and the clear design lets you see what’s inside without having to unpack everything.
Whatever you do, don't place boxes or furniture directly on a concrete floor. Concrete can "sweat" moisture. Elevate everything on wooden pallets or even just thick plastic sheeting to create a buffer. For extra peace of mind, especially in humid areas, toss in a few moisture absorbers like silica gel packets or desiccant buckets throughout the unit.
Your unit is only as secure as its environment. Before you move a single thing in, give the space a thorough sweep and inspect every corner for cracks or holes. A few minutes of prep work can prevent a massive headache down the line.
To Climate-Control or Not to Climate-Control
One of the most important decisions you'll make is whether to spring for a climate-controlled unit. This isn't just a luxury; it’s a feature that regulates temperature and humidity, which is absolutely essential for certain items.
To help you decide, here’s a quick breakdown of what you get with each option.
Standard Unit vs. Climate-Controlled Unit
So, is the extra cost worth it? If you're storing anything valuable, sentimental, or irreplaceable that could be ruined by extreme heat, cold, or moisture—the answer is a definite yes. Think of it as insurance for your most precious belongings. Without it, you’re gambling with your antique wooden dresser warping or your expensive electronics failing from internal corrosion. It's a small price to pay for total peace of mind.
Maintaining Your Organized System Over Time
Locking the door on a perfectly organized storage unit feels great, but the job isn't quite done. Your organized space is like a garden—it needs a little ongoing attention to keep it from getting overrun with weeds. If you just leave it be, it won’t take long for that pristine order to slip back into chaos.
Think of it this way: maintaining your unit is a lot like building effective personal productivity systems for your work or home life. A little bit of consistent effort saves you from a massive clean-up project down the road.
Schedule Regular Check-ins and Purges
I can't stress this enough: pop into your unit every few months. Set a recurring reminder on your phone for a quarterly visit. These quick trips aren't just for grabbing your winter coats or holiday decorations. They're your chance to do a quick visual sweep.
Look for any warning signs, like pests or moisture, and check that your boxes are still stacked safely. More importantly, this is the perfect moment to ask yourself, "Do I still actually need all of this?" Our lives change, and so do the things we need to hold onto.
This is especially true with how often people move these days. Did you know that a whopping 60% of renters are thinking about moving or might move within the next year? Many use storage to handle the transition, making regular purges essential to avoid paying for space you don't need.
Don’t fall into the "set it and forget it" trap with your storage unit. A quick quarterly visit can catch a small issue, like a box that's starting to buckle, before it turns into a disaster that crushes everything underneath it.
Adding and Removing Items the Right Way
This is where the best-laid plans often crumble. It’s so tempting to just shove a new box into the first empty spot you see, or to pull something out and leave a gaping hole. Resist that temptation! A little discipline here goes a long way.
To keep your system intact, just follow a few simple rules:
- Stick to the Plan: When you bring in new items, put them in their designated zone. If it’s more kitchen stuff, it belongs with the other kitchen boxes. Simple.
- Update Your Inventory Immediately: This is non-negotiable. The moment a box comes in or goes out, update your spreadsheet or app. Your inventory is your map—if it’s wrong, you’re lost.
- Consolidate When You Can: If you take an item out and leave a box half-empty, see if you can combine its contents with another box from the same category. It’s an easy way to reclaim precious space.
If you’re using a per-box service like Endless Storage, this whole process is practically effortless. You just schedule a pickup for new items or request a return for things you need. Your digital inventory updates on its own, so there's no manual tracking to forget.
For more pro strategies on this, check out our guide on long-term storage tips. It’s packed with advice for keeping your belongings safe and easy to access for the long haul.
Common Questions About Storage Unit Organization
Even the most organized person runs into questions when it's time to pack up a storage unit. I've been there. Getting the right answers upfront saves a ton of headaches down the road and helps you use every square inch of your space effectively.
Let's walk through some of the most common questions that pop up.
How Should I Prepare the Unit Itself?
Before you even think about bringing in a box, do a quick sweep. You want to clear out any dust or little bits of debris left behind from the last person. I also make a point to check the corners and the door seal for any tiny gaps where pests could sneak in.
Once it's clean, lay down a plastic tarp or even a few old wooden pallets. This simple step creates a crucial buffer between the concrete floor and your belongings, which is a lifesaver if any moisture ever seeps in. A little prep now prevents a lot of potential damage later.
Can I Just Stack Boxes on Top of Each Other?
It’s incredibly tempting, I know, but just piling boxes into tall, freestanding towers is asking for trouble. Over time, cardboard can get compressed and weaken, especially at the bottom of a heavy stack. The last thing you want is for a box to buckle and crush everything inside.
Your best bet for using vertical space safely is to invest in some freestanding metal or plastic shelving. This lets you stack high without putting all the pressure on the bottom boxes, and you can actually see and get to your stuff without playing a dangerous game of Jenga.
If you absolutely have to stack boxes directly, always put the heaviest, sturdiest ones on the bottom to create a solid foundation. And try to use boxes that are all the same size—it makes for a much more stable, less wobbly tower.
What Is the Best Way to Remember What I Stored?
"Out of sight, out of mind" is a very real phenomenon with storage units. Fast forward a few months, and you’ll be scratching your head trying to remember which box holds the good china. Your absolute best friend here is a detailed inventory list.
It doesn't have to be fancy. A simple spreadsheet, a dedicated notebook, or an app will do the trick. For every single box, write down a general list of what's inside and note its location in the unit. A quick sketch or a simple map of your unit's layout can be a game-changer. This is especially vital if you're in the middle of a move; a solid inventory works hand-in-hand with a good plan, like the one in this ultimate moving checklist.
How Do I Keep My Unit Organized When I Add New Things?
The key to long-term organization is discipline. When you bring new items to your unit, fight the urge to just toss them into the first open spot you see. Take those extra two minutes to put things where they belong—holiday decorations with other holiday items, kitchen supplies with other kitchen stuff.
And this is the most important part: update your inventory list immediately. The second a box goes in or comes out, make a note of it. An out-of-date inventory is almost as useless as no inventory at all. If you take a few things out of a box, see if you can consolidate what's left into another partially full box to keep things tidy and save space.
Ready to skip the heavy lifting and endless organizing? With Endless Storage, you can manage your belongings without ever visiting a storage unit. We send you boxes, you pack, and we pick them up for storage in our climate-controlled facilities. When you need something back, just click, and we’ll ship it to you. Get started today at https://www.endless-storage.com and discover a smarter way to store.
Frequently Asked Questions
Unveiling the Secrets to Effortless Storage
Endless Storage is available nationwide. You pick a plan, tell us where to pickup, and we'll send a UPS van to collect, whichever state you're in.
Your shipping label will be sent to your email within a few minutes, if not instantaneously. It can also be accessed through your customer profile.
Your box will be shipped to one of our climate controlled self storage facilities in our closest self storage facility. Our manager will accept your package, notify you that your box has been received, and securely stored. Only our managers will have access to Endless Storage boxes.
Email us at admin@endless-storage.com click to live chat with us, or send us a message below.
Never! We're committed to transparent pricing with no surprises. You'll lock in your rate with no hidden fees and no long-term contracts.
Fast access guaranteed! Your boxes will arrive at your doorstep within 48 hours of requesting them back. Need to check on delivery? We provide tracking information for complete peace of mind.
Totally flexible! Store month-to-month with no long-term commitment and cancel anytime.
Everything's online! Use your account dashboard to:
• Set up automatic monthly payments
• Request box returns
• Update your address
• Order additional boxes
• Track shipments
Your boxes are insured up to $100 each. Our customer service team will help you file any necessary claims and resolve issues quickly.
Don't worry – we'll email you right away if there's a payment issue. Your items stay safe, though you may have temporary service interruption or late fees until payment is resolved.
When you request our free storage kits, you'll have 30 days to send in your boxes to activate your 3 months of free storage. Think of it like starting a gym membership – your activation window begins when you receive your kits, and your full free trial begins once you send in your first box. During your free months, you'll experience our complete storage service at no cost.
Your 30-day activation window begins when you receive your storage kits. We'll send you an email confirmation when your kits are delivered, marking the start of your activation period.
If you haven't sent any boxes for storage within your 30-day activation window, your free trial will expire and we'll begin charging the regular monthly rate of $9.99 per box. This helps ensure our storage kits go to customers who are ready to use our service.
A box costs $9.99 per month to store (plus sales tax). This price includes free shipping for standard boxes under 50 lbs. and smaller than 16"x16"x16"
Log into your Endless Storage account, locate the box you would like returned, and simply click Return My Box.
Yes, each box stored with us is insured for up to $100 throughout transit as well as the duration of storage within our facilities.
Your box will be at your doorstep within 48 hours of you requesting it back.
Store 10+ boxes? We'll pick them up for free! After your purchase, we'll contact you to schedule a convenient pickup time and arrange UPS collection.
We trust UPS with all shipments, and every box includes $100 insurance coverage. You'll receive tracking information to monitor your items' journey.
Yes! Visit any of our locations by appointment. Just bring a photo ID matching your customer profile.
For everyone's safety, we can't store hazardous materials, firearms, or perishables. All items must fit within our standard boxes.
It's easy! Order your storage kit online, and we'll ship it to you within 1-2 business days. Your shipping labels will be emailed instantly and available in your account.
We're here to help! Email us at admin@endless-storage.com, use our live chat, or send us a message through your account.
To cancel your storage service with Endless Storage, please email your cancellation request to admin@endless-storage.com. Our team will process your request within 2 business days and confirm your cancellation via email.
We understand packing takes time. However, to maintain your free trial benefits, you'll need to send at least one box within the 30-day activation window. If you need more time, you can always start with one box to activate your trial and send the rest later. You can always reach out to admin@endless-storage.com if you have any issues or concerns.
When you request our free storage kits, you're starting a 30-day window to begin using our storage service.
Important: To activate your free trial, send at least one box for storage within 30 days. If no boxes are sent within this 30-day window, a one-time $50 fee applies to cover materials and shipping costs. This fee is clearly disclosed before you sign up.
Think of it like reserving a hotel room – we're setting aside space and sending specialized packing materials for your use. The fee only applies if you request materials but don't begin storage, similar to a hotel's no-show charge.