Moving out of a rental property involves more than just packing boxes. It's a detailed process with legal and financial implications that can feel overwhelming, especially for urban residents dealing with small apartments and the stress of relocation. A successful move-out secures your full security deposit, maintains a positive rental history, and prevents costly disputes with your landlord. This comprehensive moving out of rental checklist breaks down the entire process into eight manageable, chronological steps.
From deciphering your lease agreement weeks in advance to the final key handover, we provide actionable insights and practical examples to guide you through every task. Following this plan will not only simplify your move but also empower you to navigate the process with confidence, ensuring you leave your old home on the best possible terms. To streamline your entire move-out process and ensure all aspects are covered, you might consider professional assistance from companies offering specialized move-out services, which can be a lifesaver when you're short on time. This guide is your roadmap to a stress-free transition, protecting both your finances and your reputation as a responsible tenant.
1. Review and Comply with Lease Terms
Before you pack a single box, your first step in any successful move-out is a thorough review of your original lease agreement. This legally binding document is the ultimate rulebook for ending your tenancy correctly. It contains all the specific obligations you agreed to when you moved in, and ignoring them can lead to significant financial penalties and disputes. Think of it as the foundational step in your moving out of rental checklist; getting this right makes every subsequent step smoother.
Why Your Lease is Your Most Important Tool
Your lease dictates the entire move-out process, from how much notice you must give to the specific condition the property must be in when you leave. Overlooking these details is a common and costly mistake. For example, a tenant in a competitive rental market might assume a 30-day notice is standard, but their lease could require a 60-day notice. Submitting late notice could result in a penalty equivalent to a full month's rent.
Pro Tip: Don't just skim your lease. Read every clause related to termination, security deposits, and property condition. Highlight key dates and requirements to create a personalized checklist.
Real-World Scenarios
Understanding your lease can directly protect your security deposit.
- Pet Clauses: An NYC renter with a dog remembered their lease had a specific pet clause requiring professional carpet cleaning upon moving out. By scheduling the service and providing the receipt to their landlord, they ensured the return of their full pet deposit.
- Joint Liability: A group of students in a shared house reviewed their joint and several liability clause. This meant they were all equally responsible for the property's condition. They coordinated to complete the final inspection and sign the move-out condition report together, preventing one person from being unfairly charged for damages.
This infographic summarizes the most critical compliance points typically found in a lease agreement.
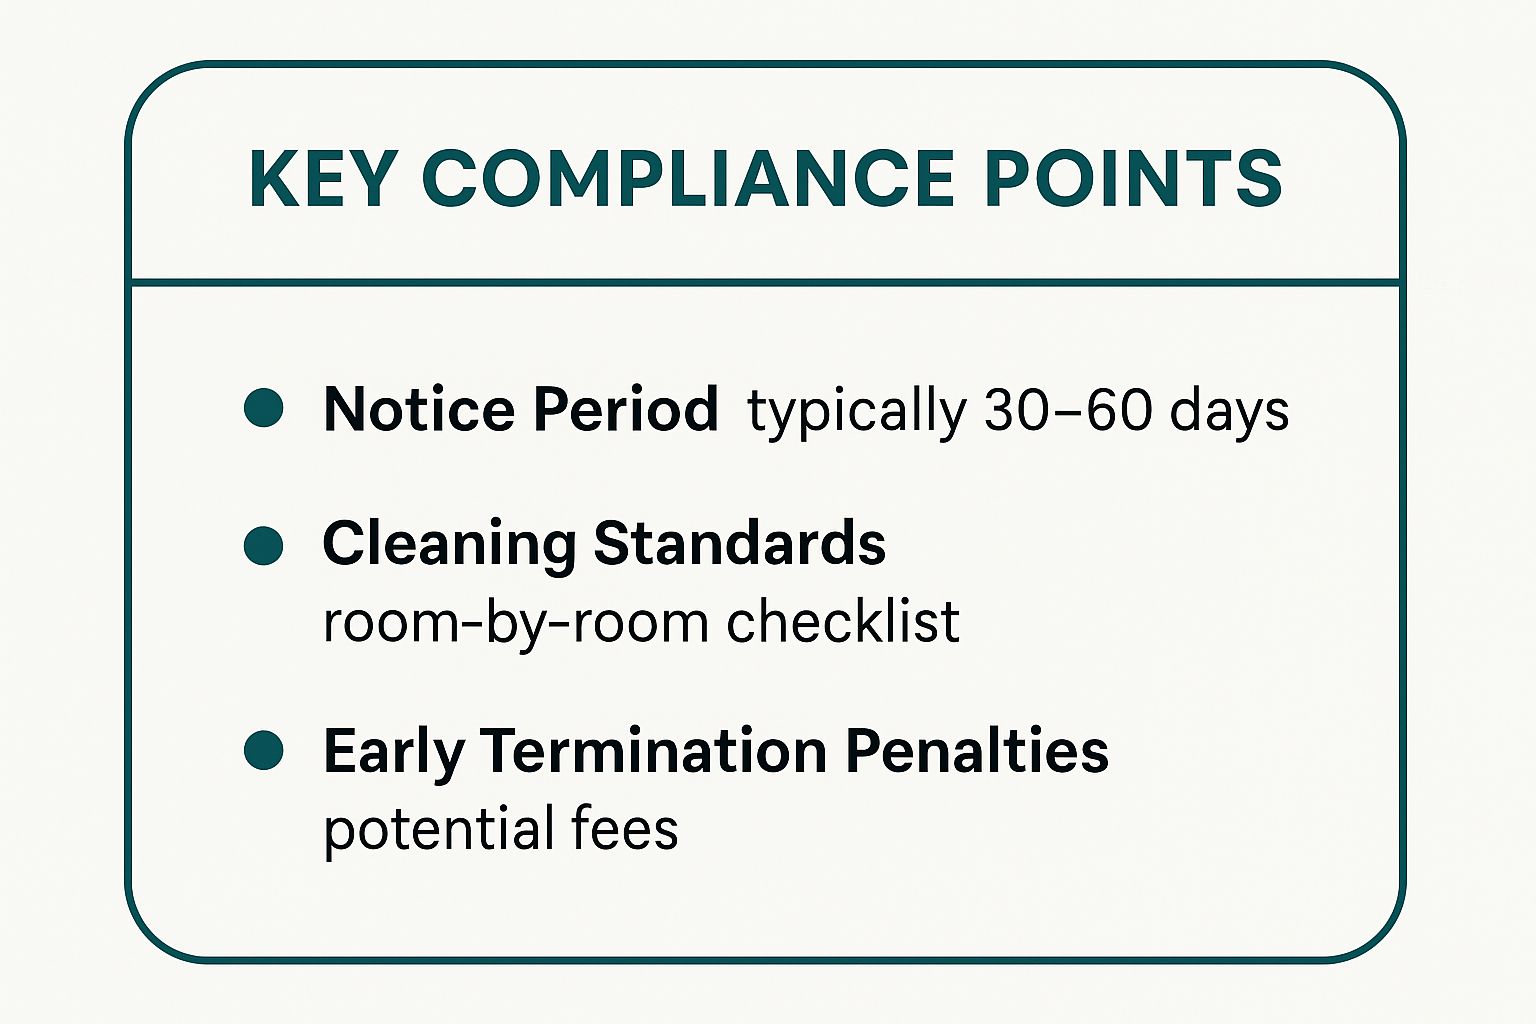
As the visualization highlights, focusing on your notice period, cleaning standards, and potential penalties provides a clear roadmap for a compliant move. If you anticipate any issues meeting these terms, such as needing to break your lease early, communicate with your landlord immediately and in writing to discuss potential solutions.
2. Provide Proper Written Notice
Once you've reviewed your lease, the next critical task is to formally notify your landlord of your intent to move out. This isn't a casual text or phone call; it's an official written notice that legally establishes your departure date. Submitting this document correctly and on time is a non-negotiable part of any moving out of rental checklist, as it triggers the formal timeline for ending your tenancy and starting the security deposit return process.
Why Written Notice is Non-Negotiable
A formal written notice serves as undeniable proof that you have complied with your lease's termination requirements. It protects you from claims that you abandoned the property or failed to provide adequate notification, which could lead to hefty fines or the forfeiture of your entire security deposit. The notice creates a clear, documented record of your move-out date, preventing misunderstandings with your landlord.
Pro Tip: Always send your notice via certified mail with a return receipt requested. This provides a legally recognized, date-stamped confirmation that your landlord received the document, leaving no room for dispute.
Real-World Scenarios
Timely, formal notice directly impacts your finances and the smoothness of your move.
- Avoiding Extra Rent: A Texas tenant's lease required a 30-day notice. By sending it via certified mail on the last day of the month, they created a paper trail that prevented the landlord from charging them for an additional month's rent of $1,200, which could have happened with a less formal method like an email that "went to spam."
- Month-to-Month Flexibility: A renter in Oregon on a month-to-month lease successfully ended their tenancy by providing a standard 30-day written notice. This formal step ensured a clean break and a clear timeline for their deposit return, avoiding the ambiguity that can sometimes complicate verbal agreements.
Submitting your notice correctly is the official starting pistol for your move-out. Be sure to check your state and local landlord-tenant laws, as they may have specific requirements for notice periods that can supersede the terms in your lease agreement. Always keep a dated copy of the notice and the certified mail receipt for your records.
3. Document Current Property Condition
Before you begin any cleaning or repairs, one of the most crucial tasks in your moving out of rental checklist is to create a detailed record of the property's condition. This involves taking comprehensive photographs and videos, supported by written notes, to establish a clear baseline of the apartment's state upon your departure. This evidence is your primary defense against potential disputes over your security deposit, providing irrefutable proof that protects you from being charged for pre-existing issues or normal wear and tear.

Why Documentation is Your Financial Safeguard
Landlords compare the property's move-out condition to the initial move-in report. Without your own evidence, their assessment becomes the only record, leaving you vulnerable to unfair charges. A thorough visual log creates an objective account, shifting the burden of proof and ensuring you are only held responsible for damages you actually caused. This simple step can save you hundreds, or even thousands, of dollars in wrongly withheld deposit funds.
Pro Tip: Use a camera app that automatically embeds the date and time on your photos. For extra validation, include a current newspaper or a dated item in some shots to indisputably establish when the documentation was created.
Real-World Scenarios
Effective documentation directly translates into a secured deposit refund.
- Proving Pre-existing Issues: A Seattle tenant’s move-out photos clearly showed faint water stains on a ceiling that were present upon move-in. When the landlord tried to charge $800 for a "new" leak, the timestamped images proved the damage was pre-existing, leading to the charge being dropped.
- Distinguishing Wear from Damage: A college student documented minor scuffs on walls and worn carpet paths, classic examples of "normal wear and tear." This evidence helped them successfully argue against the landlord's attempt to charge for a full repaint and carpet replacement, securing their full deposit.
- Verifying Appliance Functionality: A family took a short video of each appliance (refrigerator, oven, dishwasher) in working order. When the landlord later claimed the refrigerator was broken and tried to deduct a $300 repair fee, the video evidence proved it was functional at move-out, forcing a full refund.
4. Complete Deep Cleaning
Once you have handled the administrative tasks, it's time to physically prepare the property for handover. A thorough deep clean is a critical part of any moving out of rental checklist and is often the most scrutinized element during the final inspection. This goes far beyond a quick tidy-up; it involves restoring the entire property to the level of cleanliness it was in when you first moved in, as stipulated by your lease agreement.

Why a Deep Clean Maximizes Your Deposit Return
Landlords can and will deduct cleaning costs from your security deposit if the property is not left in satisfactory condition. These professional cleaning fees can often be much higher than what it would cost you to do it yourself or hire your own service. Investing time or a small amount of money in a deep clean offers a significant return by safeguarding your full deposit.
Pro Tip: Start cleaning as you pack. Clean empty closets, drawers, and rooms as they are cleared of your belongings. This makes the final, intensive cleaning session far less overwhelming and more manageable.
Real-World Scenarios
A meticulous cleaning effort directly translates into financial savings and positive landlord references.
- Smart Investment: A Denver tenant with pets invested $200 in professional carpet cleaning. Because this was their only potential issue, they easily secured the return of their full $1,500 security deposit.
- DIY Savings: An apartment dweller dedicated a full weekend to deep cleaning their unit, following a detailed checklist. Their effort saved them an estimated $500 in cleaning fees the landlord would have charged.
- Beyond the Deposit: After a professional move-out cleaning in Boston, a tenant's landlord was so impressed they wrote a glowing letter of reference, which helped the tenant secure their next, more competitive rental.
For a comprehensive guide, this detailed move-out cleaning checklist can help ensure you don't miss a single spot.
This video provides a visual guide to an effective move-out clean.
To avoid deposit deductions, focus your efforts on high-traffic and commonly neglected areas. Pay extra attention to kitchen grease on cabinets and appliances, bathroom mildew in grout, and any carpet stains. Remember to keep all receipts for cleaning supplies and professional services as proof of your diligence.
5. Address Necessary Repairs
Once you've given notice and documented the property's condition, the next critical step is to address any damages that occurred during your tenancy. Restoring the property to its original state, minus normal wear and tear, is a key part of your moving out of rental checklist. This proactive approach not only fulfills your lease obligations but also significantly increases the chances of getting your full security deposit back.
Why Proactive Repairs Protect Your Deposit
Landlords often charge a premium for repairs, deducting costs for materials and labor from your security deposit at a higher rate than you would pay yourself. By handling repairs before the final inspection, you control the cost and quality of the work. This step differentiates between minor, acceptable wear and major, deductible damage. Neglecting this can turn a small, fixable issue into a significant financial deduction. For example, if a major appliance is malfunctioning due to misuse, you might need to look into professional appliance repair services to avoid a hefty replacement charge from the landlord.
Pro Tip: Keep receipts for all repair materials and services. Presenting these to your landlord serves as proof of your efforts to maintain the property and can help resolve any disputes during the final walkthrough.
Real-World Scenarios
Taking initiative on repairs can lead to substantial savings.
- Minor Wall Damage: A tenant spent $50 on spackle, a small paintbrush, and a sample pot of perfectly matched paint to fill nail holes and scuffs. This small effort prevented a potential $200 professional painting charge from their landlord.
- Accidental Damage: A renter who accidentally cracked a bathroom tile hired a local handyman for $120 to replace it. The landlord's quoted cost for the same repair was nearly $300, saving the tenant $180.
- Preventative Fixes: Noticing the caulking around the bathtub was peeling, a tenant spent an hour and $15 on new silicone caulk to reseal it. This simple DIY fix prevented a potential landlord claim for water damage behind the wall.
Addressing these issues is much easier after you've sorted through your belongings. You can learn more about decluttering before you move to clear space and reveal any hidden areas that need attention. By being meticulous and documenting your work, you present a compelling case for a full deposit return.
6. Coordinate Final Walkthrough
Once your belongings are out and the unit is clean, the final walkthrough with your landlord or property manager is a critical step in your moving out of rental checklist. This is a formal inspection where you and the landlord jointly assess the property's condition against your initial move-in report. Participating actively in this meeting is your best opportunity to address potential issues in real-time and prevent misunderstandings that could jeopardize your security deposit.
Why a Joint Inspection is Non-Negotiable
Attending the final walkthrough allows you to provide context, point out pre-existing damage documented on your move-in checklist, and immediately dispute any unfair claims. It transforms the process from a one-sided judgment into a collaborative review. Without your presence, you leave the entire assessment to your landlord’s discretion, which can lead to surprise deductions for issues you could have easily explained or rectified.
Pro Tip: Schedule the walkthrough for a time after all your possessions are moved out and cleaning is complete, but at least 48 hours before your lease officially ends. Bring your move-in photos and condition report to compare side-by-side.
Real-World Scenarios
A proactive approach to the final walkthrough directly protects your finances.
- Preventing False Charges: A renter in Seattle used their move-in photos during the walkthrough to prove that several large scuffs on the hardwood floors were pre-existing. This prevented a potential charge of over $600 for floor refinishing.
- On-the-Spot Solutions: A Chicago tenant's walkthrough revealed a few missed spots inside the oven. By pointing it out, the landlord agreed to waive any cleaning fee if the tenant cleaned it immediately, which took only 15 minutes and saved them a $75 deduction.
- Negotiating Fair Costs: During a joint inspection, a landlord noted the carpets looked worn. The tenants agreed but argued it was normal wear and tear over three years. They successfully negotiated to split the cost of a standard carpet cleaning 50/50, rather than being charged for a full replacement.
By managing this final meeting professionally, you ensure the move-out process concludes on fair terms. For an in-depth guide on what to look for during this crucial meeting, you can learn more about conducting a thorough apartment walkthrough checklist. Taking detailed notes and getting a written summary of the inspection provides a clear record that helps secure the timely return of your full deposit.
7. Handle Utilities and Address Changes
Once you have your moving date set, it's time to tackle the administrative task of managing your services and mail. This involves systematically transferring or disconnecting all utilities, updating your mailing address with crucial institutions, and setting up mail forwarding. Properly handling these details is a vital part of any moving out of rental checklist, as it prevents surprise bills for services you no longer use and ensures a seamless transition for important correspondence.
Why This Administrative Step is Crucial
Failing to manage your utilities and address changes can lead to frustrating and expensive consequences. You could be charged for electricity, gas, or internet used by the next tenant if you don't schedule a disconnection. Similarly, missed credit card statements, tax documents, or medical bills sent to your old address can result in late fees, service interruptions, and even damage to your credit score.
Pro Tip: Create a master spreadsheet with two tabs: "Utilities" and "Address Changes." List each service provider or institution, their contact number, your account number, and the scheduled date for disconnection or update.
Real-World Scenarios
A methodical approach ensures nothing falls through the cracks.
- Preventing Extra Costs: A graduate student moving out of his apartment created a checklist of all his utilities. By calling each provider two weeks in advance to schedule disconnection for the day after his move-out, he avoided over $200 in charges that would have accrued before the new tenant moved in.
- Seamless Transition: A family preparing for a cross-country move made a comprehensive list of every account that needed an address update, from banks and insurance to subscription boxes and alumni associations. This diligence ensured they received their first mortgage bill at their new home on time.
This administrative process also involves organizing the confirmation emails and reference numbers you'll receive. Staying organized with your important documents is key to a stress-free move. Learn more about how to organize important documents to keep everything in order. By planning these changes 2-4 weeks before your move, you ensure a smooth and financially sound transition away from your rental property.
8. Return Keys and Retrieve Security Deposit
The final, official act of your tenancy is handing back the keys. This step is more than just a formality; it's a critical transaction that concludes your lease obligations and initiates the security deposit return process. Properly managing this final exchange by returning all keys, fobs, and access devices ensures a clean break and protects your financial interests, making it an essential final task on your moving out of rental checklist.
Why This Final Step is Crucial
Formally returning all property keys, including copies, mail keys, garage door openers, and any access fobs, signals that you have fully vacated and surrendered possession of the property. Failing to return every single item can lead to your landlord charging you for replacement costs or re-keying the entire unit, with these fees often deducted directly from your security deposit. A clear, documented return process prevents disputes and provides a positive final impression.
Pro Tip: Insist on a signed and dated receipt that itemizes every key and device you are returning. This simple document is your proof of compliance and can be invaluable if a dispute arises later about unreturned items.
Real-World Scenarios
A well-documented key return directly impacts your security deposit refund and future rental references.
- Preventing Disputes: A Chicago renter returned their apartment and garage keys but got a receipt listing only the apartment keys. When the landlord tried to charge for a "missing" garage opener, the tenant's copy of the move-out inspection report, which noted the opener's return, cleared the dispute and secured their full deposit.
- Ensuring Prompt Refund: After a move in California, a tenant provided their landlord with a written forwarding address during the key handover. This formal notification legally started the 21-day clock for the landlord to return the security deposit, ensuring the tenant received their refund within the state-mandated timeframe.
This final step is the culmination of your entire moving process, from initial planning to the final box. For a comprehensive look at organizing your belongings for the move itself, you can explore this detailed packing list for moving out. By understanding the rules surrounding your security deposit and formalizing the key return, you close out your tenancy professionally and protect your finances.
Moving Out Checklist: 8-Step Comparison
Final Thoughts: Turning the Page to Your Next Chapter
Successfully navigating your move-out is the final, critical step in your rental journey. It's more than just packing boxes; it's a strategic process that safeguards your finances, protects your reputation as a tenant, and sets the stage for a smooth transition into your next home. By systematically working through this comprehensive moving out of rental checklist, you have transformed what can be an overwhelming and chaotic experience into a structured, manageable project.
Let's quickly recap the cornerstones of a successful move-out, the key takeaways that truly make a difference between a stressful ordeal and a seamless departure.
The Pillars of a Flawless Move-Out
The entire process hinges on three fundamental principles: meticulous documentation, proactive communication, and diligent planning.
Documentation is Your Defense: From the initial photos you took upon moving in to the detailed images and videos you captured before leaving, this evidence is your primary tool for securing your full security deposit. It removes subjectivity and replaces "he said, she said" scenarios with undeniable proof of the property's condition.
Communication is Your Ally: Clear, timely, and professional communication with your landlord or property manager prevents misunderstandings. Providing proper written notice, coordinating the final walkthrough, and discussing potential repairs upfront builds goodwill and demonstrates responsibility, which is invaluable for securing a positive future reference.
Planning is Your Power: Attempting to tackle everything in the final 48 hours is a recipe for disaster. Your timeline, starting from reviewing your lease two months out to forwarding your mail and canceling utilities, is what makes the process feel controlled rather than frantic. Each completed task on your moving out of rental checklist is a step towards a stress-free finish line.
Key Insight: Think of your move-out not as an ending, but as the final exam of your tenancy. Acing it ensures you leave on the best possible terms, with your full security deposit in hand and a positive rental history to carry forward.
By embracing these strategies, you’ve done more than just move out. You have honored your legal commitments, demonstrated respect for the property, and advocated for your own financial interests. This diligence pays dividends, not just in the immediate return of your deposit, but in the confidence and peace of mind you carry into your new home. You are now fully equipped to turn the page, leaving your old space with professionalism and stepping into your next chapter with a clean slate.
Feeling overwhelmed by items that won't fit in your new urban apartment? Don't let clutter complicate your fresh start. Endless Storage offers a seamless, on-demand storage solution, picking up your belongings and bringing them back whenever you need them. Visit Endless Storage to see how you can simplify your move and maximize your new living space.
Frequently Asked Questions
Unveiling the Secrets to Effortless Storage
Endless Storage is available nationwide. You pick a plan, tell us where to pickup, and we'll send a UPS van to collect, whichever state you're in.
Your shipping label will be sent to your email within a few minutes, if not instantaneously. It can also be accessed through your customer profile.
Your box will be shipped to one of our climate controlled self storage facilities in our closest self storage facility. Our manager will accept your package, notify you that your box has been received, and securely stored. Only our managers will have access to Endless Storage boxes.
Email us at admin@endless-storage.com click to live chat with us, or send us a message below.
Never! We're committed to transparent pricing with no surprises. You'll lock in your rate with no hidden fees and no long-term contracts.
Fast access guaranteed! Your boxes will arrive at your doorstep within 48 hours of requesting them back. Need to check on delivery? We provide tracking information for complete peace of mind.
Totally flexible! Store month-to-month with no long-term commitment and cancel anytime.
Everything's online! Use your account dashboard to:
• Set up automatic monthly payments
• Request box returns
• Update your address
• Order additional boxes
• Track shipments
Your boxes are insured up to $100 each. Our customer service team will help you file any necessary claims and resolve issues quickly.
Don't worry – we'll email you right away if there's a payment issue. Your items stay safe, though you may have temporary service interruption or late fees until payment is resolved.
When you request our free storage kits, you'll have 30 days to send in your boxes to activate your 3 months of free storage. Think of it like starting a gym membership – your activation window begins when you receive your kits, and your full free trial begins once you send in your first box. During your free months, you'll experience our complete storage service at no cost.
Your 30-day activation window begins when you receive your storage kits. We'll send you an email confirmation when your kits are delivered, marking the start of your activation period.
If you haven't sent any boxes for storage within your 30-day activation window, your free trial will expire and we'll begin charging the regular monthly rate of $9.99 per box. This helps ensure our storage kits go to customers who are ready to use our service.
A box costs $9.99 per month to store (plus sales tax). This price includes free shipping for standard boxes under 50 lbs. and smaller than 16"x16"x16"
Log into your Endless Storage account, locate the box you would like returned, and simply click Return My Box.
Yes, each box stored with us is insured for up to $100 throughout transit as well as the duration of storage within our facilities.
Your box will be at your doorstep within 48 hours of you requesting it back.
Store 10+ boxes? We'll pick them up for free! After your purchase, we'll contact you to schedule a convenient pickup time and arrange UPS collection.
We trust UPS with all shipments, and every box includes $100 insurance coverage. You'll receive tracking information to monitor your items' journey.
Yes! Visit any of our locations by appointment. Just bring a photo ID matching your customer profile.
For everyone's safety, we can't store hazardous materials, firearms, or perishables. All items must fit within our standard boxes.
It's easy! Order your storage kit online, and we'll ship it to you within 1-2 business days. Your shipping labels will be emailed instantly and available in your account.
We're here to help! Email us at admin@endless-storage.com, use our live chat, or send us a message through your account.
To cancel your storage service with Endless Storage, please email your cancellation request to admin@endless-storage.com. Our team will process your request within 2 business days and confirm your cancellation via email.
We understand packing takes time. However, to maintain your free trial benefits, you'll need to send at least one box within the 30-day activation window. If you need more time, you can always start with one box to activate your trial and send the rest later. You can always reach out to admin@endless-storage.com if you have any issues or concerns.
When you request our free storage kits, you're starting a 30-day window to begin using our storage service.
To avoid any charges, simply send at least one box for storage within 30 days to activate your 3-month free trial. If you decide not to use our service and don't send any boxes within the 30-day window, a one-time $50 fee will apply to cover the costs of materials and shipping. This helps ensure our storage kits go to customers who are ready to use our service.
Think of it like reserving a hotel room – we're setting aside space and sending specialized packing materials for your use. The fee only applies if you request materials but don't begin storage, similar to a hotel's no-show charge.
