
Packing efficiently is less about some secret folding technique and more about what you do before the first box is even taped shut. Let's be honest, diving in without a plan is a one-way ticket to stress, damaged items, and a whole lot of wasted time.
It all comes down to laying the right groundwork. A little prep goes a long way.
Build Your Packing Foundation Before You Start
The real secret to a smooth packing process isn't a magic wand—it's the prep work. Rushing things is the number one reason people get overwhelmed, find broken heirlooms later, and spend way more time on this than they need to.
Before you even think about grabbing the packing tape, you need a solid foundation. If you’re preparing for a full-scale move, this ultimate NZ checklist for moving home is a great resource for getting everything in order.
Declutter With Purpose
Here’s a simple truth: the easiest way to pack is to have less stuff to pack. Walk through each room and be ruthless. Do you really need to store that old gadget or those clothes you haven't worn in years?
Sort everything into three piles: Keep, Donate, and Discard. This single step drastically cuts down on the amount you have to handle, saving you real money on supplies and making the eventual unpacking process a breeze. We have a great guide on how to declutter before moving if you need a little push to get started.
A cluttered space is a cluttered mind. Taking the time to declutter isn't just about getting rid of things; it's about simplifying the entire transition and giving yourself a fresh start. Don't pack what you don't need.
Gather Your Supplies
Once your "keep" pile is finalized, it's time to assemble your toolkit. Nothing kills momentum like having to stop every ten minutes to hunt for the scissors or more tape.
Set up a dedicated "packing station"—a clear table or a corner of a room—and stock it with everything you need.
A well-stocked packing station is your command center. Before you start, take a few minutes to gather everything you need. This quick table breaks down the essentials.
Your Essential Packing Supply Checklist
Having these items ready to go turns a frustrating chore into a smooth, assembly-line process. Trust me, you’ll thank yourself later.
The need for smart packing isn't just a household challenge; it's a massive global industry. The paper packaging sector alone saw production hit 258.7 million metric tons in 2023, largely because e-commerce demands materials that maximize space and protect contents efficiently—the same principles you're using at home.
Master Proven Techniques for Packing Common Items
Knowing how to pack efficiently isn’t just about tossing things into a box. It’s about applying specific strategies to different types of items. Forget the guesswork; let's get into the hands-on methods that turn packing into a science. These are the core skills that will protect your belongings and help you maximize every single inch of space.
For clothing, the goal is simple: minimize wrinkles and save space. The classic rolling technique is your best friend here. Instead of folding your shirts and pants, which creates hard creases, roll them up tightly. This method compresses the fabric and lets you fit so much more into a box or suitcase.
This simple but effective rolling technique really does maximize your space.
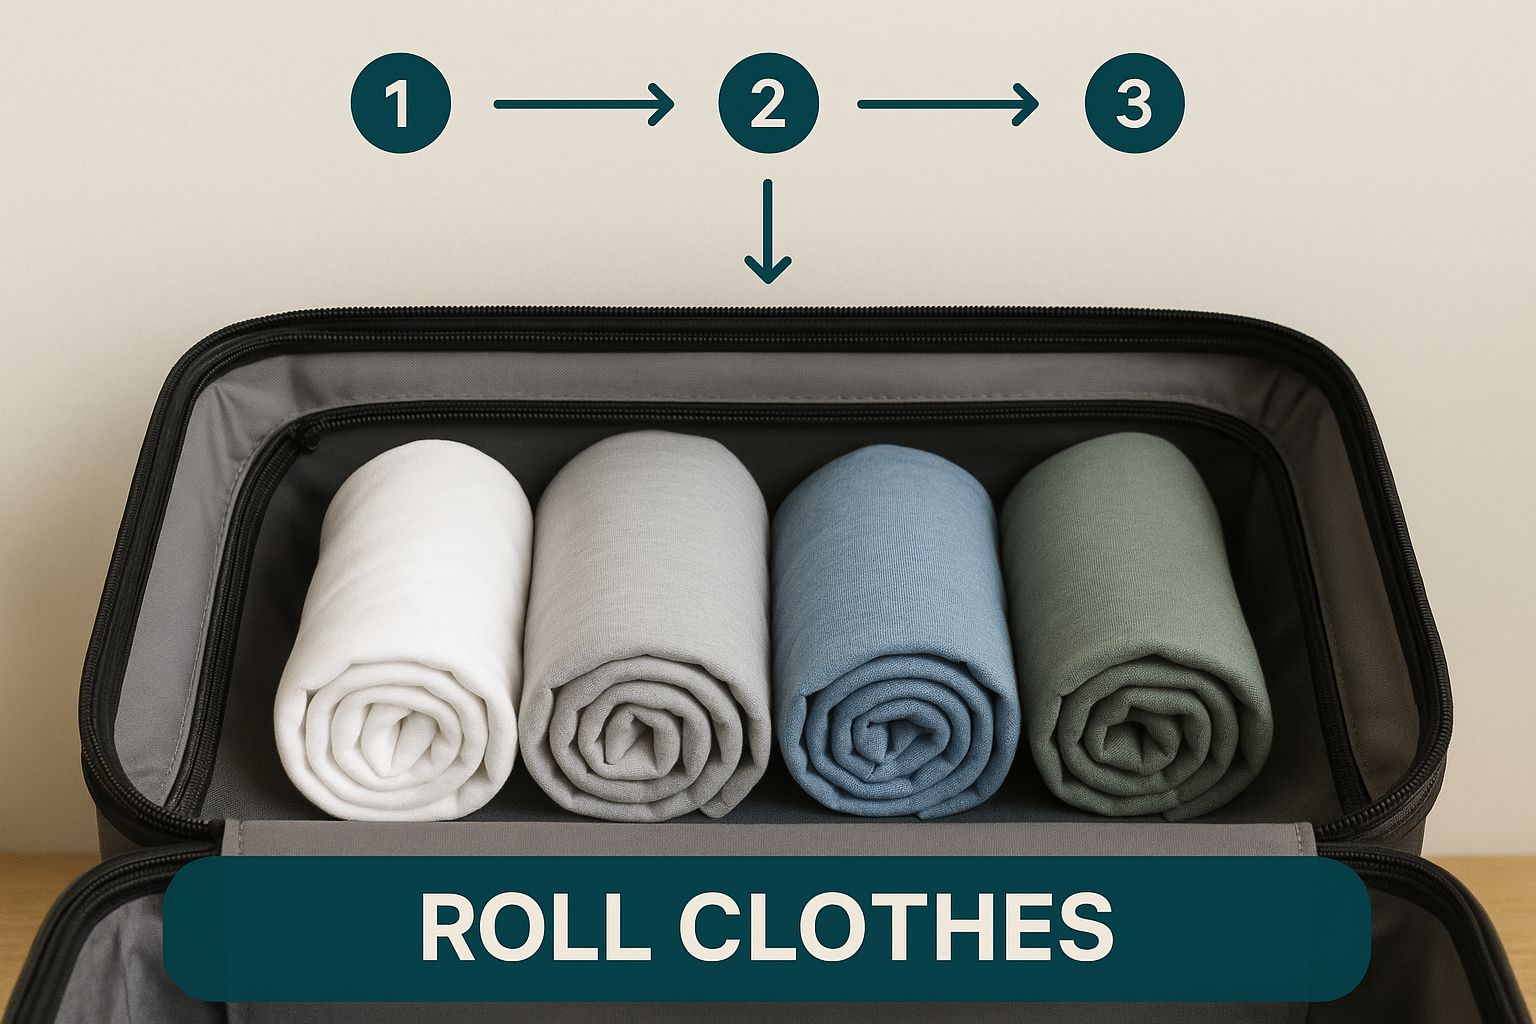
By switching to rolling, you can often fit up to 25% more clothing into the same box, all while keeping your items ready to wear when you unpack them.
Handle Your Kitchenware with Care
The kitchen is often the toughest room to pack. You’re dealing with all sorts of fragile and awkwardly shaped items. The key here is nesting. Think of your pots and pans like Russian nesting dolls—place the smallest one inside a slightly larger one, and keep going.
To stop them from getting scratched up, just place a thin layer of packing paper or even a dish towel between each pot or pan. This simple step protects non-stick surfaces and keeps your cookware in top condition. You can use the same logic for mixing bowls and any other stackable items.
For plates and other breakables, proper cushioning is absolutely non-negotiable.
The most common mistake I see is people underestimating how much things will shift around in transit. Every empty space in a box is a potential hazard for your fragile items. You have to fill all those gaps with soft materials to create a snug, secure environment.
When it comes to your delicate dishes, there's a real art to it. To learn more about protecting your dinnerware, check out our detailed guide on the best way to pack dishes for moving.
Protect Fragile and Awkward Items
Some items just need an extra layer of defense. For extremely fragile pieces like delicate glassware, family heirlooms, or small electronics, the "box-in-a-box" method is a professional-grade solution that I swear by.
Here’s how it works:
- Wrap the item thoroughly: Start by wrapping the object in several layers of bubble wrap or packing paper.
- Place it in a small box: Secure the wrapped item inside a small, sturdy box. Fill any extra space with cushioning material so it can't move at all.
- Nest the small box: Put that smaller box inside a larger moving box. Make sure there are at least two inches of cushioning (like crumpled paper or packing peanuts) on all sides—bottom, top, and all four sides.
This double-boxing technique creates a powerful shock-absorbing buffer that protects your most valuable possessions from the inevitable bumps and drops.
Finally, what about those truly awkward items? For something like a floor lamp, take it apart if you can. Remove the shade and bulb, then pack them separately. Wrap the base and pole in a moving blanket. For framed art or monitors, use a specialty picture box. These are designed to provide a snug fit and extra protection for the screen or glass. It’s these specific strategies that ensure everything arrives safely.
Optimize Every Box for Space and Safety
Knowing how to pack items is one thing; knowing how to strategically load a box is a completely different skill. This is where you transform a chaotic pile of belongings into a stable, secure, and space-maximized unit. A well-packed box isn't just neater—it's safer for your items and a whole lot easier for you to handle.
The first rule of thumb, and it's a non-negotiable one for a reason, is all about weight distribution. Heavy items always go on the bottom. By placing dense objects like books, small kitchen appliances, or canned goods at the base of the box, you create a solid foundation.
From there, you can layer the lighter, more delicate items on top. This simple practice is what prevents your grandmother’s favorite vase from getting crushed by a stack of cookbooks. It also keeps boxes from becoming top-heavy and dangerously unstable when you stack them.
Eliminate Wasted Space With Fillers
Empty space is the enemy of efficient packing. Every gap inside a box gives your items room to shift, slide, and collide during transit—and that's a primary cause of breakage. The solution is simple: fill every single void with soft, pliable materials.
You don't always need to run out and buy expensive packing supplies, either. Everyday household items work perfectly for this job:
- Towels and Linens: Bath towels, dishcloths, or old sheets are great for wrapping items and filling larger gaps.
- Socks and T-shirts: Rolled-up socks are perfect for tucking into small corners or stuffing inside glassware.
- Packing Paper: Crumpled packing paper is my go-to for creating a cushioned buffer between items.
The goal is to create a snug environment. When you gently shake a sealed box, you shouldn't hear or feel anything moving around inside. That attention to detail is the secret to knowing how to pack efficiently and safely.
A properly filled box feels solid. There should be no rattling, shifting, or collapsing when you press down on the top flaps. This tells you that the contents are secure and the box has the structural integrity to be stacked without caving in.
Create Internal Zones For Organization
For boxes containing lots of small, miscellaneous items—think kitchen junk drawers or office supplies—creating internal "zones" is a total game-changer. Instead of just dumping everything in together, use small cardboard dividers or even smaller boxes to separate items by category.
This technique keeps things organized and stops small, hard objects from scratching or damaging more delicate ones. For example, you can place pens and scissors in one zone and fragile photo frames in another, all within the same larger box. Learning how to pack a box for moving this way makes unpacking significantly faster and less of a headache.
The skill of packing efficiently extends far beyond just getting your stuff into storage. It's a cornerstone of the global economy, influencing a packaging market projected to be worth an eye-watering $1.44 trillion by 2030. Innovations in materials and techniques are constantly evolving to maximize protection while minimizing waste. This systematic approach ensures every box you pack is a masterpiece of efficiency.
Sort Out a Labeling System for Stress-Free Unpacking
Even the most perfectly packed box is useless if you can't find it later. Let's be honest, just scribbling "Kitchen" on the side is a recipe for disaster. You'll end up tearing through five identical boxes just to find the coffee maker on moving day. A smart labeling system is the single best gift you can give your future self, turning the chaos of unpacking into a calm, orderly process.
Thinking through your labeling strategy before you start taping up boxes is the key. Your goal should be to know exactly what's inside any given box without having to open it. This is especially true when you're using a box-by-box service like ours, where you might only need one specific item back from storage.
Choose a System That Works for You
There’s no single “best” way to label your boxes; the right method really depends on how detailed you want to get. The most important thing is to pick one system and stick with it for every single box you pack. Consistency is everything here.
A great, simple starting point is a color-coded system. Just assign a different color of duct tape or marker to each room—maybe blue for the bedroom, green for the kitchen, and yellow for the bathroom. This lets you see at a glance where every box belongs, which makes sorting them on unpacking day a breeze.
For a bit more detail, a numerical system paired with a master inventory list gives you incredible control.
Each box gets a unique number (like Kitchen - Box #1, Kitchen - Box #2). Then, on a spreadsheet or in a notebook, you jot down the key contents of that specific box. This method is a lifesaver for long-term storage or when you need to find one particular thing without a huge search.
Essential Labeling Best Practices
No matter what system you land on, a few universal rules will make your life so much easier. Nailing these simple habits is a core part of learning how to pack efficiently.
- Be Specific: Don't just write "Kitchen." Get more detailed. "KITCHEN #3 - Coffee maker, mugs, filters" is infinitely more helpful.
- Label Multiple Sides: Always put your label on the top and at least one of the long sides of the box. That way, you can identify what's inside even when they're stacked high.
- Mark Fragile Items: For any box with breakables, clearly write "FRAGILE" in big letters on multiple sides. You can't overdo this one.
When you develop a consistent and detailed labeling plan, you're essentially creating a roadmap for a smooth unpacking experience. To really perfect your method, check out our complete guide on how to label boxes for moving and storage.
Use Sustainable and Budget-Friendly Packing Hacks
Efficient packing isn't just about fitting more into a box. It’s about being smart with your resources, both for your wallet and the environment. Before you rush out to buy rolls of bubble wrap and stacks of new boxes, take a moment to look around your house. You probably have a goldmine of packing materials you can repurpose right now.
This mindset shift is key to packing efficiently. Not only does it save you a surprising amount of money, but it also cuts down on waste. It’s proof that smart packing can be both green and economical.
Repurpose Household Items as Padding
Why buy endless rolls of single-use plastic when your linen closet is already full of excellent padding? Soft, bulky items you already own are perfect for protecting less fragile belongings. This simple hack is a huge win for both your budget and the planet.
Here are a few ideas I've seen work wonders:
- Bath Towels and Blankets: These are your best friends for wrapping larger, awkward items like picture frames, lamps, or small electronics. They provide a thick, cushioned layer of protection.
- T-shirts and Sweaters: Got a drawer full of old t-shirts? Use them to wrap individual glasses or mugs. Bulky sweaters are also perfect for filling in the gaps along the sides of your boxes to stop things from shifting.
- Socks: A clean sock is perfectly shaped to stuff inside glassware or shoes. This helps them keep their form and adds an extra bit of cushioning from the inside out.
Using this strategy means you're not just protecting your stuff—you're also packing your linens at the same time. The push for sustainability is a big deal these days, especially when you consider that packaging contributes to roughly 40% of the planet's plastic waste.
Find Free and Reusable Container Options
Good-quality boxes don't have to come with a price tag. With a bit of foresight, you can easily score sturdy, clean boxes for free. Try calling or stopping by local liquor stores, bookstores, or even grocery stores. They get shipments all the time in durable boxes and are usually more than happy to give them away.
For anything you'll be storing long-term, think about investing in a set of clear, reusable plastic totes. They cost more upfront, but their durability is unmatched. Plus, being able to see what's inside at a glance is a total game-changer when you're looking for something specific.
And don't forget the power of compression. For those big, puffy items like winter coats, comforters, and pillows, vacuum-sealed bags are incredible. By sucking all the air out, you can shrink these items down to a fraction of their original size. For a deeper dive, check out our guide to the best vacuum storage bags and see how much space you can really save.
Beyond what you can do at home, it's also worth looking into companies with sustainable and eco-friendly packaging commitments to support broader environmental goals. These small, smart hacks really do add up.
Of course, even with a solid game plan, you're bound to run into a few questions when you're surrounded by boxes and packing tape. Getting the right answers can mean the difference between a smooth move and a series of frustrating headaches. Let's tackle some of the most common packing puzzles we see.
The absolute biggest mistake people make? Waiting until the last minute. Procrastination is the sworn enemy of a good packing job. It always leads to a frantic rush where you're just tossing things into boxes without any rhyme or reason. This not only puts your belongings at risk of getting broken but also turns unpacking into a chaotic nightmare.
Right behind that is the classic mistake of overpacking your boxes. It’s so tempting to cram just one more thing inside, but that’s a recipe for disaster.
Keep this in mind: A good rule of thumb is to keep every box under 40 pounds. This simple guideline makes the box safe for you (and our team) to lift, saves your back, and prevents the box from bursting open in transit.
How Should I Pack Heavy Items Like Books?
The real secret to packing books isn't about brute strength—it's about using the right container. Small, sturdy boxes are your best friend here. They physically stop you from making the box too heavy to safely handle.
When you load them up, always lay the books flat to protect their spines from getting bent or broken. A pro tip is to alternate the direction of the spines with each layer you add. This little trick keeps the stack nice and level, making it much more stable inside the box.
What if you only have medium-sized boxes? No problem. Just pack smarter. Put a solid layer of books at the bottom, and then fill the rest of the space with lighter, bulkier things. Think pillows, linens, or even stuffed animals. This creates a much more balanced and manageable weight.
Should I Use Original Boxes For Electronics?
Yes, a thousand times yes! If you've still got the original packaging for your TV, computer monitor, or gaming console, that is hands-down the safest way to move it. Those custom-fit foam inserts were designed by engineers specifically to protect that device from all the bumps and vibrations of a journey.
But if that box was recycled years ago, don't sweat it. Just grab a strong moving box that’s a little bigger than the electronic item. Carefully wrap the device in an anti-static bubble wrap or a soft blanket, then fill in every gap on all sides with crumpled packing paper or towels. The goal is to make sure it can't shift around inside the box at all.
What Goes In An Essentials Box?
Your "open first" box is basically your 24-hour survival kit. This is the box that saves you from tearing open ten different containers just to find your toothbrush. It should hold everything you’ll need the moment you walk through the door, long before you have the energy to start the real unpacking.
Here’s what we always recommend putting in yours:
- Personal items: Think daily medications, basic toiletries, a phone charger, and a fresh change of clothes for everyone in the family.
- Key tools: You’ll definitely want a box cutter, a simple toolkit (screwdriver, pliers), and maybe some scissors.
- Creature comforts: Paper towels, hand soap, some non-perishable snacks, and everything you need to make that first cup of coffee or tea are non-negotiable.
Make sure you keep this box with you during the move, or at the very least, have it loaded last so it's the first thing you can grab. This one simple step is a cornerstone of an efficient, low-stress move.
Ready to make your storage experience as efficient as your packing? With Endless Storage, you can say goodbye to clutter and hello to convenience. We deliver boxes right to your door, pick them up when you're ready, and return your items with 48-hour notice. Get started today.
Frequently Asked Questions
Unveiling the Secrets to Effortless Storage
Endless Storage is available nationwide. You pick a plan, tell us where to pickup, and we'll send a UPS van to collect, whichever state you're in.
Your shipping label will be sent to your email within a few minutes, if not instantaneously. It can also be accessed through your customer profile.
Your box will be shipped to one of our climate controlled self storage facilities in our closest self storage facility. Our manager will accept your package, notify you that your box has been received, and securely stored. Only our managers will have access to Endless Storage boxes.
Email us at admin@endless-storage.com click to live chat with us, or send us a message below.
Never! We're committed to transparent pricing with no surprises. You'll lock in your rate with no hidden fees and no long-term contracts.
Fast access guaranteed! Your boxes will arrive at your doorstep within 48 hours of requesting them back. Need to check on delivery? We provide tracking information for complete peace of mind.
Totally flexible! Store month-to-month with no long-term commitment and cancel anytime.
Everything's online! Use your account dashboard to:
• Set up automatic monthly payments
• Request box returns
• Update your address
• Order additional boxes
• Track shipments
Your boxes are insured up to $100 each. Our customer service team will help you file any necessary claims and resolve issues quickly.
Don't worry – we'll email you right away if there's a payment issue. Your items stay safe, though you may have temporary service interruption or late fees until payment is resolved.
When you request our free storage kits, you'll have 30 days to send in your boxes to activate your 3 months of free storage. Think of it like starting a gym membership – your activation window begins when you receive your kits, and your full free trial begins once you send in your first box. During your free months, you'll experience our complete storage service at no cost.
Your 30-day activation window begins when you receive your storage kits. We'll send you an email confirmation when your kits are delivered, marking the start of your activation period.
If you haven't sent any boxes for storage within your 30-day activation window, your free trial will expire and we'll begin charging the regular monthly rate of $9.99 per box. This helps ensure our storage kits go to customers who are ready to use our service.
A box costs $9.99 per month to store (plus sales tax). This price includes free shipping for standard boxes under 50 lbs. and smaller than 16"x16"x16"
Log into your Endless Storage account, locate the box you would like returned, and simply click Return My Box.
Yes, each box stored with us is insured for up to $100 throughout transit as well as the duration of storage within our facilities.
Your box will be at your doorstep within 48 hours of you requesting it back.
Store 10+ boxes? We'll pick them up for free! After your purchase, we'll contact you to schedule a convenient pickup time and arrange UPS collection.
We trust UPS with all shipments, and every box includes $100 insurance coverage. You'll receive tracking information to monitor your items' journey.
Yes! Visit any of our locations by appointment. Just bring a photo ID matching your customer profile.
For everyone's safety, we can't store hazardous materials, firearms, or perishables. All items must fit within our standard boxes.
It's easy! Order your storage kit online, and we'll ship it to you within 1-2 business days. Your shipping labels will be emailed instantly and available in your account.
We're here to help! Email us at admin@endless-storage.com, use our live chat, or send us a message through your account.
To cancel your storage service with Endless Storage, please email your cancellation request to admin@endless-storage.com. Our team will process your request within 2 business days and confirm your cancellation via email.
We understand packing takes time. However, to maintain your free trial benefits, you'll need to send at least one box within the 30-day activation window. If you need more time, you can always start with one box to activate your trial and send the rest later. You can always reach out to admin@endless-storage.com if you have any issues or concerns.
When you request our free storage kits, you're starting a 30-day window to begin using our storage service.
Important: To activate your free trial, send at least one box for storage within 30 days. If no boxes are sent within this 30-day window, a one-time $50 fee applies to cover materials and shipping costs. This fee is clearly disclosed before you sign up.
Think of it like reserving a hotel room – we're setting aside space and sending specialized packing materials for your use. The fee only applies if you request materials but don't begin storage, similar to a hotel's no-show charge.