
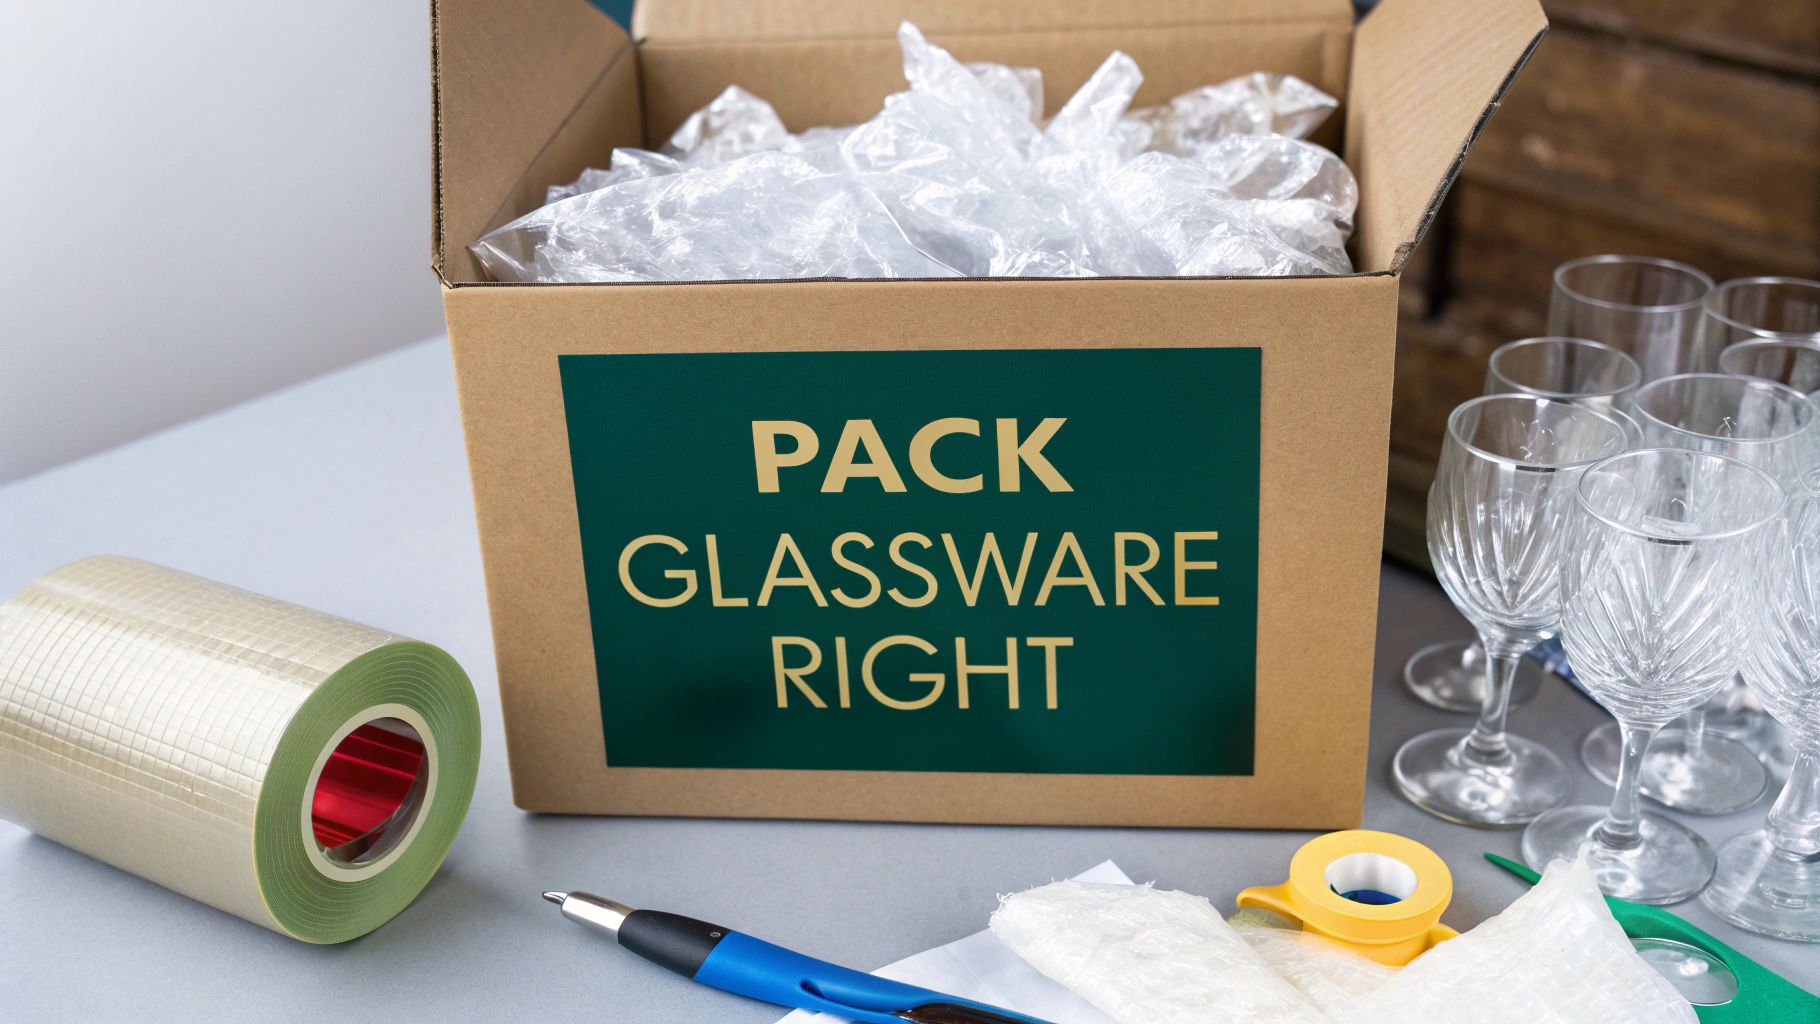
The real secret to protecting your glassware has nothing to do with how you wrap it—it starts with gathering the right materials before you even touch the first glass. The absolute best way to pack glassware is by using professional-grade supplies like double-walled dish pack boxes, clean packing paper, and good, strong packing tape. These specific items are designed to give you the structural integrity and cushioning you need to avoid heartbreak when you unpack.
Why the Right Supplies Are Non-Negotiable
Trying to skimp on proper materials is one of the most common—and most costly—moving mistakes I see. It's so tempting to just grab any old box from the garage or wrap things in newspaper, but those shortcuts are a direct path to cracked stems and shattered family heirlooms.
Think of it this way: investing in the right gear isn't about spending more money. It’s about building a protective system that guarantees your most delicate items arrive in one piece.
The foundation of that system is the box itself. A standard moving box is just single-walled cardboard, which can easily get crushed when another box is stacked on top. A dish pack box, on the other hand, is built with double-corrugated cardboard, giving it way more rigidity and protection. A lot of them even come with cell dividers that create individual compartments to stop glasses from bumping into each other.
Cushioning Materials Really Matter
Beyond the box, what you use for cushioning is critical. Each material plays a specific role in keeping your glasses safe.
- Packing Paper: This is your go-to. It’s clean, totally ink-free, and flexible enough to wrap each glass snugly. You can also crumple it up to stuff inside bowls for extra internal support. Best of all, unlike newspaper, it won't leave smudges all over your nice crystal.
- Bubble Wrap: You don't need this for every single glass, but it provides incredible shock absorption. I always save it for the most fragile or valuable pieces—think thin-rimmed wine glasses or antique crystal—as an extra layer of defense.
- Cell Dividers: Honestly, these cardboard inserts are a total game-changer. They create a grid inside the box that isolates each glass in its own little cell. This stops that dangerous clinking and shifting that causes the vast majority of breaks during a move.
The goal is to eliminate any and all movement. If a glass can shift inside the box, it can break. Using the right combination of sturdy boxes, form-fitting paper, and void-filling materials ensures everything stays snug and secure from your old home to your new one.
For a complete checklist of what to get, our guide on the best packing supplies for moving has you covered.
The Professional Technique for Wrapping Glassware
If you want to pack glassware like the pros, it all comes down to one specific method. Most professional movers call it the 'roll and tuck.' It’s a simple technique that creates a cushioned, self-contained bundle around each piece, protecting it from all those bumps and vibrations during a move. It's less about having fancy materials and more about how you use them to get rid of empty space and build up structural support.
First, lay a single sheet of clean packing paper on a flat surface. Take a glass—let's say a sturdy tumbler—and place it on its side at one corner of the paper. Now, gently roll the glass diagonally across the sheet, giving it two full turns.
After those first two rolls, pause. This next part is key. Tuck the loose edge of the paper snugly into the mouth of the glass. This simple move provides crucial internal support and stops the rim from getting crushed under pressure. Once you've tucked it in, keep rolling until you hit the opposite corner. You should have a tight, protective cylinder. Just finish it off by tucking the last bits of paper into the glass.
Adapting the Technique for Different Glassware
This basic method works for almost any glass, but you'll want to make a few small tweaks for more delicate pieces. Stemware, for instance, needs some extra love right where it's most likely to break.
- Wine Glasses and Flutes: Start by using the roll-and-tuck method on the bowl of the glass. Once that's done, grab a half-sheet of paper and wrap it just around the stem, starting from where it meets the bowl and going all the way down to the foot. This gives that fragile stem the reinforcement it needs to survive the trip.
- Heavy Mugs and Tumblers: With these, internal support is everything. Make sure you tuck the paper firmly inside the opening to absorb any shocks. Since they're heavier, always place these items on the bottom layer inside your packing box.
The real goal here is to make a firm, cushioned bundle where no part of the glass can touch another. If you've done it right, a gentle shake of the wrapped glass should feel solid—no rattling at all.
This infographic breaks down the basic supplies you'll need to get started.

It’s a simple flow: a good box, plenty of cushioning paper, and maybe some bubble wrap for extra peace of mind. That's the foundation of professional packing.
Handling Larger and Bulkier Items
The same wrapping principles apply even when you're dealing with bigger glass items, which are becoming more and more common. You might be surprised to learn that glass packaging between 500–1000 ml now makes up 36.43% of the market, making it the fastest-growing segment. That trend toward bigger, family-sized containers means you're probably packing heavier and more awkward glass jugs and jars. You can dive deeper into these trends over at Mordor Intelligence.
Getting this wrapping technique down is a game-changer, but it's only one piece of the puzzle. For even more tips on protecting all sorts of breakables, take a look at our complete guide on how to pack fragile items for safe shipping.
How to Strategically Pack Your Boxes
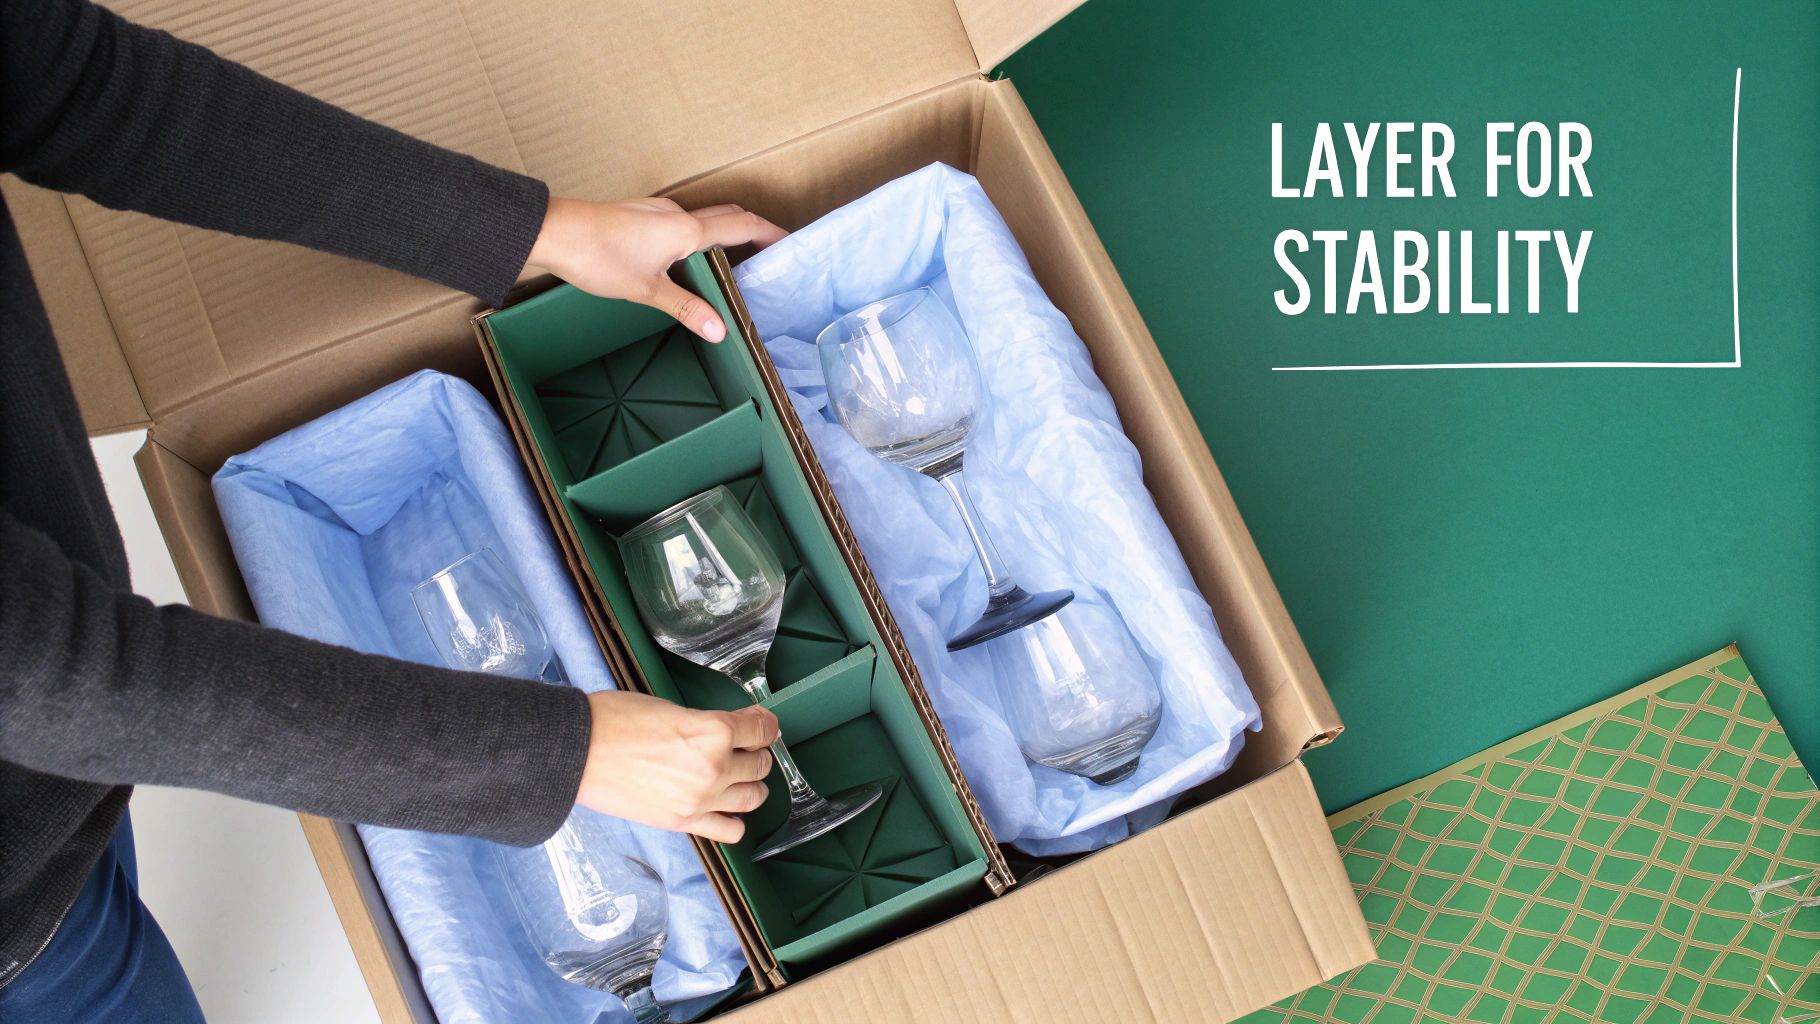
Now that you've got your glasses individually wrapped, it's time to get them into the box. This part is less about just packing and more about engineering a tiny, secure fortress where nothing can shift or rattle around.
First things first, create a soft landing pad. Grab a good amount of packing paper, crumple it up, and build a generous cushion at the bottom of your box—aim for at least two to three inches deep. This is your first line of defense against the inevitable bumps and jolts of the move.
Layering for Strength and Stability
With your base ready, you can start placing the wrapped glasses inside. I've learned the hard way that the golden rule here is heaviest items first. You want to build a solid, stable foundation.
- Bottom Layer: Start with your heavy hitters—thick tumblers, pint glasses, and those chunky coffee mugs. Place them upright, just like they’d sit in your cabinet.
- Middle Layer: This is perfect for your everyday drinking glasses and other standard-weight items.
- Top Layer: Save this space for the most delicate pieces. Think wine glasses, champagne flutes, and anything with a thin stem. Their light weight means they won't put any pressure on the sturdier items below.
Once a layer is complete, add a flat piece of cardboard or a couple sheets of bubble wrap on top before starting the next one. This simple step distributes the weight evenly and prevents any direct glass-on-glass contact.
Believe it or not, the most common reason for breakage isn't a big drop. It’s the constant, subtle vibrations and shifts inside a moving truck. A tightly packed box with cushioned layers is the best way to neutralize that threat.
The Importance of Filling Every Void
This is the final—and maybe most important—step. You have to eliminate every single bit of empty space. Gaps allow for movement, and movement is the enemy.
Grab more crumpled packing paper and stuff it into all the nooks and crannies between your wrapped items. Wedge it in there until everything feels snug and secure.
The box should feel like one solid block. Give it a gentle shake. If you hear or feel anything shifting, you need more filler. This simple check transforms a regular box into a secure transport cell for your fragile glassware. For a deeper dive into general packing techniques, our guide on how to pack a box for moving is a great resource.
Of course, the box itself matters too. For those really special or heirloom pieces, it might be worth looking into premium gift boxes for glassware that protect fragile items, as they provide an extra layer of structural integrity right from the start.
Securing and Labeling Boxes Like a Pro
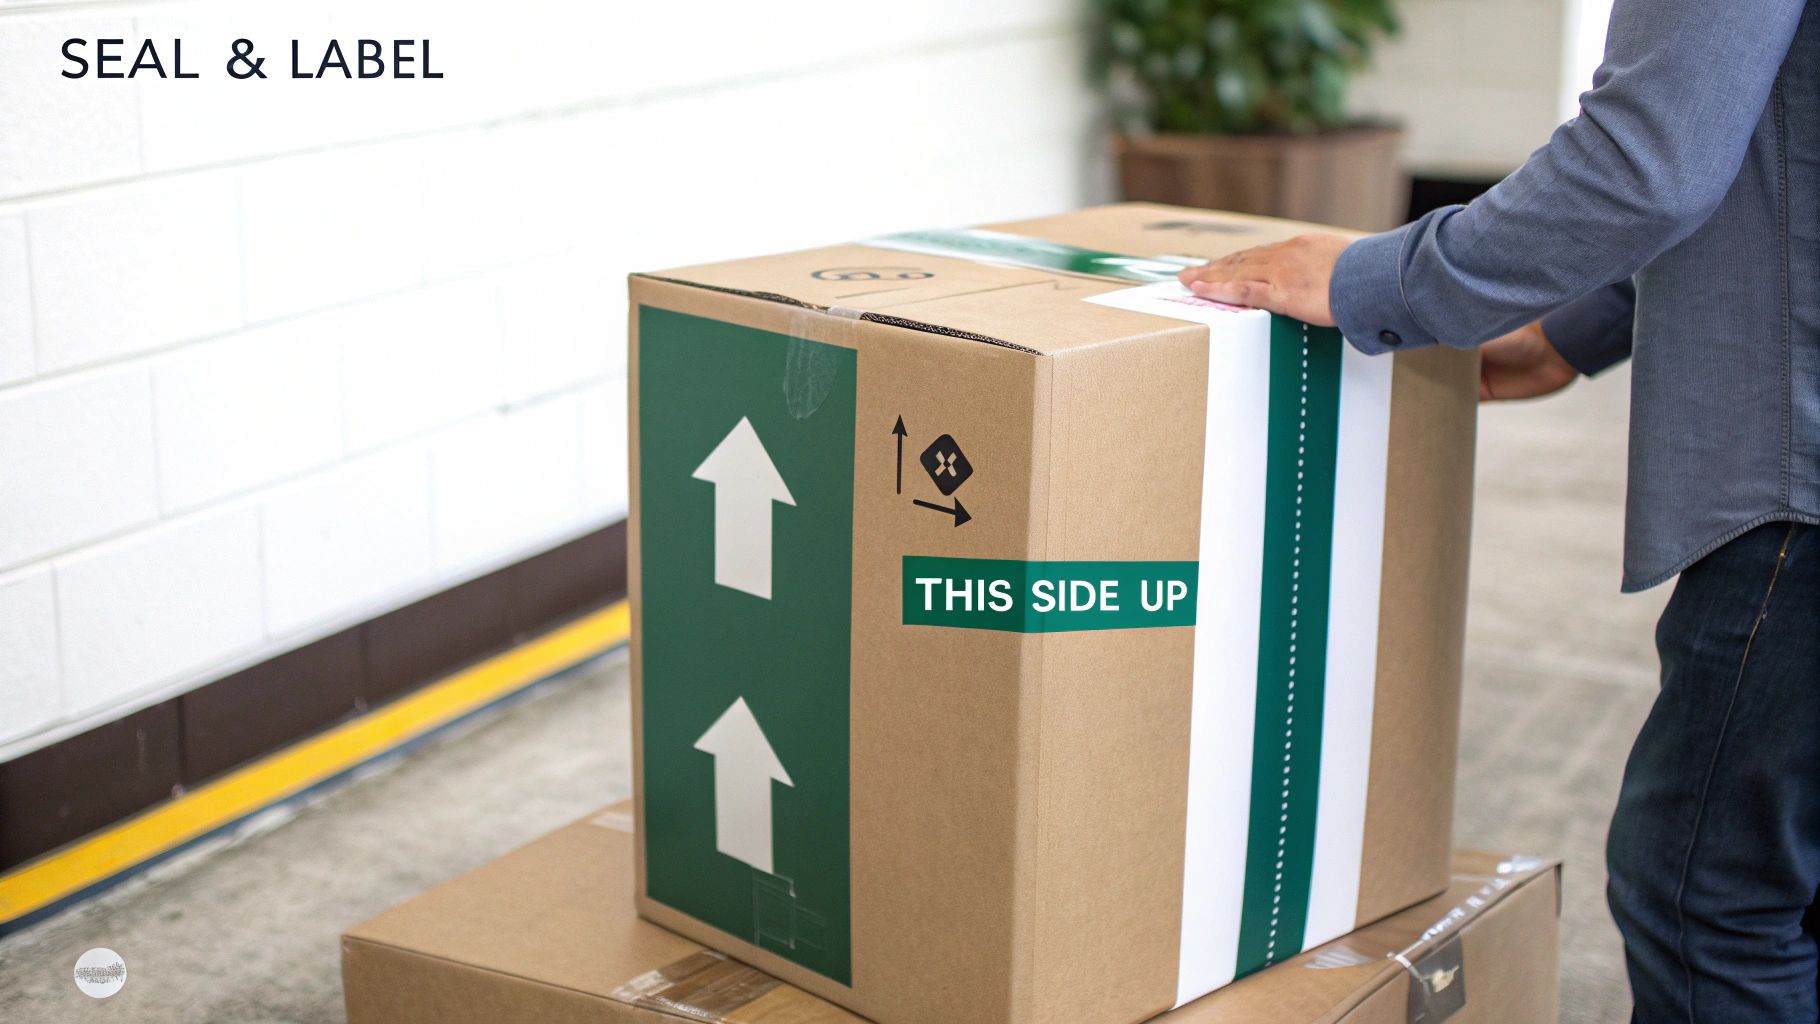
All that careful wrapping means nothing if the box gives out. A poorly sealed box can easily collapse, especially with the weight of glassware. That’s why the pros swear by the H-tape method—it gives the box maximum structural support.
Start by taping right down the center seam where the main flaps meet. Next, run tape along both of the side seams. When you're done, the tape on the bottom (and top) of the box should look like a capital "H." This simple technique reinforces all the weak points and is the best defense against a box bottom falling out.
Creating Labels That Actually Work
Just scrawling "FRAGILE" on the side with a marker isn't going to cut it. Good labeling is all about clear communication—think of it as writing handling instructions for anyone who might move that box.
A truly effective label needs to have three key things:
- Contents: Be specific. Instead of just "Kitchen," try "Kitchen - Wine Glasses & Flutes."
- Orientation: Use big arrows to mark "This Side Up" on every vertical side of the box.
- Destination: Clearly write which room the box belongs in, like "Dining Room" or "Kitchen."
A detailed label helps movers know to place the box on top of heavier stacks in the truck. It also ensures it lands in the right room in your new place, which saves you a ton of hassle and helps prevent accidents during unpacking.
This level of detail is why glass packaging remains so critical for premium goods. In fact, the global market for it is expected to jump from USD 74.64 billion to USD 105.25 billion by 2033. You can dig deeper into these numbers in the full glass packaging market report.
If you want to master the art of organization for your whole move, check out our full guide on how to label boxes.
Common Packing Mistakes and How to Avoid Them
Even with the best intentions, a few common slip-ups can turn a box of carefully wrapped glasses into a box of shards. I've seen it happen more times than I can count. Knowing what not to do is just as important as knowing the right way to pack.
One of the biggest culprits is under-packing a box. It feels wrong, I know, but leaving too much empty space inside is a recipe for disaster. Every little bump on the road gives your glasses room to slide around and knock into each other. That constant motion is what leads to breaks.
Pressure Points and Poor Choices
On the flip side, over-packing is just as bad. When you jam items in too tightly, you create dangerous pressure points. A small bump to the outside of the box can transfer all that force straight to the glass, causing an instant crack or shatter. You're aiming for a snug fit, not a forced one.
Another classic mistake I see is people reaching for newspaper. It's free and it's everywhere, but the ink transfers right onto your glassware. You'll spend ages trying to scrub off those stubborn, grimy stains. Just don't do it.
Insider Tip: Before you pack a single valuable piece, take a quick photo of it with your phone. Having a dated picture provides essential documentation for insurance purposes should any damage occur during the move.
It’s also worth thinking about sustainability. In Europe, where glass recycling rates often top 70%, using recycled packing materials is pretty standard. This simple choice can cut furnace energy needs by up to 30%. Good packing can protect your items and the planet. For more on this, check out these sustainable glass packaging trends.
To make sure you're starting with the right supplies from the get-go, take a look at our complete guide on packing materials for fragile items.
Answering Your Glassware Packing Questions
No matter how carefully you plan, a few questions always seem to pop up during the packing process. Let's run through some of the most common ones I hear, so you can pack up your kitchen with total confidence.
Can I Use Towels or Clothes Instead of Paper?
I get this one a lot. It feels like a clever, eco-friendly shortcut, but trust me, wrapping glasses in towels or clothing is a recipe for disaster. Fabric just doesn't work the same way as packing paper; it compresses unevenly and leaves vulnerable spots completely exposed.
Worse, it allows items to shift around inside the box, and that movement is what leads to breaks. It's always best to stick with materials actually designed for moving—they provide the consistent, reliable protection your glassware needs.
What Is the Biggest Packing Mistake?
By far, the most common and costly mistake I see is leaving empty space inside the box. It doesn't matter how perfectly you've wrapped each individual glass; if there are gaps, your items will move during transit.
Think about the constant vibration on a moving truck. That jostling will cause glasses to shift and knock against each other, leading to cracks and shatters. Every single void needs to be stuffed with crumpled packing paper to create a snug, solid block. No wiggle room means a break-free move.
Is Bubble Wrap Better Than Packing Paper?
They aren't really competitors—they're teammates that serve different, equally important roles. Packing paper is your go-to for the first layer. It's perfect for wrapping directly against the glass because you can mold it tightly to create a protective skin.
Bubble wrap, on the other hand, is best used as a secondary layer for your most delicate pieces, like crystal stemware. It’s also great for lining the bottom and top of the box to add extra shock absorption. If you’re tackling a bigger relocation, a solid guide on how to prepare for a move out of state can give you more tips like this. Using both materials where they work best gives you the ultimate security for your fragile items.
Feeling overwhelmed? Endless Storage makes moving and decluttering simple. We send you the boxes, you pack, and we pick them up for secure, climate-controlled storage. Get your space back by visiting Endless Storage today.
Frequently Asked Questions
Unveiling the Secrets to Effortless Storage
Endless Storage is available nationwide. You pick a plan, tell us where to pickup, and we'll send a UPS van to collect, whichever state you're in.
Your shipping label will be sent to your email within a few minutes, if not instantaneously. It can also be accessed through your customer profile.
Your box will be shipped to one of our climate controlled self storage facilities in our closest self storage facility. Our manager will accept your package, notify you that your box has been received, and securely stored. Only our managers will have access to Endless Storage boxes.
Email us at admin@endless-storage.com click to live chat with us, or send us a message below.
Never! We're committed to transparent pricing with no surprises. You'll lock in your rate with no hidden fees and no long-term contracts.
Fast access guaranteed! Your boxes will arrive at your doorstep within 48 hours of requesting them back. Need to check on delivery? We provide tracking information for complete peace of mind.
Totally flexible! Store month-to-month with no long-term commitment and cancel anytime.
Everything's online! Use your account dashboard to:
• Set up automatic monthly payments
• Request box returns
• Update your address
• Order additional boxes
• Track shipments
Your boxes are insured up to $100 each. Our customer service team will help you file any necessary claims and resolve issues quickly.
Don't worry – we'll email you right away if there's a payment issue. Your items stay safe, though you may have temporary service interruption or late fees until payment is resolved.
When you request our free storage kits, you'll have 30 days to send in your boxes to activate your 3 months of free storage. Think of it like starting a gym membership – your activation window begins when you receive your kits, and your full free trial begins once you send in your first box. During your free months, you'll experience our complete storage service at no cost.
Your 30-day activation window begins when you receive your storage kits. We'll send you an email confirmation when your kits are delivered, marking the start of your activation period.
If you haven't sent any boxes for storage within your 30-day activation window, your free trial will expire and we'll begin charging the regular monthly rate of $9.99 per box. This helps ensure our storage kits go to customers who are ready to use our service.
A box costs $9.99 per month to store (plus sales tax). This price includes free shipping for standard boxes under 50 lbs. and smaller than 16"x16"x16"
Log into your Endless Storage account, locate the box you would like returned, and simply click Return My Box.
Yes, each box stored with us is insured for up to $100 throughout transit as well as the duration of storage within our facilities.
Your box will be at your doorstep within 48 hours of you requesting it back.
Store 10+ boxes? We'll pick them up for free! After your purchase, we'll contact you to schedule a convenient pickup time and arrange UPS collection.
We trust UPS with all shipments, and every box includes $100 insurance coverage. You'll receive tracking information to monitor your items' journey.
Yes! Visit any of our locations by appointment. Just bring a photo ID matching your customer profile.
For everyone's safety, we can't store hazardous materials, firearms, or perishables. All items must fit within our standard boxes.
It's easy! Order your storage kit online, and we'll ship it to you within 1-2 business days. Your shipping labels will be emailed instantly and available in your account.
We're here to help! Email us at admin@endless-storage.com, use our live chat, or send us a message through your account.
To cancel your storage service with Endless Storage, please email your cancellation request to admin@endless-storage.com. Our team will process your request within 2 business days and confirm your cancellation via email.
We understand packing takes time. However, to maintain your free trial benefits, you'll need to send at least one box within the 30-day activation window. If you need more time, you can always start with one box to activate your trial and send the rest later. You can always reach out to admin@endless-storage.com if you have any issues or concerns.
When you request our free storage kits, you're starting a 30-day window to begin using our storage service.
Important: To activate your free trial, send at least one box for storage within 30 days. If no boxes are sent within this 30-day window, a one-time $50 fee applies to cover materials and shipping costs. This fee is clearly disclosed before you sign up.
Think of it like reserving a hotel room – we're setting aside space and sending specialized packing materials for your use. The fee only applies if you request materials but don't begin storage, similar to a hotel's no-show charge.